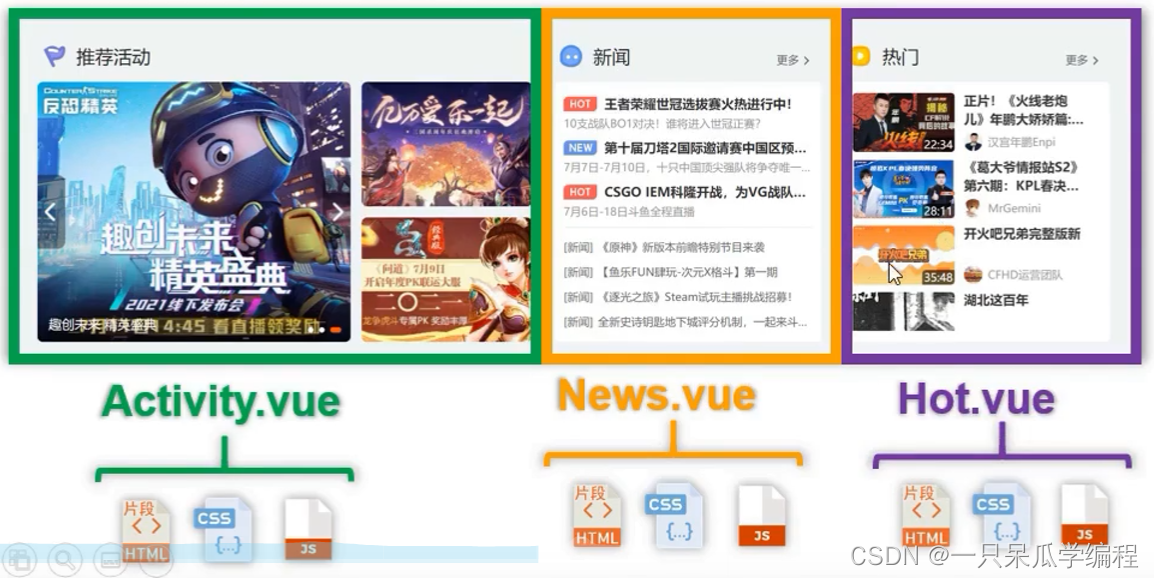
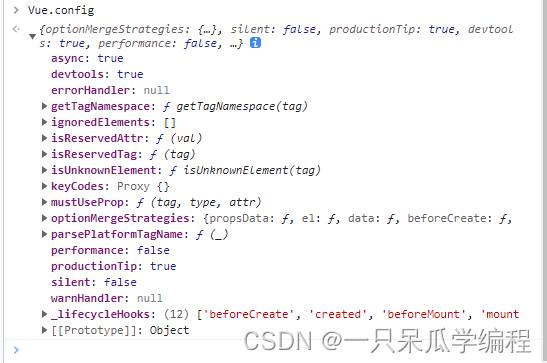
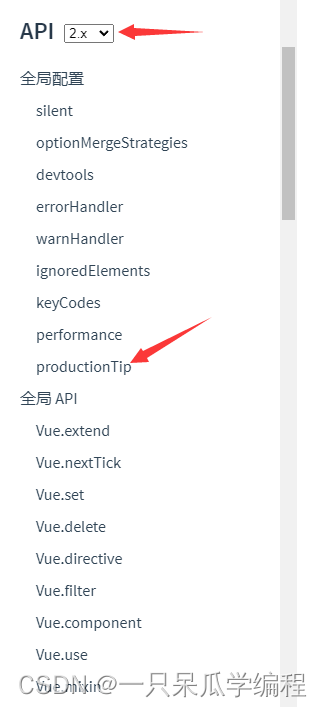
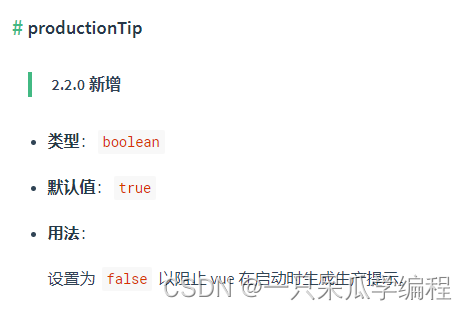
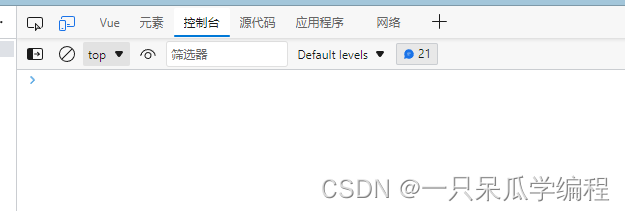
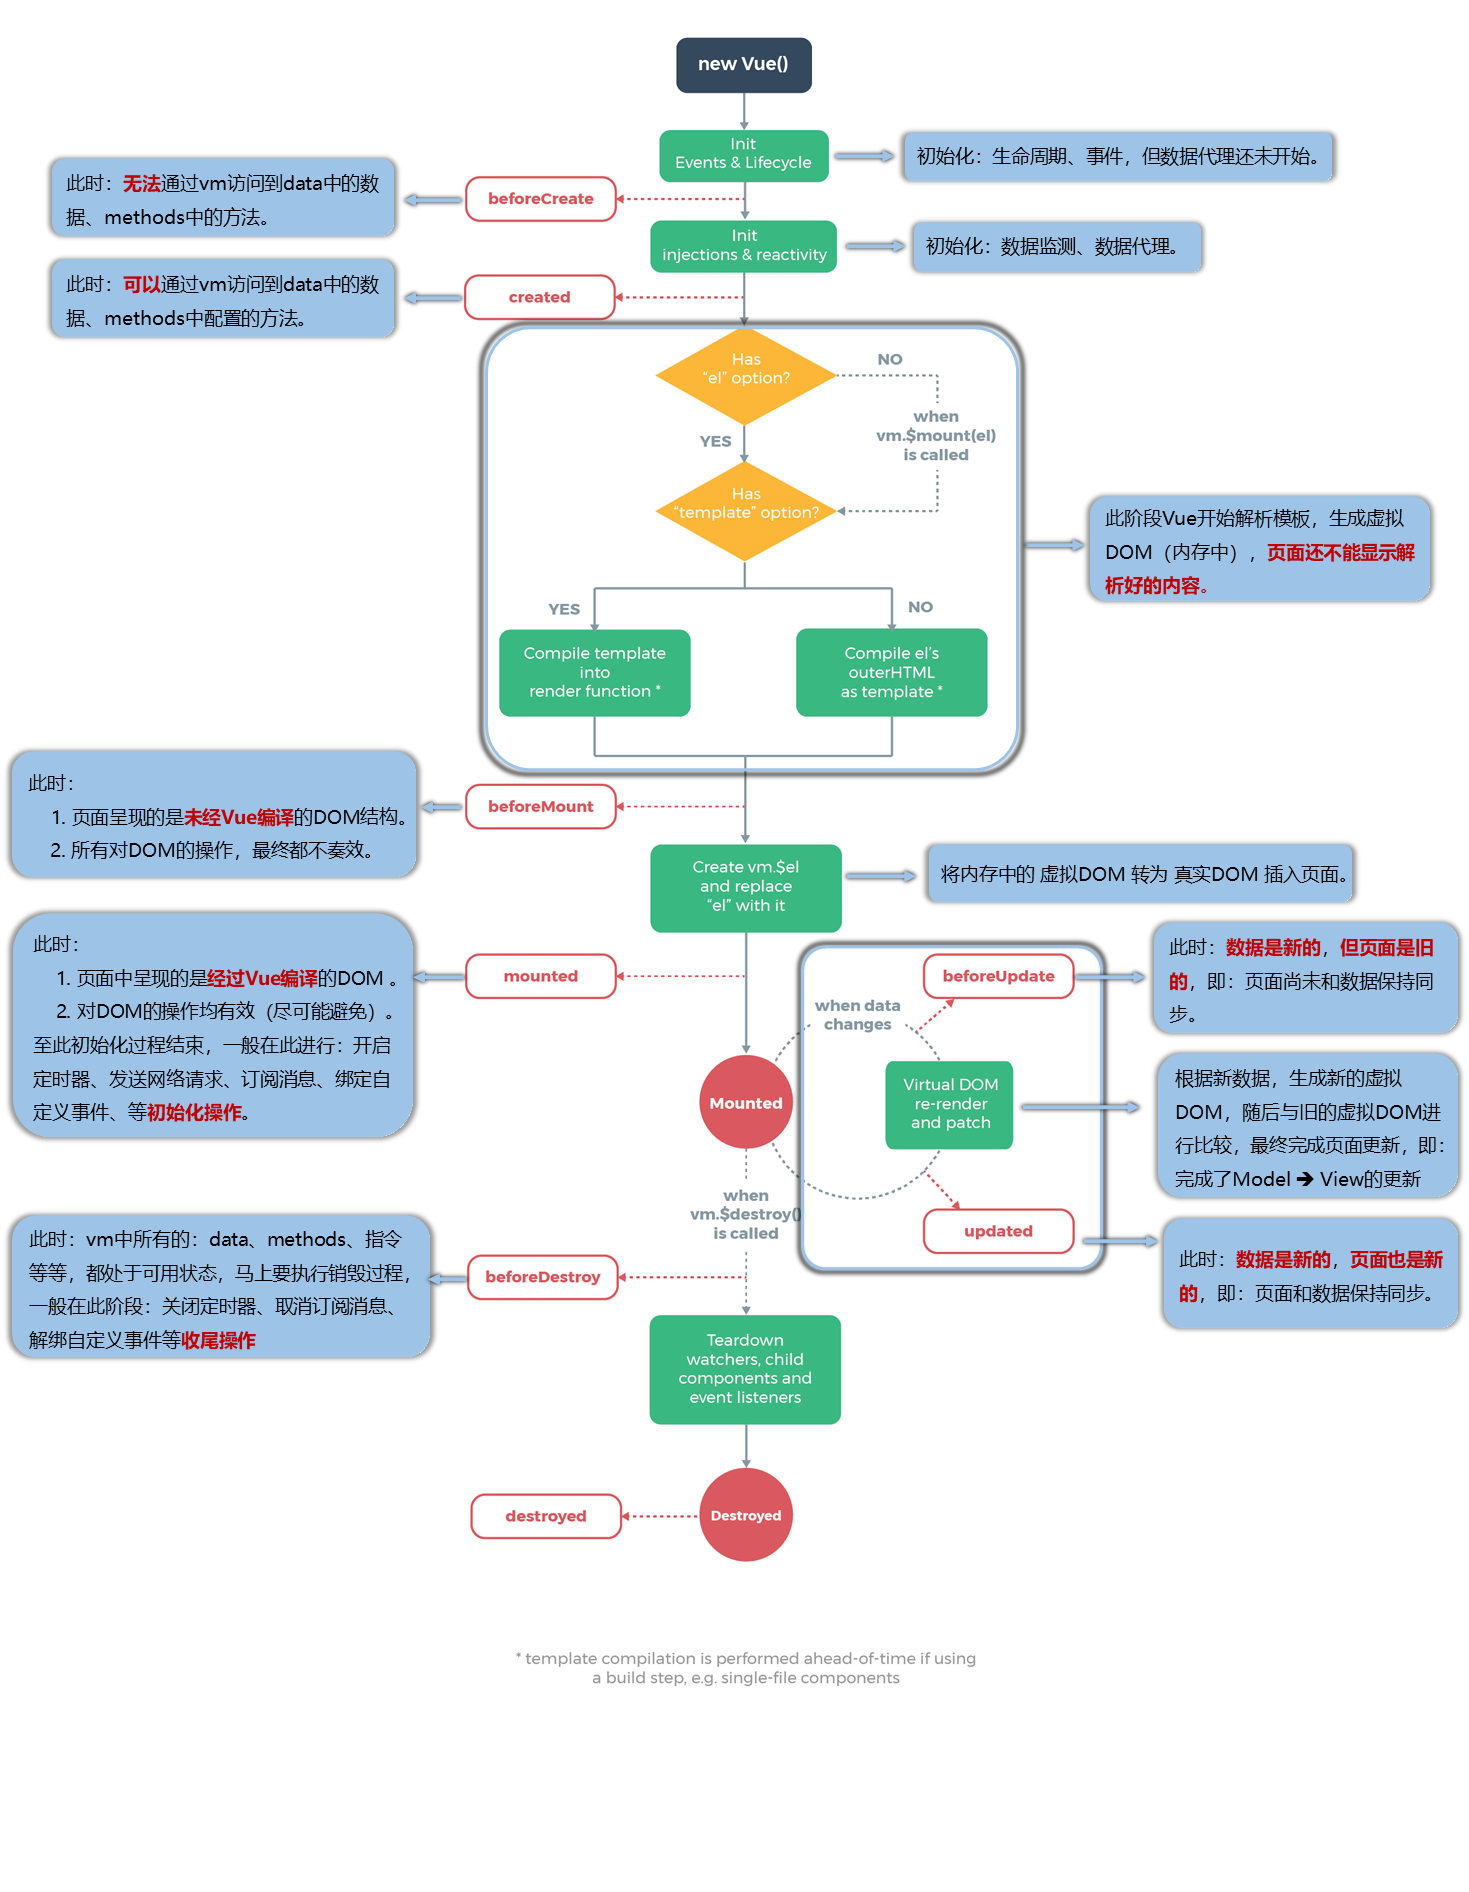
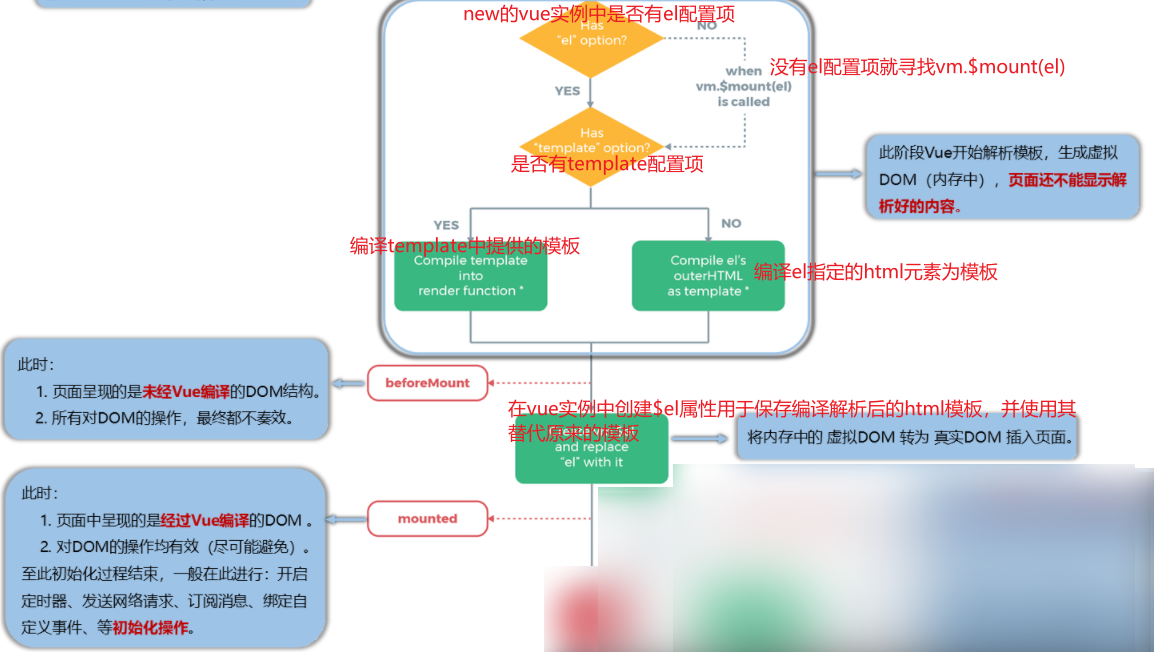
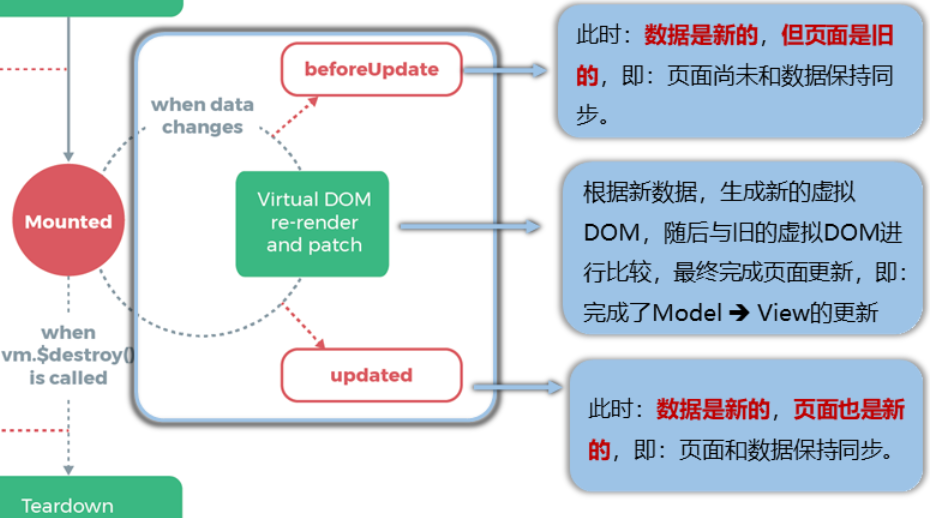
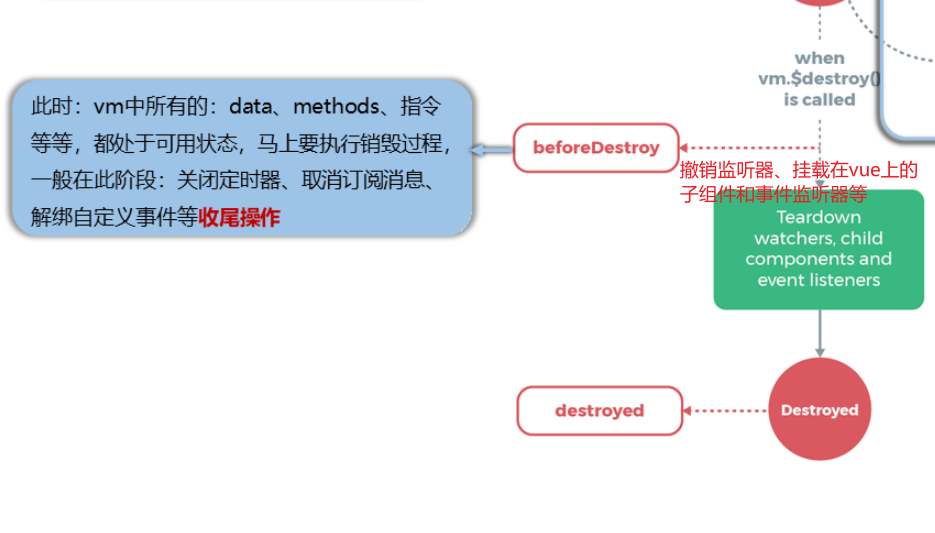
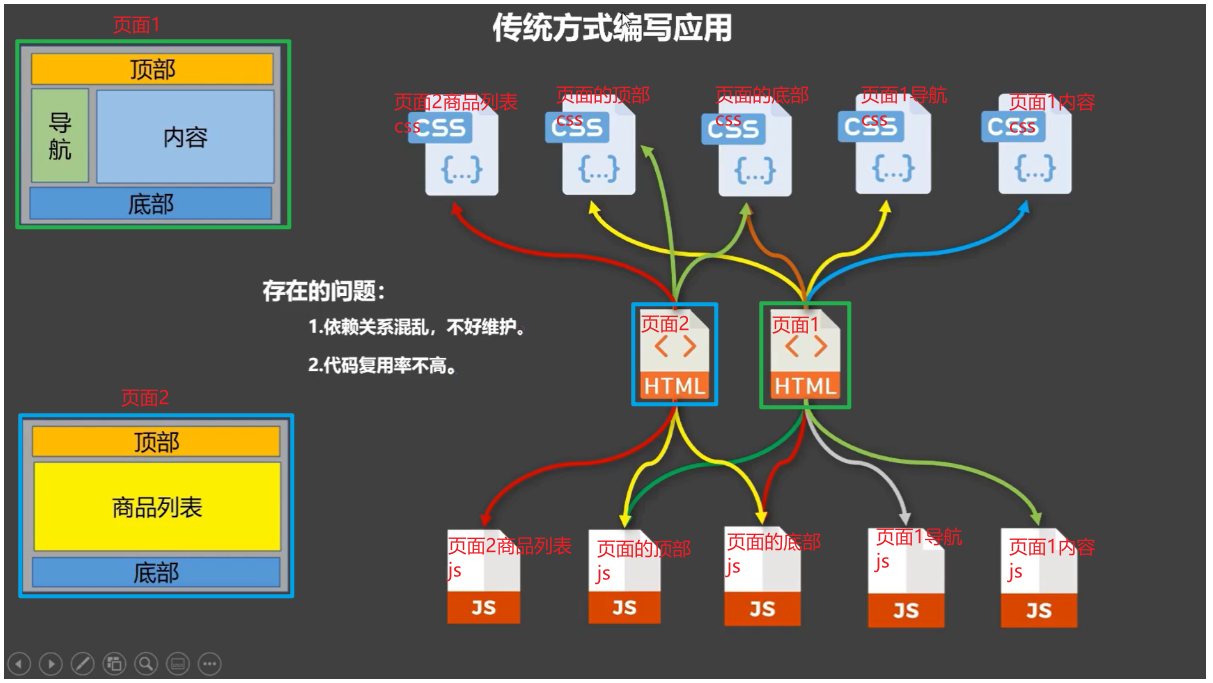
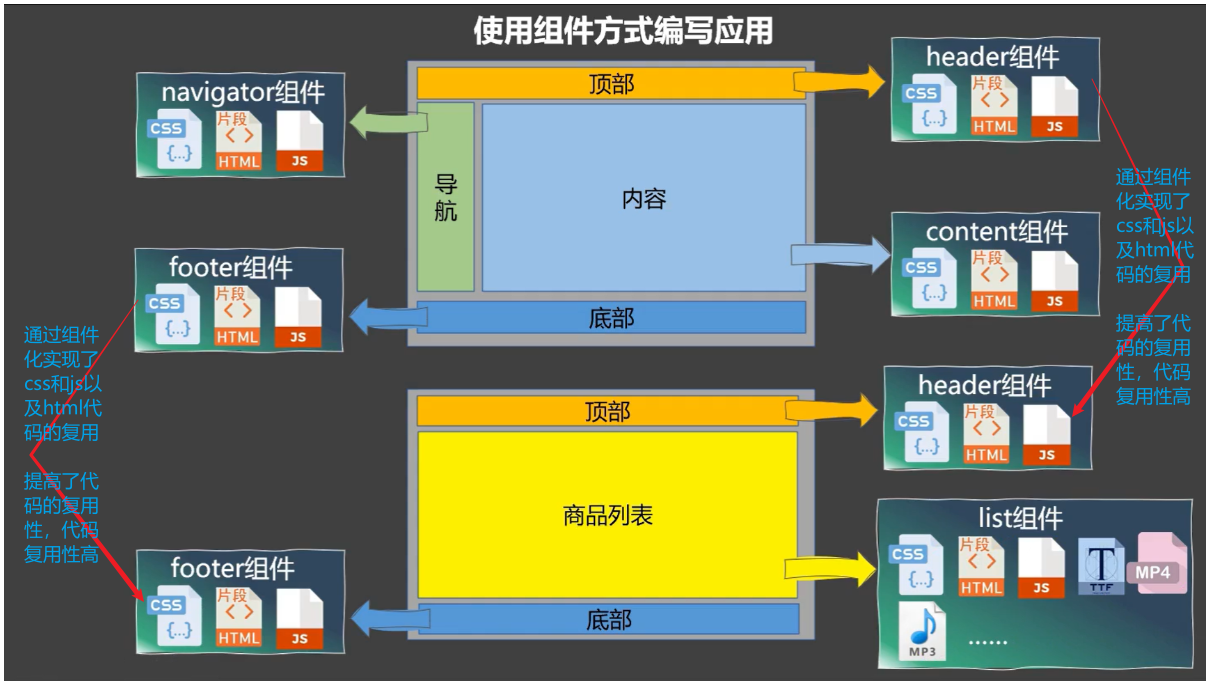
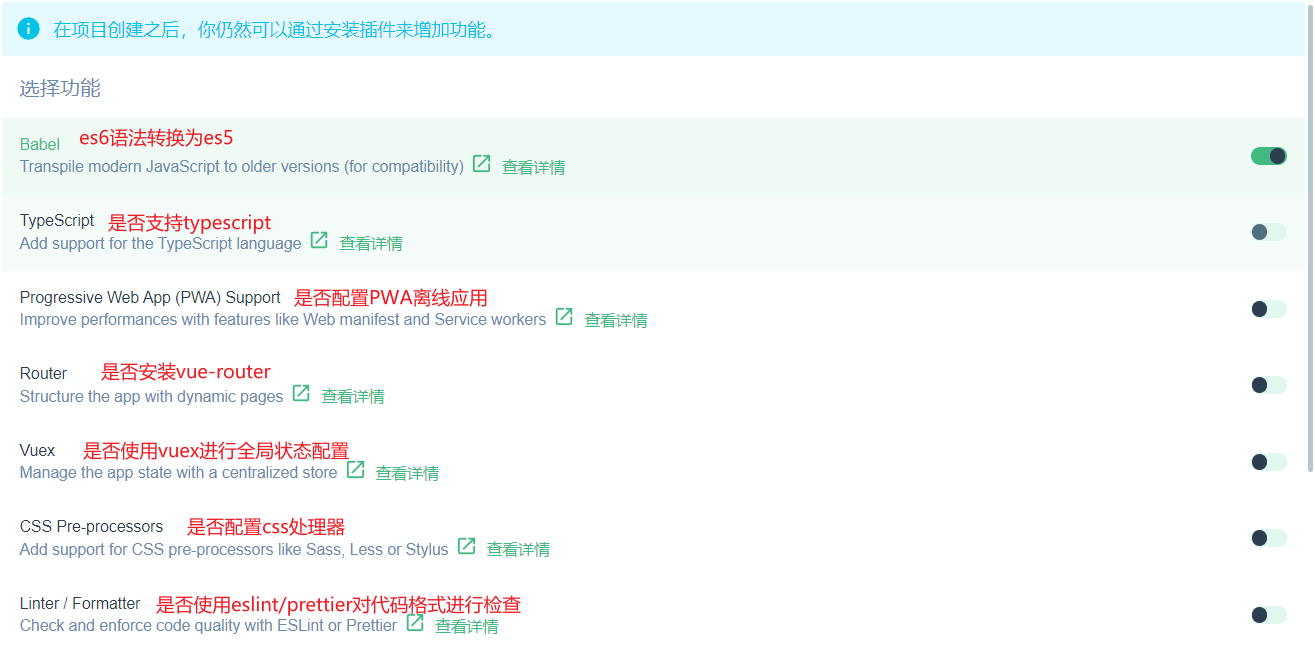
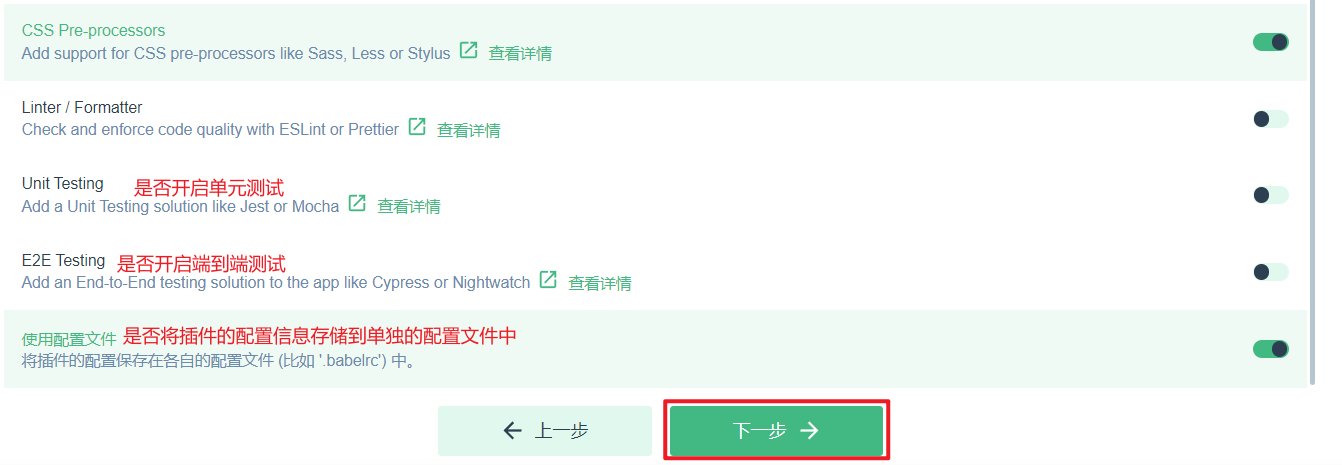
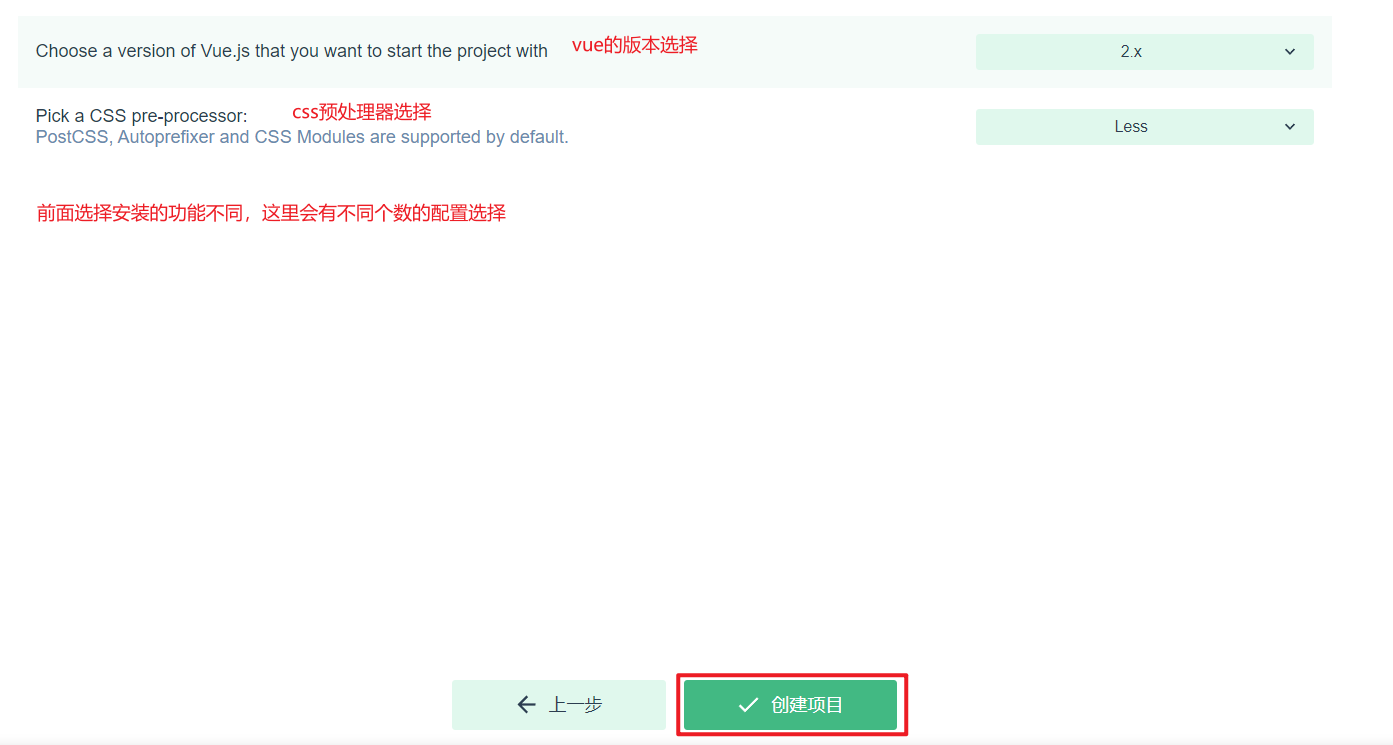
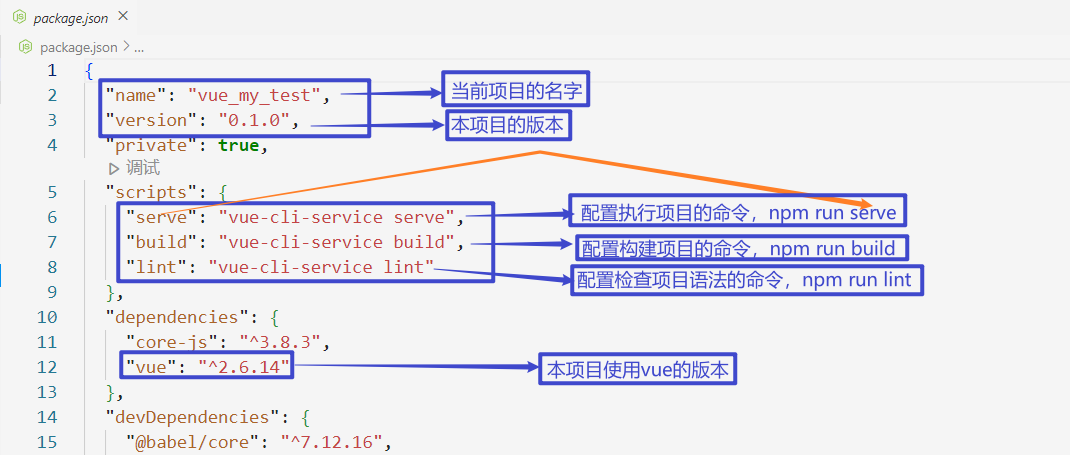
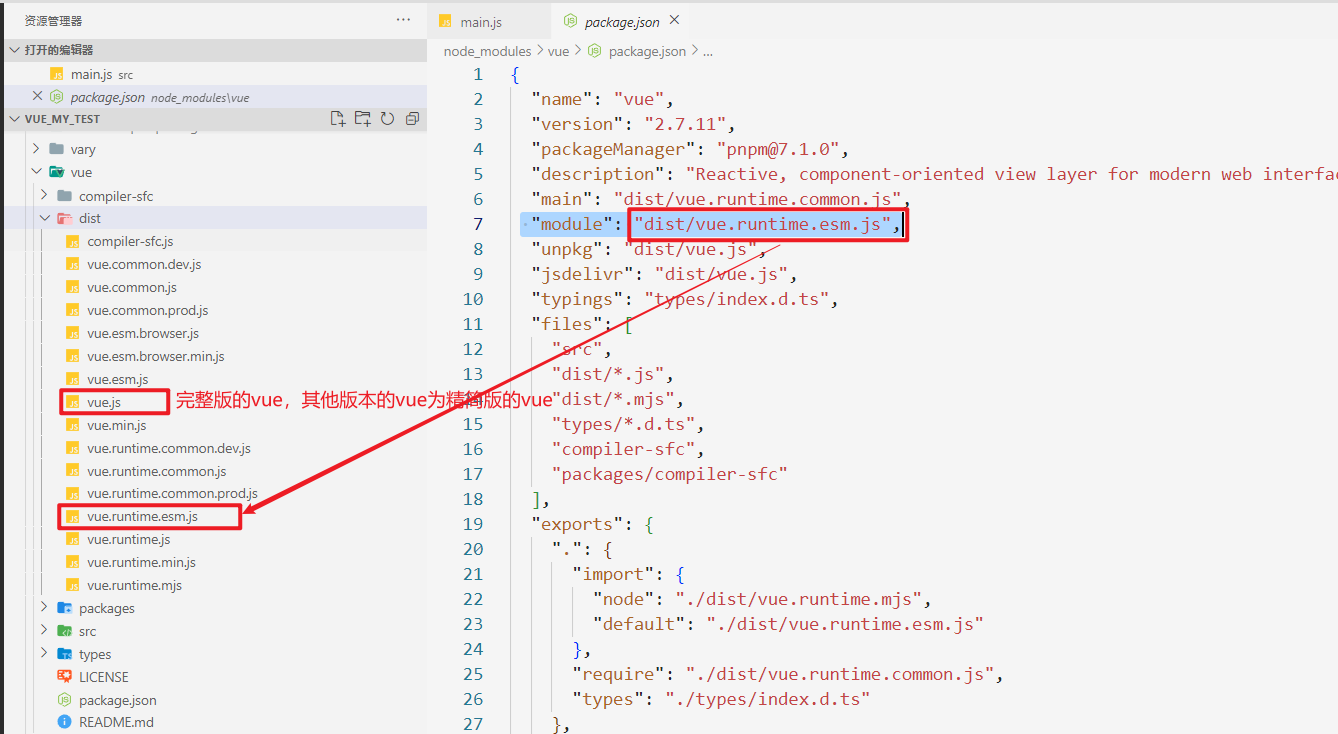
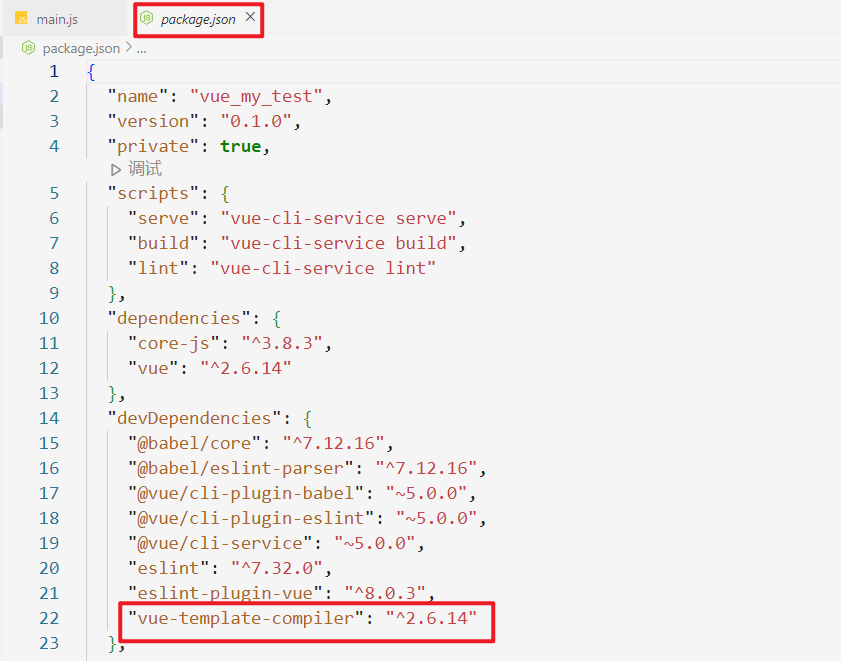
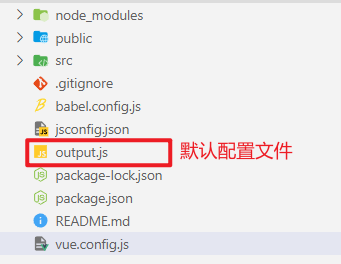
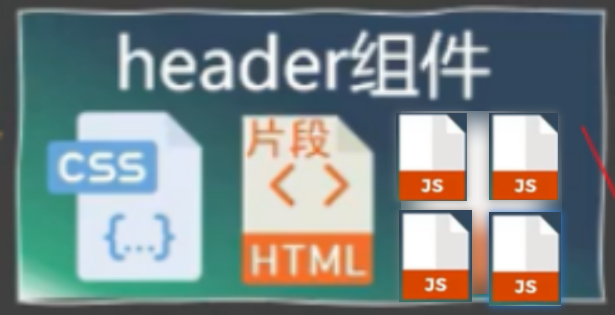
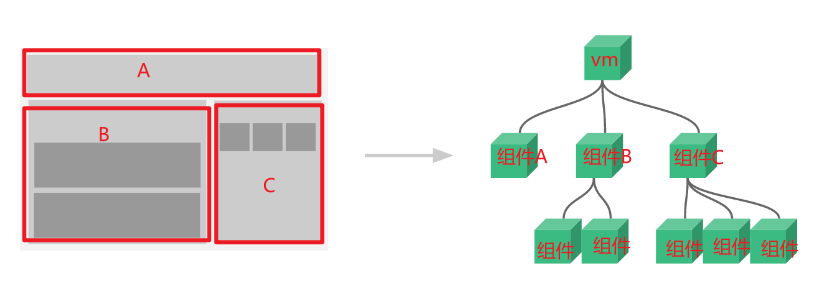
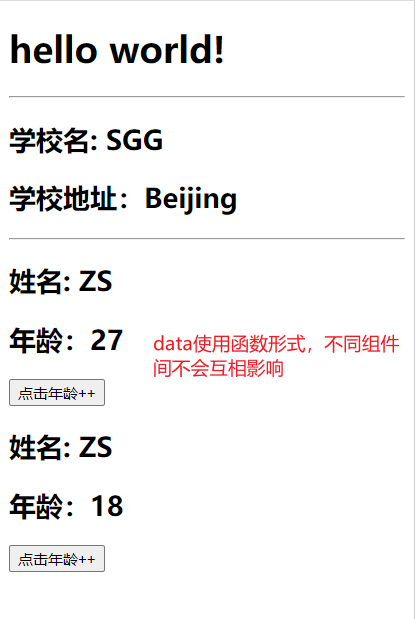
1. 官网· 英文官网: https://vuejs.org/ 中文官网: https://cn.vuejs.org/ 2. 介绍与描述· vue是一套用于动态构建用户界面的渐进式 JavaScript 框架 渐进式:vue可以自底向上逐层的应用 作者:尤雨溪 3. Vue的特点· 3.1. 采用组件化模式,提高代码的复用率,让代码易于维护。· 组件化: 提高代码的复用率:当其他的页面也需要使用相同的组件时,直接引入写好的对应的组件即可 代码易于维护:每个vue文件不同组件的标签、样式、交互进行单独管理,不会互相影响
3.2. 声明式编码,无需操作DOM,提高开发效率。· 命令式编码:即一条命令实现对应的步骤,一个命令一个步骤
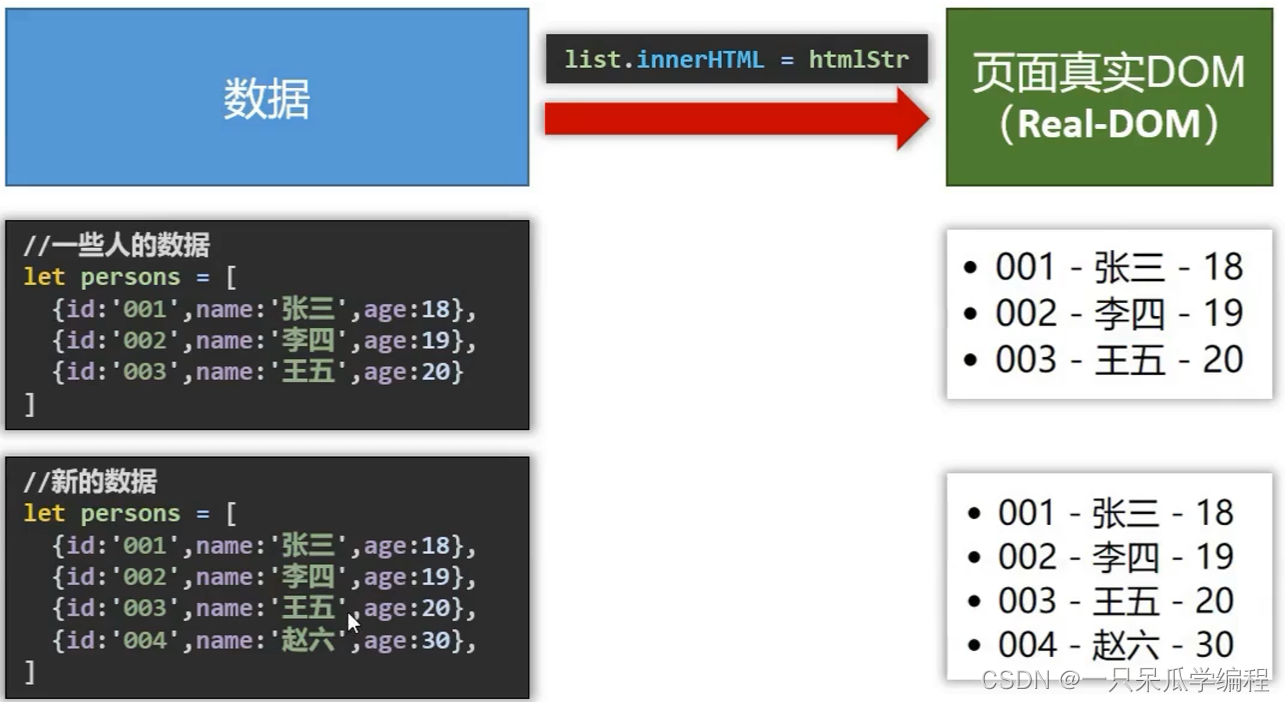
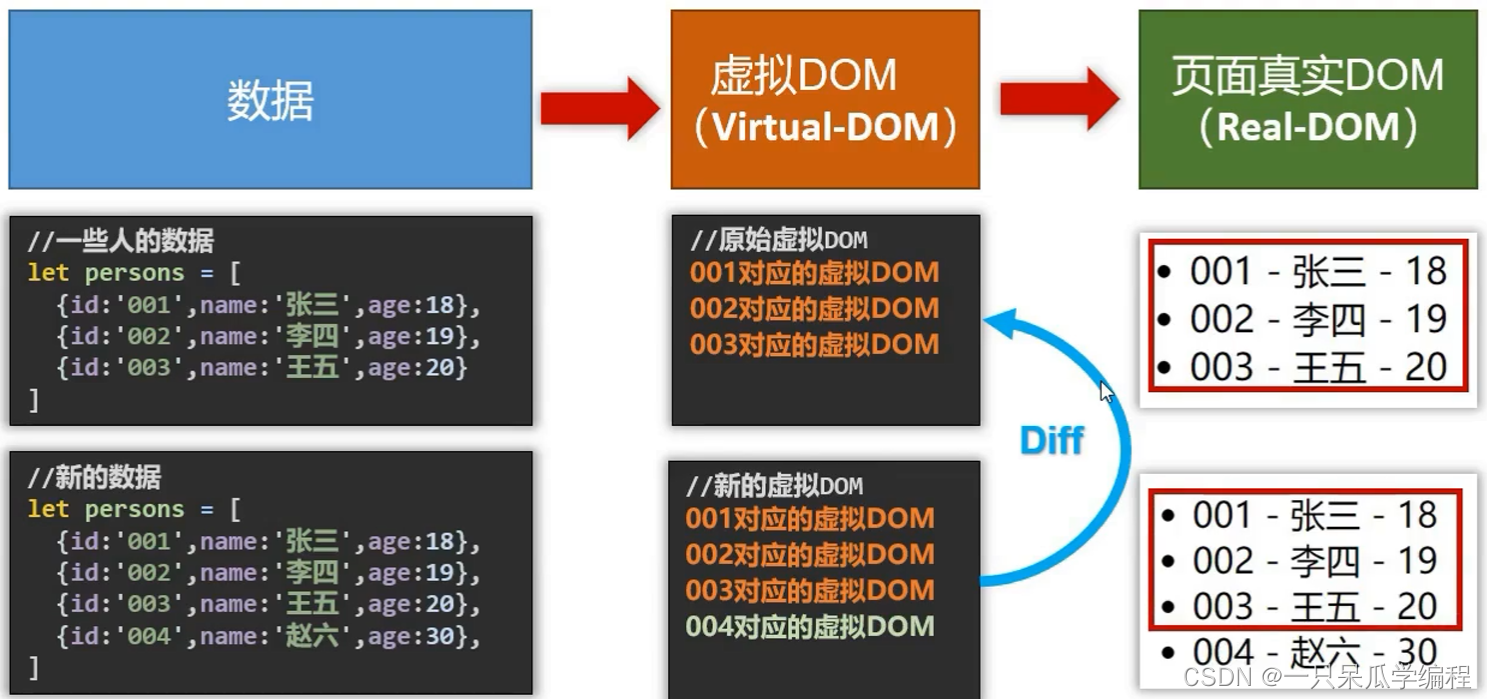
3.3. 使用虚拟DOM和Diff算法复用DOM· 使用原生js将数据渲染到页面,当数据发生变化时,需要手动进行判断那些数据时新数据,重新进行渲染,或者将页面中的数据先进行删除再重新渲染改变后的数据。
数据没有变化的DOM继续复用 即不发生改变,而新数据的DOM会将其渲染到页面对应的位置。
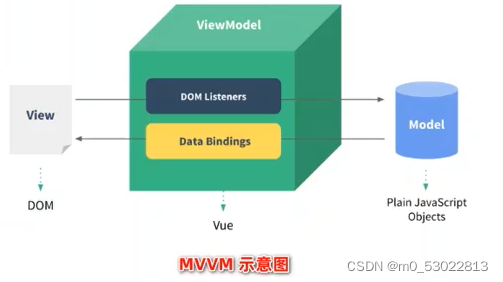
3.4. 遵循 MVVM 模式· MVVM是vue实现数据驱动视图和双向数据绑定的核心原理。M odel:当前页面渲染时所依赖的数据源。V iew:当前页面所渲染的DOM结构。V iewM odel:vue实例,MVVM的核心。
MVVM的工作原理:
当数据源发生变化时,会被ViewModel监听到,VM会根据最新的数据源自动更新页面的结构。
当表单元素的值发生变化时,也会被VM监听到,VM会把变化过后最新的值自动同步到Model数据源中。
3.5. 编码简洁, 体积小, 运行效率高, 适合移动/PC端开发· 3.6. 它本身只关注 UI, 也可以引入其它第三方库开发项目· vue-cli: vue 脚手架 vue-resource axios vue-router: 路由 vuex: 状态管理 element-ui: 基于 vue 的 UI 组件库(PC 端) … 4. vue的特性· vue框架的特性主要体现在:
1.数据驱动视图
使用vue的页面中,vue会监听数据的变化,自动重新渲染页面的结构(数据驱动视图是单向的数据绑定 )
2.双向数据绑定
在填写表单时,双向数据绑定可以辅助开发者在不操作dom的前提下自动把用户填写的内容同步到数据源,开发者不用再手动操作dom
5. vue的版本· 当前,vue 共有3个大版本,其中:
2.x版本的vue是目前企业级项目开发中的主流版本
vue3 .x和vue2.x版本的对比:
vue2 .x中绝大多数的API与特性,在vue3.x中同样支持。同时,vue3.x中还新增了3.x所特有的功能、并废弃了某些2.x中的旧功能
新增的功能例如:
废弃的旧功能如下:
[详细的变更信息,请参考官方文档给出的迁移指南](https://v3.vuejs.org/guide/ migration/introduction.html)
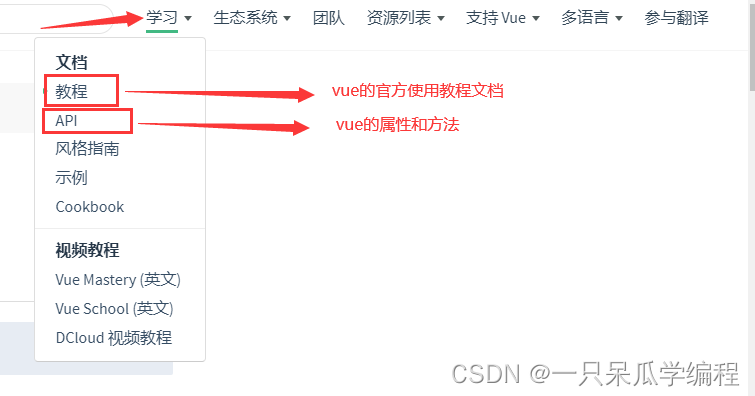
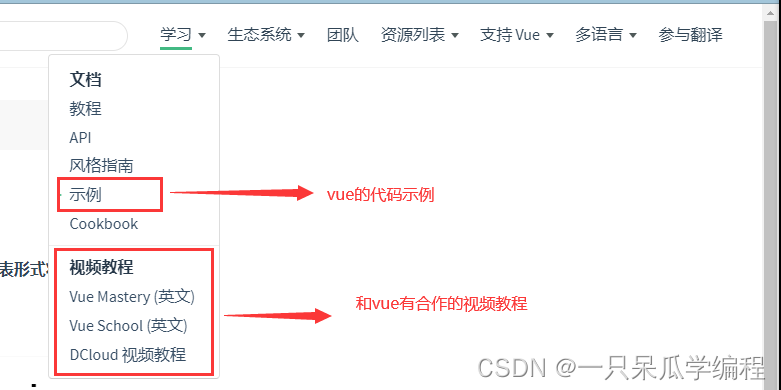
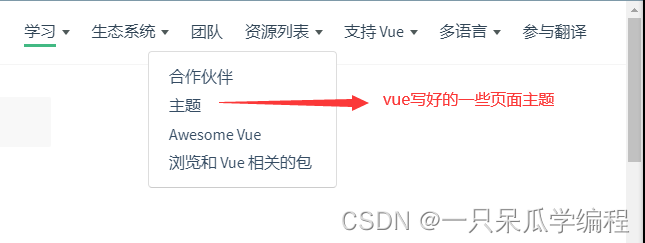
6. 学习Vue之前要掌握的JavaScript基础知识· ES6语法规范 ES6模块化 包管理器(npm yarn …) 一个即可 原型、原型链 数组常用方法 axios promise 官网导航栏使用简介· 1. 学习板块·
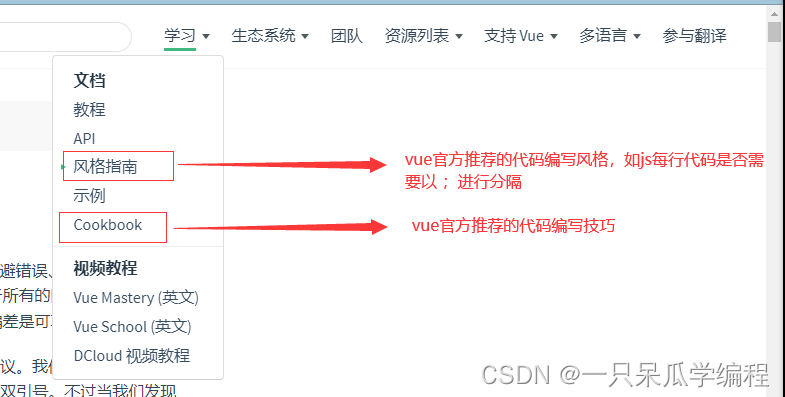
官方推荐代码编写技巧示例:
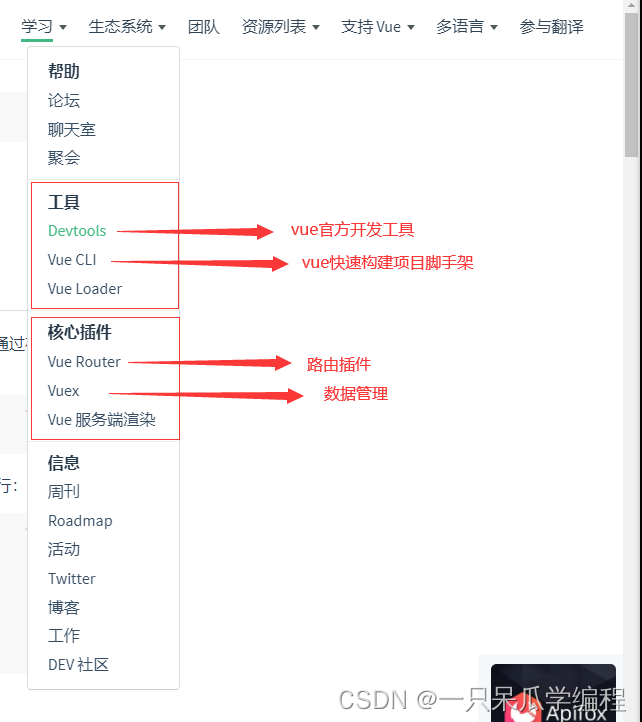
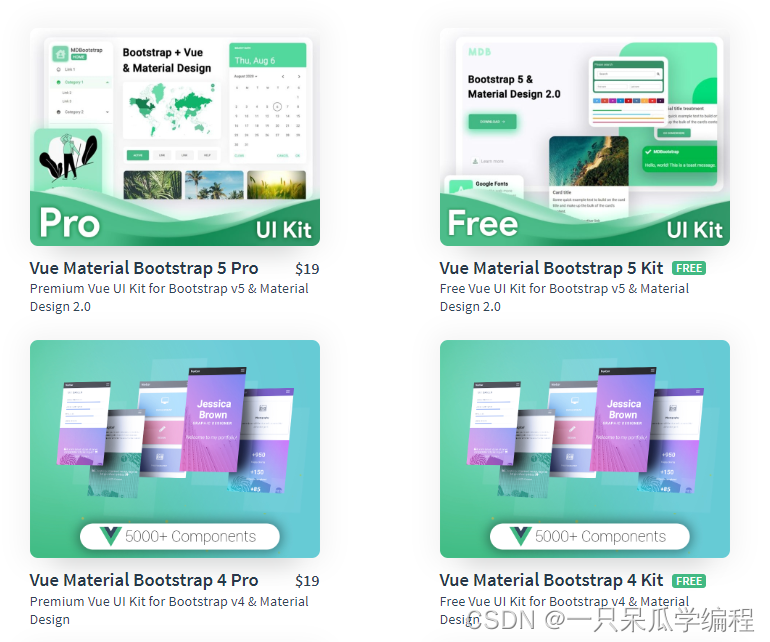
2. 生态系统板块·
3. 资源列表板块·
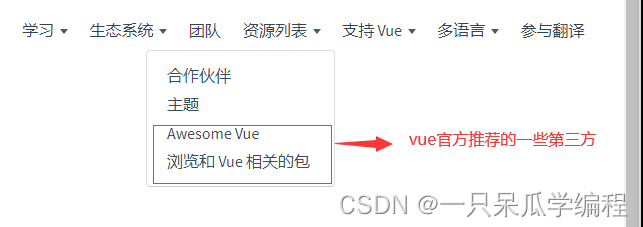
vue官方推荐的一些好用的第三方包、组件库
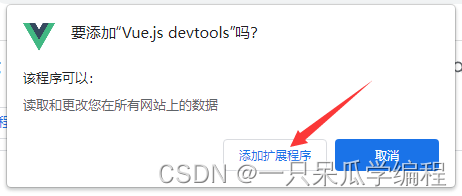
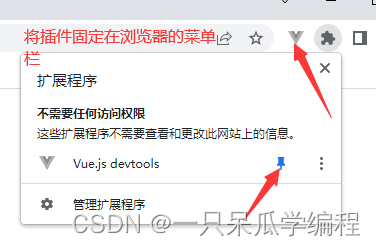
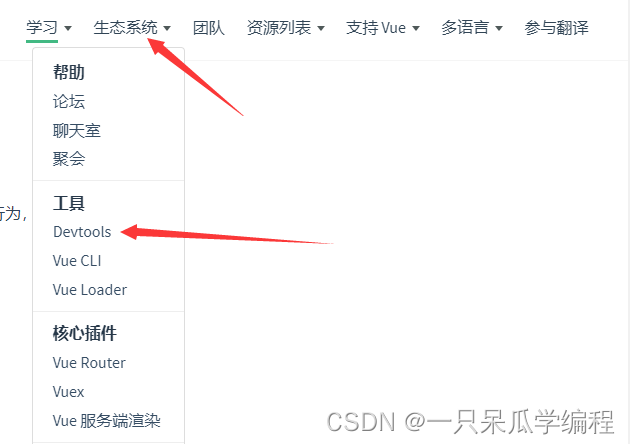
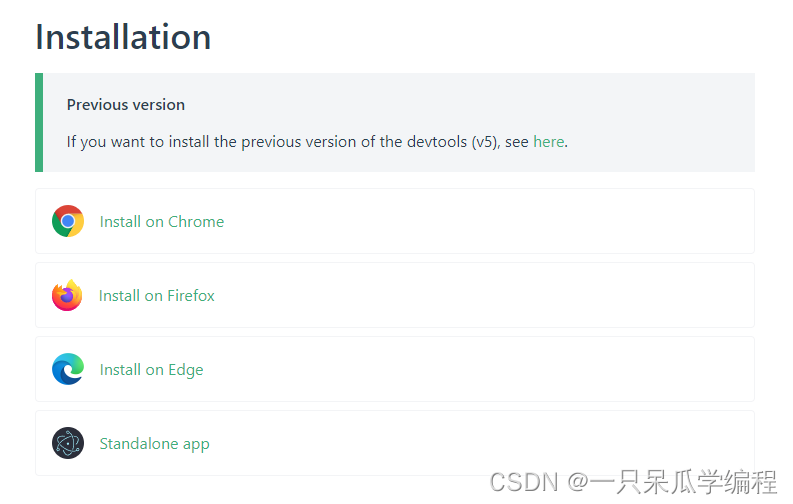
开发环境搭建· 在浏览器上安装 Vue Devtools,可以在一个更友好的界面中审查和调试 Vue 应用。
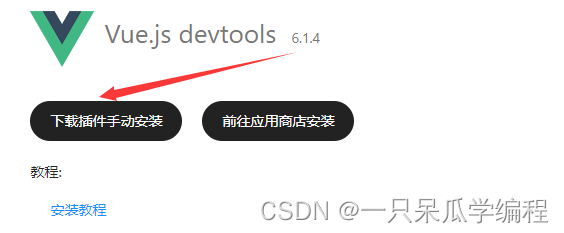
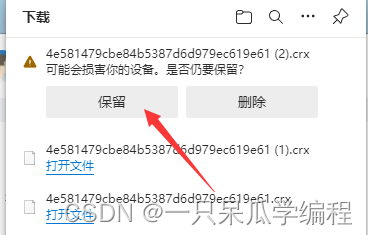
1.1 下载·
根据浏览器选择对应的进行安装
尝试在官网的GitHub上下载文件压缩包,安装失败后,在 Chrome 浏览器安装Vue Devtools调试工具 (详细教程) 本博客中的评论找到答案:
推荐一个下载vue-devtools插件商店,直接下载拖拽到扩展程序就可以了, https://chrome.pictureknow.com/extension?id=d50143a5f53d406dbe992277bfc90521
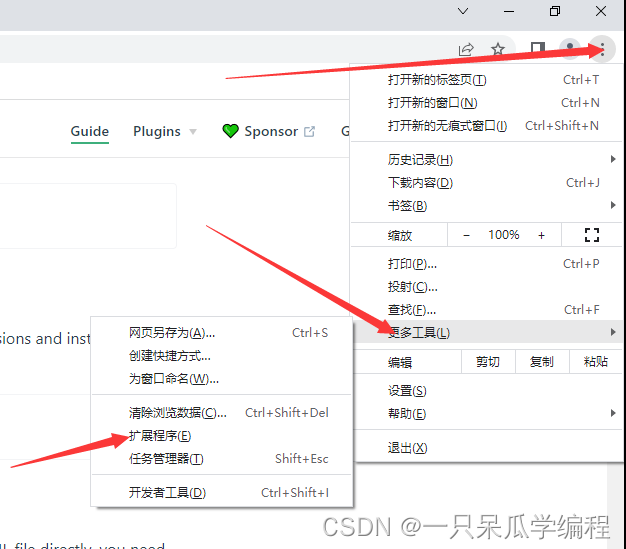
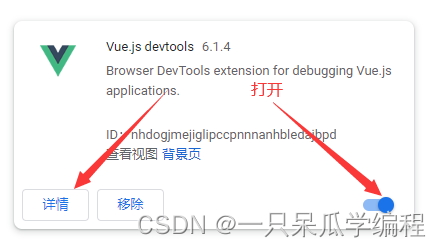
打开谷歌安转拓展
打开开发者模式
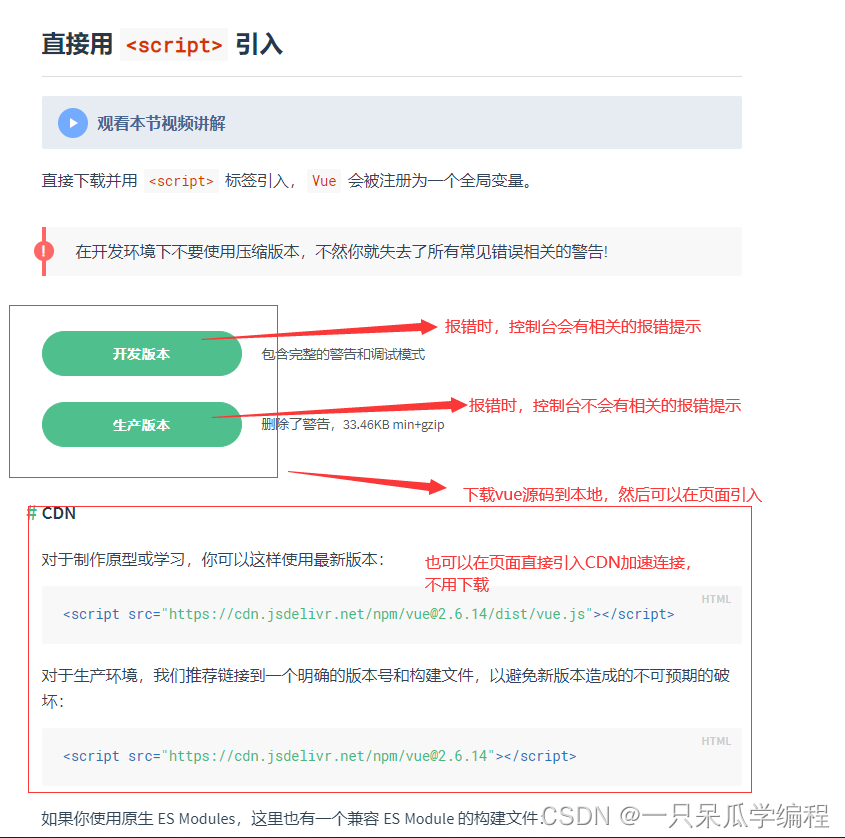
2. 下载并在页面引入 Vue· 2.1 Vue的下载·
ps:后面会使用 vue-cli 或 vite(脚手架)直接构建 vue 项目,不用手动引入 vue。
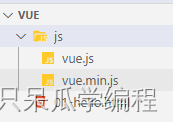
下载的 vue 文件
2.2 Vue的引入· 1 2 3 4 5 6 7 8 9 10 11 12 13 14 15 16 <!DOCTYPE html > <html lang ="en" > <head > <meta charset ="UTF-8" > <meta http-equiv ="X-UA-Compatible" content ="IE=edge" > <meta name ="viewport" content ="width=device-width, initial-scale=1.0" > <title > Document</title > </head > <body > <script src ="https://cdn.jsdelivr.net/npm/vue@2.6.14/dist/vue.js" > </script > </body > </html >
2.3 页面控制台警告提示解决·
1 2 3 4 5 6 7 8 9 10 11 12 13 14 15 16 17 18 19 20 <!DOCTYPE html > <html lang ="en" > <head > <meta charset ="UTF-8" > <meta http-equiv ="X-UA-Compatible" content ="IE=edge" > <meta name ="viewport" content ="width=device-width, initial-scale=1.0" > <title > Document</title > </head > <body > <script src ="./js/vue.js" > </script > <script > Vue .config .productionTip = false </script > </body > </html >
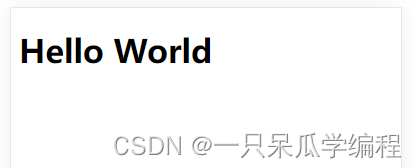
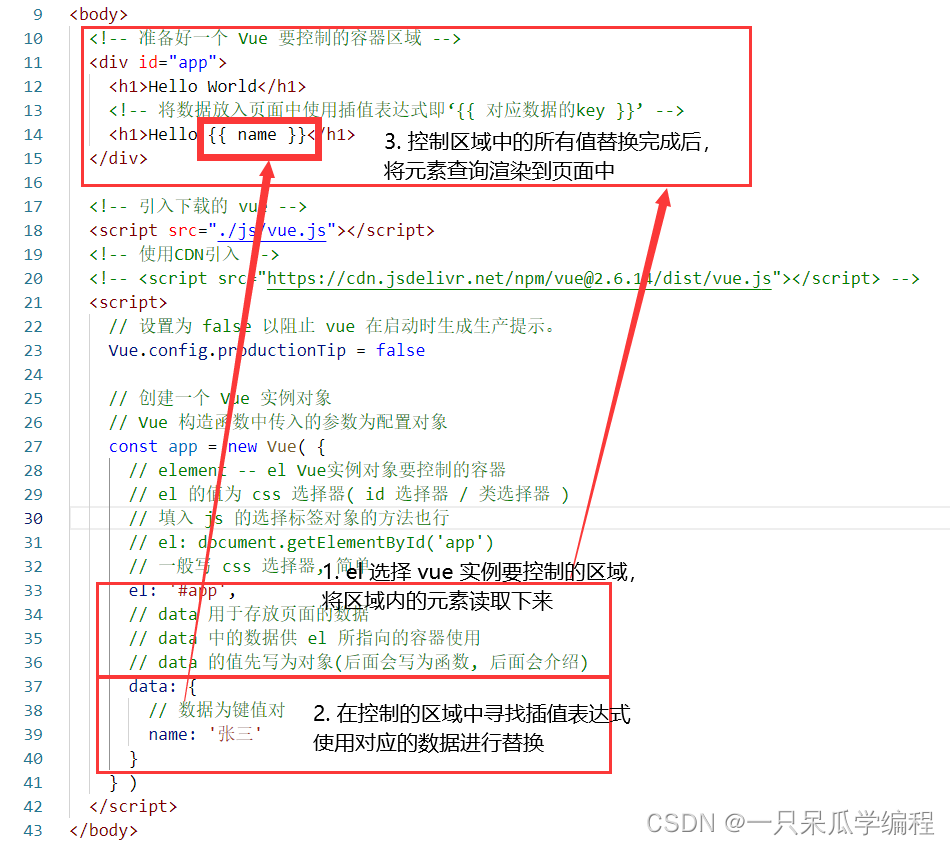
初始Vue–HelloWorld引入案例· 1. Hello World 引入案例· 准备好一个 Vue 要控制的容器区域 创建一个 Vue 实例对象 选择 Vue 实例对象要控制的容器 1 2 3 4 5 6 7 8 9 10 11 12 13 14 15 16 17 18 19 20 21 22 23 24 25 26 27 28 29 30 31 32 33 34 35 <!DOCTYPE html > <html lang ="en" > <head > <meta charset ="UTF-8" > <meta http-equiv ="X-UA-Compatible" content ="IE=edge" > <meta name ="viewport" content ="width=device-width, initial-scale=1.0" > <title > Document</title > </head > <body > <div id ="app" > <h1 > Hello World</h1 > </div > <script src ="./js/vue.js" > </script > <script > Vue .config .productionTip = false const app = new Vue ( { el : '#app' } ) </script > </body > </html >
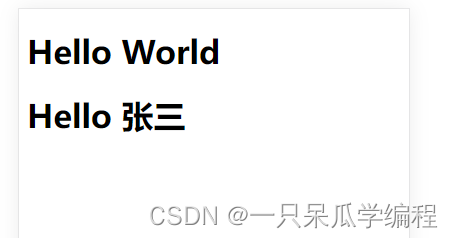
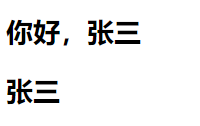
2. Vue 对页面数据的控制· 准备好 data 用于存放页面的数据 将数据放入页面中使用插值表达式(后面会介绍)即 {{ 对应数据的key }} 1 2 3 4 5 6 7 8 9 10 11 12 13 14 15 16 17 18 19 20 21 22 23 24 25 26 27 28 29 30 31 32 33 34 35 36 37 38 39 40 41 42 43 44 <!DOCTYPE html > <html lang ="en" > <head > <meta charset ="UTF-8" > <meta http-equiv ="X-UA-Compatible" content ="IE=edge" > <meta name ="viewport" content ="width=device-width, initial-scale=1.0" > <title > Document</title > </head > <body > <div id ="app" > <h1 > Hello World</h1 > <h1 > Hello {{ name }}</h1 > </div > <script src ="./js/vue.js" > </script > <script > Vue .config .productionTip = false const app = new Vue ( { el : '#app' , data : { name : '张三' } } ) </script > </body > </html >
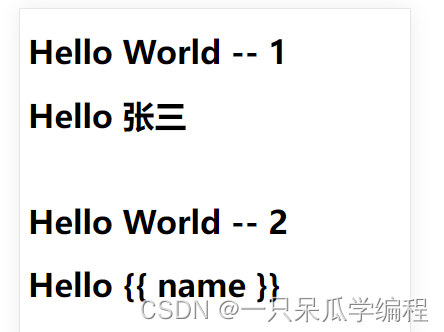
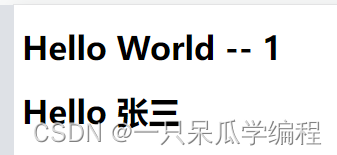
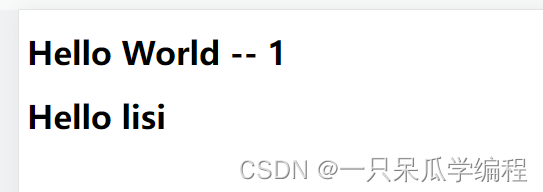
3. Vue 实例对象与对应控制区域的对应关系· 3.1 一个 Vue 实例对象能否控制多个区域(容器)· 1 2 3 4 5 6 7 8 9 10 11 12 13 14 15 16 17 18 19 20 21 22 23 24 25 26 27 28 29 30 31 32 33 34 35 36 37 38 <!DOCTYPE html > <html lang ="en" > <head > <meta charset ="UTF-8" > <meta http-equiv ="X-UA-Compatible" content ="IE=edge" > <meta name ="viewport" content ="width=device-width, initial-scale=1.0" > <title > Document</title > </head > <body > <div class ="app" > <h1 > Hello World -- 1</h1 > <h1 > Hello {{ name }}</h1 > </div > <br > <div class ="app" > <h1 > Hello World -- 2</h1 > <h1 > Hello {{ name }}</h1 > </div > <script src ="./js/vue.js" > </script > <script > Vue .config .productionTip = false const app = new Vue ( { el : '.app' , data : { name : '张三' } } ) </script > </body > </html >
一个 Vue 实例对象只能控制一个区域,一个 Vue 实例对象只控制对应的第一个区域
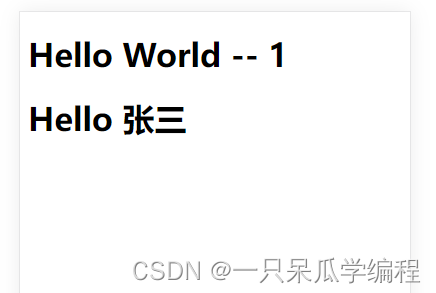
3.2 一个容器能否由多个 Vue 实例控制· 1 2 3 4 5 6 7 8 9 10 11 12 13 14 15 16 17 18 19 20 21 22 23 24 25 26 27 28 29 30 31 32 33 34 35 36 37 38 39 40 41 42 43 44 <!DOCTYPE html > <html lang ="en" > <head > <meta charset ="UTF-8" > <meta http-equiv ="X-UA-Compatible" content ="IE=edge" > <meta name ="viewport" content ="width=device-width, initial-scale=1.0" > <title > Document</title > </head > <body > <div class ="app" > <h1 > Hello World -- 1</h1 > <h1 > Hello {{ name }}</h1 > </div > <script src ="./js/vue.js" > </script > <script > Vue .config .productionTip = false const app1 = new Vue ( { el : '.app' , data : { name : '张三' } } ) </script > <script > Vue .config .productionTip = false const app2 = new Vue ( { el : '.app' , data : { name : '李四' } } ) </script > </body > </html >
一个容器只由一个 Vue 实例进行控制,一个容器只由第一个 Vue 实例进行控制
由上述可得:
4. 根据 Hello World 案例进行分析· 4.1 插值语法中可以书写的数据格式· 插值语法{{}}中可以书写js表达式。
表达式:
4.2 根据案例进行分析·
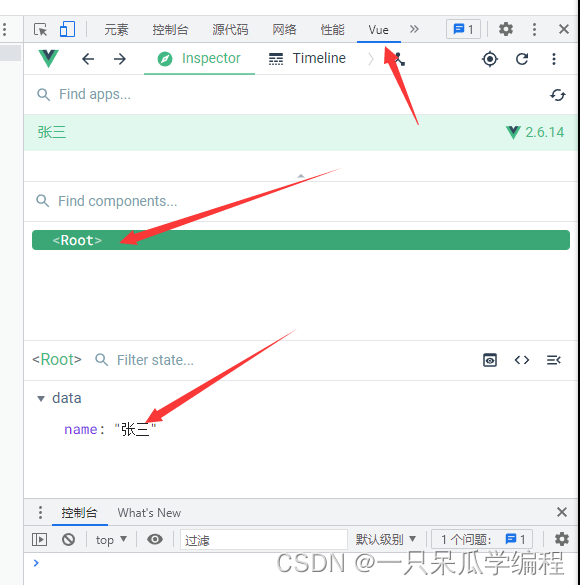
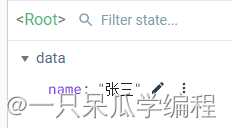
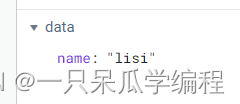
4.3 Vue 的 data 中数据发生变化,页面会发生对应的更新· 打开 vue devtools 查看组件变量
5. 总结· 想让 Vue 工作,就必须创建一个 Vue 实例,且要传入一个配置对象; app 容器里的代码依然符合 html 规范,只不过混入了一些特殊的 Vue 语法; app 容器里的代码被称为【Vue模板】 Vue实例和容器是一一对应的; 真实开发中只有一个Vue实例,并且会配合着组件一起使用; 中的xxx要写js表达式,且xxx可以自动读取到data中的所有属性 一旦data中的数据发生改变,那么页面中用到该数据的地方也会自动更新; 模板语法· 1. Vue模板语法的分类· Vue模板语法主要分为两类:
插值语法
指令语法( v- 开头 )
2. 插值语法· 用于解析标签体内容
2.1 引入· 1 2 3 4 5 6 7 8 9 10 11 12 13 14 15 16 17 18 19 20 <!DOCTYPE html > <html lang ="en" > <head > <meta charset ="UTF-8" > <meta http-equiv ="X-UA-Compatible" content ="IE=edge" > <meta name ="viewport" content ="width=device-width, initial-scale=1.0" > <title > Document</title > <script src ="./js/vue.js" > </script > </head > <body > <div id ="app" > <p > hello jack</p > </div > <script > new Vue ( { el : '#app' } ) </script > </body > </html >
2.2 插值语法实现· 想要实现对 hello 后面名字的动态控制,就需要使用 vue 提供的插值语法 ---- 插值表达式 – {{}}
使用{{}}可以将对应的值渲染到元素的内容节点中。
语法: {{xxx}}
1 2 3 4 5 6 7 8 9 10 11 12 13 14 15 16 17 18 19 20 21 22 23 24 <!DOCTYPE html > <html lang ="en" > <head > <meta charset ="UTF-8" > <meta http-equiv ="X-UA-Compatible" content ="IE=edge" > <meta name ="viewport" content ="width=device-width, initial-scale=1.0" > <title > Document</title > <script src ="./js/vue.js" > </script > </head > <body > <div id ="app" > <p > hello {{name}}</p > </div > <script > new Vue ( { el : '#app' , data : { name : 'marry' } } ) </script > </body > </html >
2.3 插值语法中书写js表达式· 在vue提供的插值语法中,除了支持绑定简单的数据值外,还支持JavaScript表达式运算。
用法示例:
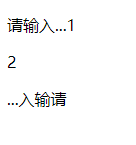
1 2 3 4 5 6 7 8 9 10 11 12 13 14 15 16 17 18 19 20 21 22 23 24 25 26 27 <!DOCTYPE html > <html lang ="en" > <head > <meta charset ="UTF-8" > <meta name ="viewport" content ="width=device-width, initial-scale=1.0" > <title > Document</title > </head > <body > <div id ="app" > <p > {{ tips + '1' }}</p > <p > {{ ok ? '1' : '2' }}</p > <p > {{ tips.split('').reverse().join('') }}</p > </div > <script src ="https://cdn.jsdelivr.net/npm/vue@2/dist/vue.js" > </script > <script > const vm = new Vue ({ el : "#app" , data : { tips : "请输入..." } }) </script > </body > </html >
3. Vue指令· 3.1 指令的概念· 指令是Vue为开发者提供的模板语法,用于辅助开发者渲染页面的基本结构。
3.2 指令的分类· 指令按照不同的用途可以分为如下6大类:
内容渲染指令 属性绑定指令 事件绑定指令 双向绑定指令 条件渲染指令 列表渲染指令 4. 内容渲染指令· 插值语法是内容渲染指令中的一部分。【Vue---- 内容渲染指令】
3.3 内容渲染指令· 内容渲染指令是用来辅助开发者渲染DOM元素中的文本内容。
可以将对应的值渲染到元素的内容节点中3.3.1常用的内容渲染指令:· 1.v-text {{ }}
3.3.2 v-text· 用法示例:
1 2 3 4 5 6 7 8 9 10 11 12 13 14 15 16 17 18 19 20 21 22 23 24 25 <!DOCTYPE html > <html lang ="en" > <head > <meta charset ="UTF-8" > <meta name ="viewport" content ="width=device-width, initial-scale=1.0" > <title > Document</title > </head > <body > <div id ="app" > <p v-text ="username" > </p > </div > <script src ="https://cdn.jsdelivr.net/npm/vue@2/dist/vue.js" > </script > <script > const vm = new Vue ({ el : '#app' , data : { username : '张三' } }) </script > </body > </html >
v-text的缺点:会覆盖元素内部原有的内容
3.3.3 {{}} 插值表达式· vue提供的{{}}语法是用来解决v-text会覆盖默认文本内容的问题,这种{{}}语法的专业名称是插值表达式。{{}}在实际开发中用的最多,只是内容的占位符,不会覆盖原有的内容。使用{{}}可以将对应的值渲染到元素的内容节点中。
用法示例:
1 2 3 4 5 6 7 8 9 10 11 12 13 14 15 16 17 18 19 20 21 22 23 24 25 26 <!DOCTYPE html > <html lang ="en" > <head > <meta charset ="UTF-8" > <meta name ="viewport" content ="width=device-width, initial-scale=1.0" > <title > Document</title > </head > <body > <div id ="app" > <p > 姓名:{{ username }}</p > <p > 性别:{{ gender }}</p > </div > <script src ="https://cdn.jsdelivr.net/npm/vue@2/dist/vue.js" > </script > <script > const vm = new Vue ({ el : '#app' , data : { username : "lisi" , gender : "男" } }) </script > </body > </html >
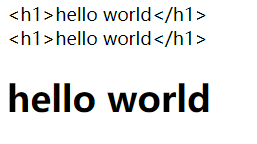
3.3.4 v-html· v-text和{{}}只能渲染纯文本内容,如果要把包含html标签的字符串渲染为页面的html元素,需要使用v-html。
用法示例:
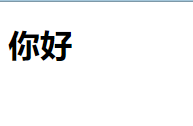
1 2 3 4 5 6 7 8 9 10 11 12 13 14 15 16 17 18 19 20 21 22 23 <!DOCTYPE html > <html lang ="en" > <head > <meta charset ="UTF-8" > <meta name ="viewport" content ="width=device-width, initial-scale=1.0" > <title > Document</title > </head > <body > <div id ="app" > <div v-html ="content" > </div > </div > <script src ="https://cdn.jsdelivr.net/npm/vue@2/dist/vue.js" > </script > <script > const vm = new Vue ({ el : "#app" , data : { content : "<h1>你好</h1>" } }) </script > </body > </html >
5. 指令语法· 用于解析标签(包括:标签属性、标签体内容、绑定事件)
5.1 属性绑定指令· 插值语法 只能实现对标签的内容的渲染 ,如果要渲染标签的属性 需要使用vue的指令语法----属性绑定指令。
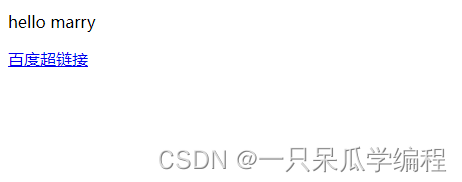
5.1.1 引入· 1 2 3 4 5 6 7 8 9 10 11 12 13 14 15 16 17 18 19 20 21 22 23 24 25 <!DOCTYPE html > <html lang ="en" > <head > <meta charset ="UTF-8" > <meta http-equiv ="X-UA-Compatible" content ="IE=edge" > <meta name ="viewport" content ="width=device-width, initial-scale=1.0" > <title > Document</title > <script src ="./js/vue.js" > </script > </head > <body > <div id ="app" > <p > hello {{name}}</p > <a href ="www.baidu.com" > 百度超链接</a > </div > <script > new Vue ( { el : '#app' , data : { name : 'marry' } } ) </script > </body > </html >
想要实现对 a 标签属性的动态控制,需要使用属性绑定指令。
5.1.2 属性绑定指令逐步尝试探索实现· 那么属性绑定指令要怎么使用?将链接更换为变量名?
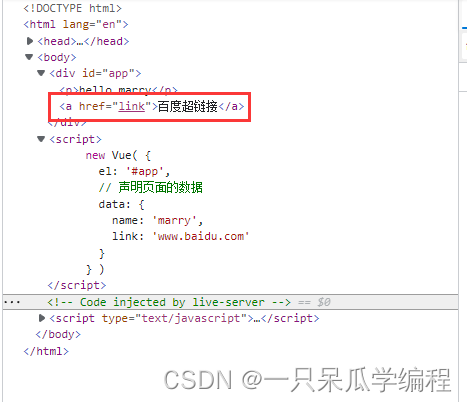
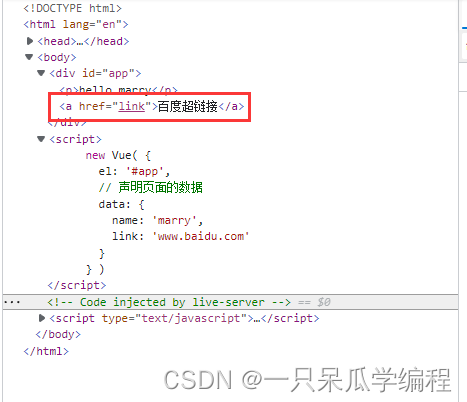
1 2 3 4 5 6 7 8 9 10 11 12 13 14 15 16 <body > <div id ="app" > <p > hello {{name}}</p > <a href ="link" > 百度超链接</a > </div > <script > new Vue ( { el : '#app' , data : { name : 'marry' , link : 'www.baidu.com' } } ) </script > </body >
1 2 3 4 5 6 7 8 9 10 11 12 13 14 15 16 <body > <div id ="app" > <p > hello {{name}}</p > <a href =link > 百度超链接</a > </div > <script > new Vue ( { el : '#app' , data : { name : 'marry' , link : 'www.baidu.com' } } ) </script > </body >
两种改法的结果一致,很明显直接将链接更换成变量名是行不通的。
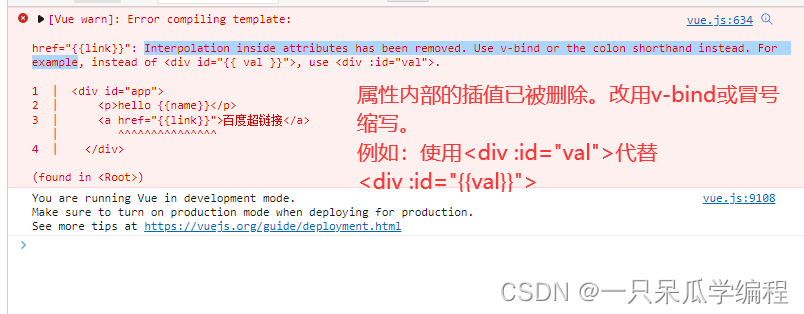
使用插值语法?
1 2 3 4 5 6 7 8 9 10 11 12 13 14 15 <body > <div id ="app" > <p > hello {{name}}</p > <a href ={{link}} > 百度超链接</a > </div > <script > new Vue ( { el : '#app' , data : { name : 'marry' , link : 'www.baidu.com' } } ) </script >
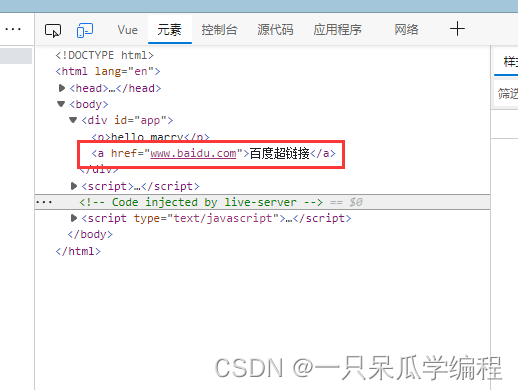
正确的使用:
1 2 3 4 5 6 7 8 9 10 11 12 13 14 15 16 17 18 <body > <div id ="app" > <p > hello {{name}}</p > <a :href ="link" > 百度超链接</a > </div > <script > new Vue ( { el : '#app' , data : { name : 'marry' , link : 'www.baidu.com' } } ) </script > </body >
使用v-bind:属性绑定指令后,等号后面引号内的值会被认为js表达式执行
5.1.3 属性绑定指令中使用js表达式· 在属性绑定中一样可以使用JavaScript表达式。
在使用属性绑定期间,绑定内容需要进行动态拼接,则字符串的外面应该包裹单引号。
示例:
1 2 3 4 5 6 7 8 9 10 11 12 13 14 15 16 17 18 19 20 21 22 23 <!DOCTYPE html > <html lang ="en" > <head > <meta charset ="UTF-8" > <meta name ="viewport" content ="width=device-width, initial-scale=1.0" > <title > Document</title > </head > <body > <div id ="app" > <p :title =" 'tips' + 123 " > nihao</p > </div > <script src ="https://cdn.jsdelivr.net/npm/vue@2/dist/vue.js" > </script > <script > const vm = new Vue ({ el : "#app" , data : { tips : "请输入..." } }) </script > </body > </html >
5.2 数据绑定· 数据绑定分为:
单向数据绑定
双向数据绑定
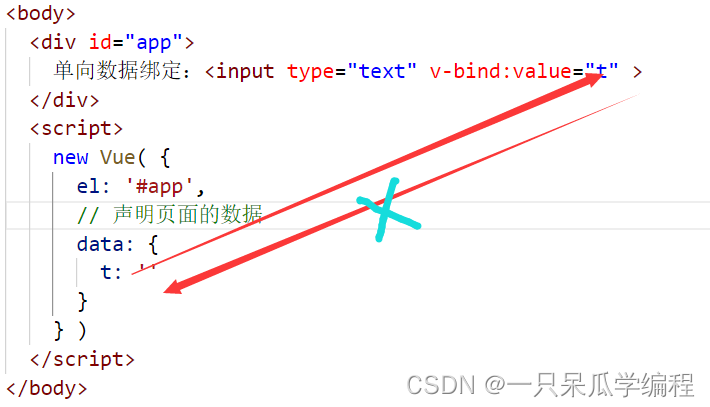
5.2.1 单向数据绑定· 单向数据绑定 ---- 使用 v-bind 指令
1 2 3 4 5 6 7 8 9 10 11 12 13 14 <body > <div id ="app" > 单向数据绑定:<input type ="text" v-bind:value ="t" > </div > <script > new Vue ( { el : '#app' , data : { t : '' } } ) </script > </body >
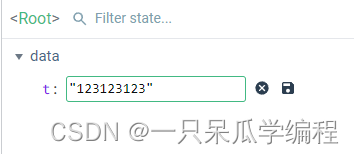
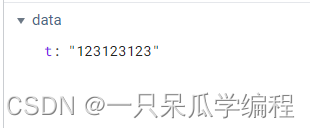
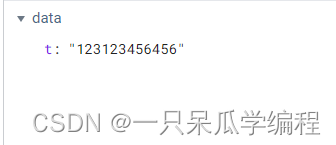
在Vue开发者工具中修改t的值
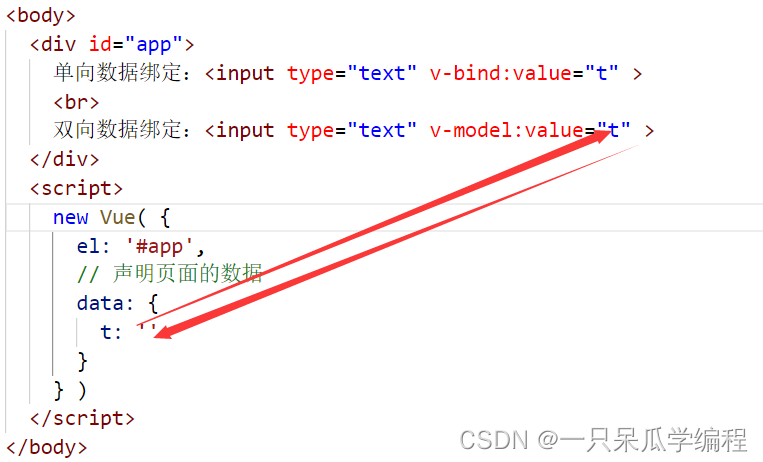
5.2.2 双向数据绑定· 双向数据绑定使用 v-model
1 2 3 4 5 6 7 8 9 10 11 12 13 14 15 16 <body > <div id ="app" > 单向数据绑定:<input type ="text" v-bind:value ="t" > <br > 双向数据绑定:<input type ="text" v-model:value ="t" > </div > <script > new Vue ( { el : '#app' , data : { t : '' } } ) </script > </body >
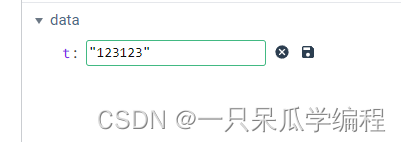
在Vue开发者工具中修改t的值
注意:
v-model 默认监听的为value的值v-model:value="t"v-model=“t”
1 2 3 4 5 6 7 8 9 10 11 12 13 14 15 16 17 18 <body > <div id ="app" > 单向数据绑定:<input type ="text" v-bind:value ="t" > <br > 双向数据绑定:<input type ="text" v-model ="t" > </div > <script > new Vue ( { el : '#app' , data : { t : '' } } ) </script > </body >
el 与 data 的两种写法· 1. el 的写法· 1.1 写法1· 在实例化Vue对象的时候,传入配置对象,使用el属性绑定vue实例需要控制的容器。
1 2 3 4 5 6 7 8 9 10 <body > <div id ="app" > </div > <script > new Vue ( { el : '#app' } ) </script > </body >
1.2 写法2· 使用Vue上的$mount方法将vue实例对象挂载到容器上。
1 2 3 4 5 6 7 8 9 10 11 <body > <div id ="app" > </div > <script > const app = new Vue ( { } ) app.$mount( '#app' ) </script > </body >
el 的写法,二者可以任选其一(两种写法没什么区别)
第二中写法更加灵活,比如,可以用于实现异步操作。
1 2 3 4 5 6 7 8 9 10 11 12 13 14 15 <body > <div id ="app" > </div > <script > const app = new Vue ( { } ) setTimeout ( ()=> { app.$mount( '#app' ) }, 1000 ) </script > </body >
2. data 的写法· 2.1 写法1· 对象式(在组件化写法中,不适用,组件化中只适用第二中写法)
1 2 3 4 5 6 7 8 9 10 11 12 13 <body > <div id ="app" > </div > <script > const app = new Vue ( { data : { } } ) app.$mount( '#app' ) </script > </body >
2.2 写法2· 函数式
1 2 3 4 5 6 7 8 9 10 11 12 13 14 15 <body > <div id ="app" > </div > <script > const app = new Vue ( { data : function ( return { } } } ) app.$mount( '#app' ) </script > </body >
data函数中的this指向vue实例
简写:
1 2 3 4 5 6 7 8 9 10 11 12 13 14 15 <body > <div id ="app" > </div > <script > const app = new Vue ( { data ( return { } } } ) app.$mount( '#app' ) </script > </body >
数据代理· 1. Object.defineProperty()方法· 该方法用于给对象添加属性。
1 2 3 4 5 6 Object .defineProperty ()需要传入三个参数: 1. 需要进行属性添加的对象2. 将要添加到对象的新属性名3. 配置对象,在配置对象中可以指定新属性的值
1.1 使用Object.defineProperty()向对象中添加属性· 1 2 3 4 5 6 7 8 9 10 11 <script > let person = { name : 'zs' , sex : 'male' } Object .defineProperty (person, 'age' , { value : 18 }) console .log (person) </script >
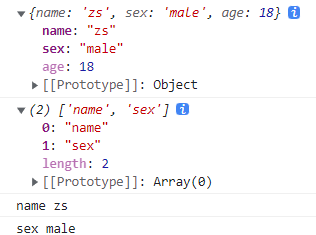
1.2 使用Object.defineProperty()添加的属性默认不可枚举· 使用Object.defineProperty()添加的属性默认不可枚举,即使用Object.defineProperty()添加的属性默认是不能进行遍历的。
1 2 3 4 5 6 7 8 9 10 11 12 13 14 15 <script > let person = { name : 'zs' , sex : 'male' } Object .defineProperty (person, 'age' , { value : 18 }) console .log (person) console .log (Object .keys (person)) for (let key in person) { console .log (key, person[key]) } </script >
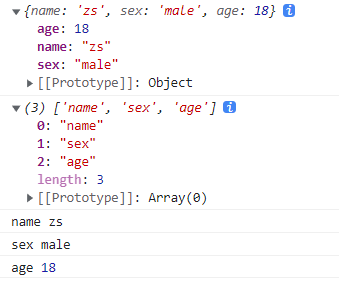
1.3 使Object.defineProperty()添加的属性可枚举· 默认情况下,使用Object.defineProperty()添加的属性是不可枚举的,在添加属性的时候,配置对象中 enumerable 的值设置为 true,则使用Object.defineProperty()添加的属性可以枚举。
1 2 3 4 5 6 7 8 9 10 11 12 13 14 15 16 17 <script > let person = { name : 'zs' , sex : 'male' } Object .defineProperty (person, 'age' , { value : 18 , enumerable : true }) console .log (person) console .log (Object .keys (person)) for (let key in person) { console .log (key, person[key]) } </script >
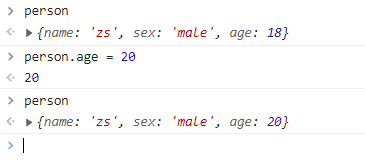
1.4 使Object.defineProperty()添加的属性值可以修改· 默认情况下,使用Object.defineProperty()添加的属性的值是不可以修改的。
要使Object.defineProperty()添加的属性值可以修改,在添加属性时,配置对象的 writable 的值设置为 true,使用Object.defineProperty()添加的属性值可以修改。
1 2 3 4 5 6 7 8 9 10 11 12 13 14 15 <script > let person = { name : 'zs' , sex : 'male' } Object .defineProperty (person, 'age' , { value : 18 , enumerable : true , writable : true }) </script >
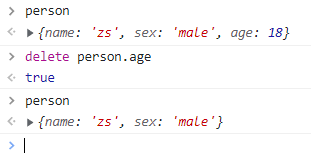
1.5 使Object.defineProperty()添加的属性可以删除· 默认情况下,使用Object.defineProperty()添加的属性的值是不可以删除的。
要使Object.defineProperty()添加的属性值可以删除,在添加属性时,配置对象的 configurable 的值设置为 true,使用Object.defineProperty()添加的属性值可以删除。
1 2 3 4 5 6 7 8 9 10 11 12 13 14 15 16 17 <script > let person = { name : 'zs' , sex : 'male' } Object .defineProperty (person, 'age' , { value : 18 , enumerable : true , writable : true , configurable : true }) </script >
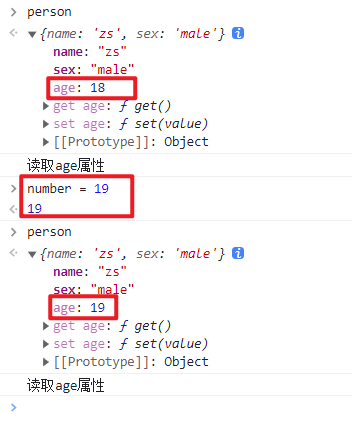
1.6 新添加的属性赋值为另外定义的变量· 向对象中新添加的属性赋值为另外定义的变量,当变量的值发生改变时,对象中的新属性值也会对应的发生变化。
1 2 3 4 5 6 7 8 9 10 11 12 13 14 15 16 17 18 19 20 21 22 23 24 25 26 27 28 29 30 31 32 33 <script > let number = 18 let person = { name : 'zs' , sex : 'male' } Object .defineProperty (person, 'age' , { get ( console .log ('读取age属性' ) return number }, set (value ) { console .log ('修改了age的属性值:' , value) } }) </script >
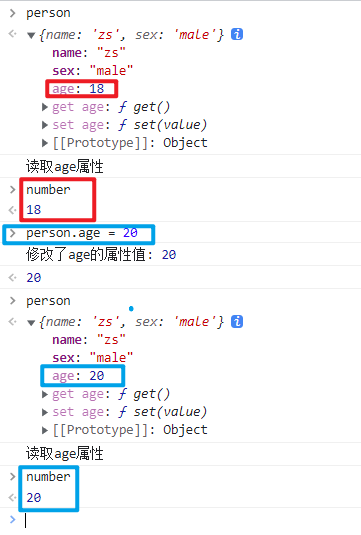
1.7 修改新添加的属性值同时修改对应的变量· 当对象中新添加的属性值发生改变时,对应的变量值也会对应的发生变化。
1 2 3 4 5 6 7 8 9 10 11 12 13 14 15 16 17 18 19 20 21 22 23 24 25 26 27 28 29 30 31 32 33 34 <script > let number = 18 let person = { name : 'zs' , sex : 'male' } Object .defineProperty (person, 'age' , { get ( console .log ('读取age属性' ) return number }, set (value ) { console .log ('修改了age的属性值:' , value) number = value } }) </script >
person 和 number 通过 Object.defineProperty() 中的 getter 和 setter 进行了关联。
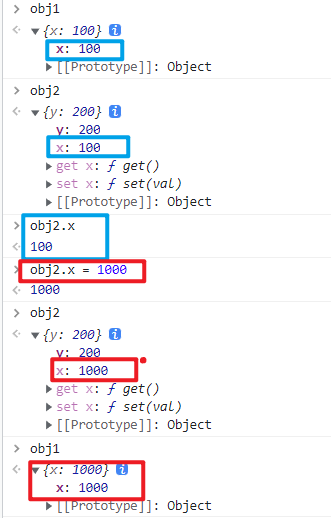
2. 数据代理· 数据代理:通过一个对象代理对另一个对象中属性的操作(读/写)
1 2 3 4 5 6 7 8 9 10 11 12 13 14 15 16 17 <script > let obj1 = { x : 100 } let obj2 = { y : 200 } Object .defineProperty (obj2, 'x' , { get ( return obj1.x }, set (val ) { obj1.x = val } }) </script >
3. Vue中的数据代理· 1 2 3 4 5 6 7 8 9 10 11 12 13 14 15 <div id ="root" > <h1 > 学校名称:{{name}}</h1 > <h1 > 学校地址:{{address}}</h1 > </div > <script src ="https://cdn.jsdelivr.net/npm/vue@2.6.14/dist/vue.js" > </script > <script > const vm = new Vue ({ el : '#root' , data : { name : '学校名称' , address : '学校地址' } }) </script >
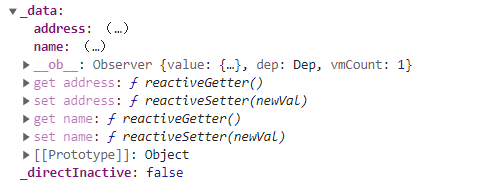
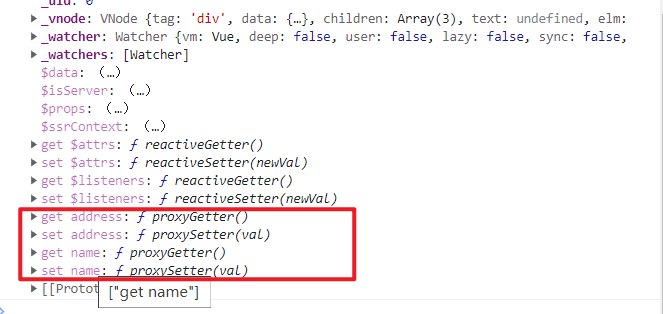
观察发现,vue实例中data的属性值的存在方式与通过Object.defineProperty()采用getter和setter向一个对象中添加一个变量作为属性的存在方式类似。
vue是通过Object.defineProperty()采用getter和setter将data中的属性放到vue实例上的。
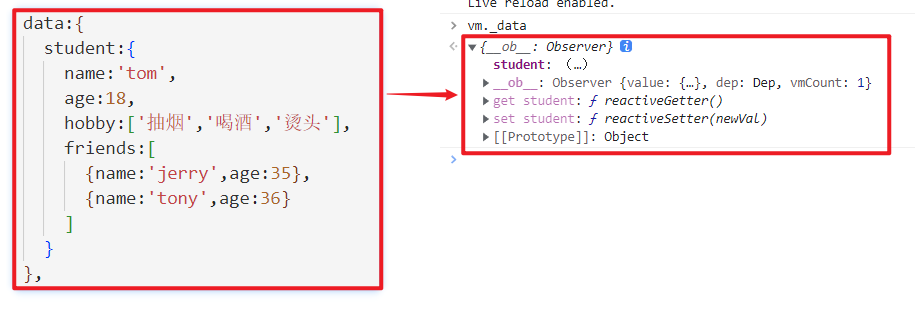
Vue实例对象中的_data就是我们创建Vue实例时所写的配置对象中的data
1 2 3 4 5 6 7 8 9 10 11 12 13 14 15 16 17 18 <body > <div id ="root" > <h1 > 学校名称:{{name}}</h1 > <h1 > 学校地址:{{address}}</h1 > </div > <script src ="https://cdn.jsdelivr.net/npm/vue@2.6.14/dist/vue.js" > </script > <script > let data = { name : '学校名称' , address : '学校地址' } const vm = new Vue ({ el : '#root' , data }) </script > </body >
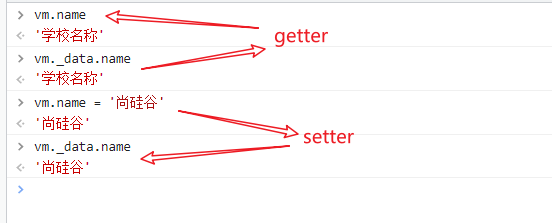
验证Vue中getter和setter:
1 2 3 4 5 6 7 8 9 10 11 12 13 14 15 16 17 18 <body > <div id ="root" > <h1 > 学校名称:{{name}}</h1 > <h1 > 学校地址:{{address}}</h1 > </div > <script src ="https://cdn.jsdelivr.net/npm/vue@2.6.14/dist/vue.js" > </script > <script > let data = { name : '学校名称' , address : '学校地址' } const vm = new Vue ({ el : '#root' , data }) </script > </body >
Vue实例对象中的_data不完全是我们所写的data,vue对其进行了数据劫持处理,为了能够实现在数据发生变化的时候,能够检测到数据发生了改变,从而页面的中对应的显示数据也能发生变化,实现页面的更新,实现页面的响应式操作。
1. 事件处理· 1.1 事件绑定指令· vue提供了v-on:事件绑定指令,用来辅助程序员为DOM元素绑定事件监听。
原生的DOM对象有onclick、oninput等原生事件,在vue中可以使用v-on:click、v-on:input等来监听DOM元素的对应事件,并为其绑定相应的事件处理函数,其中事件处理函数需要在vue实例对象的methods节点中进行声明。
v-on: 简写为 @。
1.2 元素事件绑定代码示例· 1 2 3 4 5 6 7 8 9 10 11 12 13 14 15 16 17 18 19 20 21 22 23 24 25 26 27 28 29 30 31 32 33 34 35 36 <!DOCTYPE html > <html lang ="en" > <head > <meta charset ="UTF-8" > <meta http-equiv ="X-UA-Compatible" content ="IE=edge" > <meta name ="viewport" content ="width=device-width, initial-scale=1.0" > <title > Document</title > </head > <body > <div id ="root" > <h1 > Hello {{name}}!</h1 > <button v-on:click ="show1" > 提示信息1</button > <button @click ="show2" > 提示信息2</button > </div > <script src ="https://cdn.jsdelivr.net/npm/vue@2.6.14/dist/vue.js" > </script > <script > const vm = new Vue ({ el : '#root' , data : { name : 'zs' }, methods : { show1 ( alert ('你好!' ) }, show2 ( alert ('你好!!' ) }, }, }) </script > </body > </html >
1.3 事件处理函数的参数· 事件处理函数不进行参数的传递,默认会有一个参数,即事件的触发对象。
1 2 3 4 5 6 7 8 9 10 11 12 13 14 15 16 17 18 19 20 21 22 23 24 25 26 27 28 29 30 31 32 33 34 35 36 37 38 39 40 <!DOCTYPE html > <html lang ="en" > <head > <meta charset ="UTF-8" > <meta http-equiv ="X-UA-Compatible" content ="IE=edge" > <meta name ="viewport" content ="width=device-width, initial-scale=1.0" > <title > Document</title > </head > <body > <div id ="root" > <h1 > Hello {{name}}!</h1 > <button v-on:click ="show1" > 提示信息1</button > <button @click ="show2" > 提示信息2</button > </div > <script src ="https://cdn.jsdelivr.net/npm/vue@2.6.14/dist/vue.js" > </script > <script > const vm = new Vue ({ el : '#root' , data : { name : 'zs' }, methods : { show1 (e ) { alert ('你好!' ) console .log ('提示信息1' ) console .log (e) }, show2 (e ) { alert ('你好!!' ) console .log ('提示信息2' ) console .log (e.target ) }, }, }) </script > </body > </html >
向事件处理函数显示的传递事件的触发对象,可以在绑定事件处理函数时,传入参数$event作为事件触发对象。
1 2 3 4 5 6 7 8 9 10 11 12 13 14 15 16 17 18 19 20 21 22 23 24 25 26 27 28 29 30 31 32 33 34 35 36 37 38 39 40 <!DOCTYPE html > <html lang ="en" > <head > <meta charset ="UTF-8" > <meta http-equiv ="X-UA-Compatible" content ="IE=edge" > <meta name ="viewport" content ="width=device-width, initial-scale=1.0" > <title > Document</title > </head > <body > <div id ="root" > <h1 > Hello {{name}}!</h1 > <button v-on:click ="show1($event)" > 提示信息1</button > <button @click ="show2" > 提示信息2</button > </div > <script src ="https://cdn.jsdelivr.net/npm/vue@2.6.14/dist/vue.js" > </script > <script > const vm = new Vue ({ el : '#root' , data : { name : 'zs' }, methods : { show1 (e ) { alert ('你好!' ) console .log ('提示信息1' ) console .log (e.target ) }, show2 (e ) { alert ('你好!!' ) console .log ('提示信息2' ) console .log (e.target ) }, }, }) </script > </body > </html >
向事件处理函数传递其他参数的同时,传递事件的触发对象,此时,如果不显示的传递事件的触发对象,则事件的处理函数不会接收到事件触发对象这个参数。
1 2 3 4 5 6 7 8 9 10 11 12 13 14 15 16 17 18 19 20 21 22 23 24 25 26 27 28 29 30 31 32 33 34 35 36 37 38 39 40 <!DOCTYPE html > <html lang ="en" > <head > <meta charset ="UTF-8" > <meta http-equiv ="X-UA-Compatible" content ="IE=edge" > <meta name ="viewport" content ="width=device-width, initial-scale=1.0" > <title > Document</title > </head > <body > <div id ="root" > <h1 > Hello {{name}}!</h1 > <button v-on:click ="show1($event, '张三')" > 提示信息1</button > <button @click ="show2('李四')" > 提示信息2</button > </div > <script src ="https://cdn.jsdelivr.net/npm/vue@2.6.14/dist/vue.js" > </script > <script > const vm = new Vue ({ el : '#root' , data : { name : 'zs' }, methods : { show1 (e, uname ) { alert ('你好!' ) console .log ('提示信息1 ' + uname) console .log (e.target ) }, show2 (e, uname ) { alert ('你好!!' ) console .log ('提示信息2 e ' + e) console .log ('提示信息2 uname ' + uname) }, }, }) </script > </body > </html >
1.4 事件处理函数的this· 事件处理函数如果写成普通函数,则事件处理函数的this指向vue实例对象;如果事件处理函数写成箭头,则事件处理函数的this指向windows对象,因为箭头函数没有自己的this。
1 2 3 4 5 6 7 8 9 10 11 12 13 14 15 16 17 18 19 20 21 22 23 24 25 26 27 28 29 30 31 32 33 34 <!DOCTYPE html > <html lang ="en" > <head > <meta charset ="UTF-8" > <meta http-equiv ="X-UA-Compatible" content ="IE=edge" > <meta name ="viewport" content ="width=device-width, initial-scale=1.0" > <title > Document</title > </head > <body > <div id ="root" > <h1 > Hello {{name}}!</h1 > <button v-on:click ="show1()" > 提示信息1</button > <button @click ="show2()" > 提示信息2</button > </div > <script src ="https://cdn.jsdelivr.net/npm/vue@2.6.14/dist/vue.js" > </script > <script > const vm = new Vue ({ el : '#root' , data : { name : 'zs' }, methods : { show1 ( console .log ('普通函数形式的this:' ,this === vm) }, show2 : () => { console .log ('箭头函数形式的this:' ,this ) }, }, }) </script > </body > </html >
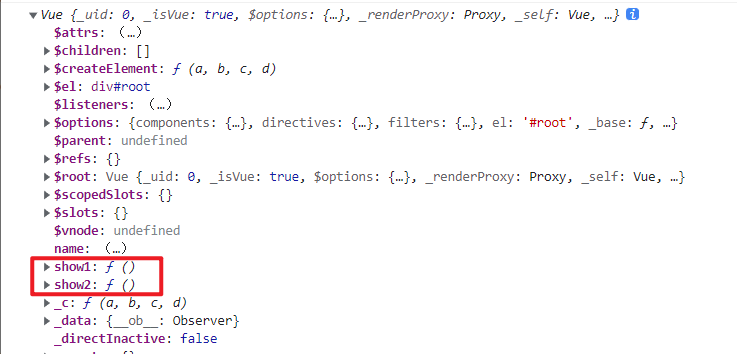
1.5 事件处理函数存放位置· 事件处理函数定义后,最终会挂载到vue实例对象上。
事件处理函数不进行数据代理,只有写在data节点上的才会进行数据代理。
1 2 3 4 5 6 7 8 9 10 11 12 13 14 15 16 17 18 19 20 21 22 23 24 25 26 27 28 29 30 31 32 33 34 <!DOCTYPE html > <html lang ="en" > <head > <meta charset ="UTF-8" > <meta http-equiv ="X-UA-Compatible" content ="IE=edge" > <meta name ="viewport" content ="width=device-width, initial-scale=1.0" > <title > Document</title > </head > <body > <div id ="root" > <h1 > Hello {{name}}!</h1 > <button v-on:click ="show1()" > 提示信息1</button > <button @click ="show2()" > 提示信息2</button > </div > <script src ="https://cdn.jsdelivr.net/npm/vue@2.6.14/dist/vue.js" > </script > <script > const vm = new Vue ({ el : '#root' , data : { name : 'zs' }, methods : { show1 ( console .log (vm) }, show2 : () => { console .log ('箭头函数形式的this:' ,this ) }, }, }) </script > </body > </html >
2. 事件修饰符· 在事件处理函数中调用preventDefault()(阻止默认行为)或 stopPropagation()(阻止冒泡)对事件的触发进行控制是非常常见的需求。
因此,vue提供了事件修饰符的概念,来辅助程序员更方便的对事件的触发进行控制。
事件修饰符 说明 .prevent 阻止默认行为(例如:阻止a连接的跳转、阻止表单的提交等) .stop 阻止事件冒泡(事件的默认处理阶段为冒泡阶段) .capture 以捕获模式触发当前的事件处理函数 .once 绑定的事件只触发1次 .self 只有在event.target是当前元素自身时触发事件处理函数 .passive 事件的默认行为立即执行,无需等待事件回调执行完毕
1 2 3 4 5 6 7 8 9 10 11 12 13 14 15 16 17 18 19 20 21 22 23 24 25 26 27 28 29 30 31 32 33 34 35 36 37 38 39 40 41 42 43 44 45 46 47 48 49 50 51 52 53 54 55 56 57 58 59 60 61 62 63 64 65 66 67 68 69 70 71 72 73 74 75 76 77 78 79 80 81 82 83 84 85 86 87 88 89 90 91 92 93 94 95 96 97 98 99 100 101 102 103 104 105 106 107 108 109 110 111 112 113 114 115 116 117 118 119 120 121 <!DOCTYPE html > <html > <head > <meta charset ="UTF-8" /> <title > 事件修饰符</title > <script src ="https://cdn.jsdelivr.net/npm/vue@2.6.14/dist/vue.js" > </script > <style > *{ margin-top : 20px ; } .demo1 { height : 50px ; background-color : skyblue; } .box1 { padding : 5px ; background-color : skyblue; } .box2 { padding : 5px ; background-color : orange; } .list { width : 200px ; height : 200px ; background-color : peru; overflow : auto; } li { height : 100px ; } </style > </head > <body > <div id ="root" > <h2 > 欢迎来到{{name}}学习</h2 > <a href ="http://www.atguigu.com" @click.prevent ="showInfo" > 点我提示信息</a > <div class ="demo1" @click ="showInfo" > <button @click.stop ="showInfo" > 点我提示信息</button > </div > <button @click.once ="showInfo" > 点我提示信息</button > <div class ="box1" @click.capture ="showMsg(1)" > div1 <div class ="box2" @click ="showMsg(2)" > div2 </div > </div > <div class ="demo1" @click.self ="showInfo" > <button @click ="showInfo" > 点我提示信息</button > </div > <ul @wheel.passive ="demo" class ="list" > <li > 1</li > <li > 2</li > <li > 3</li > <li > 4</li > </ul > </div > </body > <script type ="text/javascript" > Vue .config .productionTip = false new Vue ({ el :'#root' , data :{ name :'尚硅谷' }, methods :{ showInfo (e ){ alert ('同学你好!' ) }, showMsg (msg ){ console .log (msg) }, demo ( for (let i = 0 ; i < 100000 ; i++) { console .log ('#' ) } console .log ('累坏了' ) } } }) </script > </html >
对事件需要进行多种修饰,可以在事件后面添加多个事件修饰符,即事件修饰符可以连写。
1 2 3 <div class ="demo1" @click ="showInfo" > <a href ="http://www.atguigu.com" @click.stop.prevent ="showInfo" > 点我提示信息</a > </div >
3. 键盘事件· 在监听键盘事件时,我们经常需要判断按键,根据按下的按键进行事件的处理。Vue为我们提供了一些常用的按键别名,此时,可以使用vue提供的别名为键盘相关的事件添加按键修饰符。
Vue中常用的按键别名:
按键 别名 回车 enter 删除 delete (捕获“删除”和“退格”键) 退出 esc 空格 space 换行 tab (特殊,必须配合keydown去使用) 上 up 下 down 左 left 右 right
tab键可以将光标从当前元素切走,tab配合keyup使用,即要等tab键抬起才会触发事件,但是当我们按下tab键光标就会从当前元素切走,无法触发事件的处理函数。tab配合keydown使用,在按下的时候会调用处理函数,同时光标从当前元素切走,所以tab 特殊,必须配合keydown去使用。
vue没有提供别名的按键,可以使用按键原始的key值进行绑定,但是对于那种按键由不同单词复合而成的需要进行转化,例如,大小写切换键CapsLock 转为caps-lock(短横线命名)。
获取按键名:e.key 获取按键编码:e.keyCode 系统修饰键(用法特殊):ctrl、alt、shift、meta(win键)配合keyup使用:按下修饰键的同时,再按下其他键,随后释放其他键,事件才被触发 配合keydown使用:正常触发事件 自定义按键别名:
1 Vue .config .keyCodes .自定义键名 = 键码
代码示例:
1 2 3 4 5 6 7 8 9 10 11 12 13 14 15 16 17 18 19 20 21 22 23 24 25 26 27 28 29 30 31 <!DOCTYPE html > <html > <head > <meta charset ="UTF-8" /> <title > 键盘事件</title > <script src ="https://cdn.jsdelivr.net/npm/vue@2.6.14/dist/vue.js" > </script > </head > <body > <div id ="root" > <h2 > 欢迎来到{{name}}学习</h2 > <input type ="text" placeholder ="按下回车提示输入" @keydown.enter ="showInfo" > </div > </body > <script type ="text/javascript" > Vue .config .productionTip = false new Vue ({ el :'#root' , data :{ name :'尚硅谷' }, methods : { showInfo (e ){ console .log (e.target .value ) } }, }) </script > </html >
键盘事件可以连写。比如需要实现,按下ctrl+y键才在控制台输出在文本框输入的内容。
1 2 3 4 5 6 7 8 9 10 11 12 13 14 15 16 17 18 19 20 21 22 23 24 25 26 27 28 29 30 31 32 <!DOCTYPE html > <html > <head > <meta charset ="UTF-8" /> <title > 键盘事件</title > <script src ="https://cdn.jsdelivr.net/npm/vue@2.6.14/dist/vue.js" > </script > </head > <body > <div id ="root" > <h2 > 欢迎来到{{name}}学习</h2 > <input type ="text" placeholder ="按下回车提示输入" @keydown.ctrl.y ="showInfo" > </div > </body > <script type ="text/javascript" > Vue .config .productionTip = false new Vue ({ el :'#root' , data :{ name :'尚硅谷' }, methods : { showInfo (e ){ console .log (e.key ) console .log (e.target .value ) } }, }) </script > </html >
计算属性· 通过一个姓名案例引出讲解计算属性
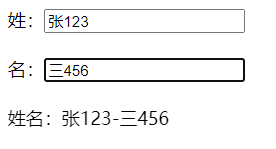
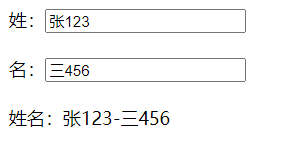
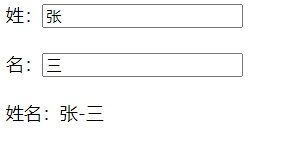
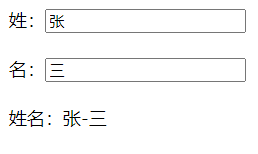
1 实现效果·
2 插值语法实现· 1 2 3 4 5 6 7 8 9 10 11 12 13 14 15 16 17 18 19 20 21 22 23 24 25 26 27 28 <!DOCTYPE html > <html lang ="en" > <head > <meta charset ="UTF-8" > <meta http-equiv ="X-UA-Compatible" content ="IE=edge" > <meta name ="viewport" content ="width=device-width, initial-scale=1.0" > <title > Document</title > </head > <body > <div id ="root" > 姓:<input type ="text" v-model ="firstName" > <br > <br > 名:<input type ="text" v-model ="lastName" > <br > <br > 姓名:<span > {{firstName}}-{{lastName}}</span > </div > <script src ="https://cdn.jsdelivr.net/npm/vue@2.6.14/dist/vue.js" > </script > <script > new Vue ({ el : '#root' , data : { firstName : '张' , lastName :'三' } }) </script > </body > </html >
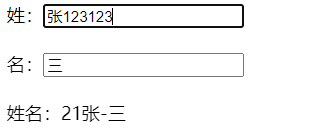
如果现在有个需求:
1 姓名:<span > {{firstName.slice(0,3).split('').reverse().join('')}}-{{lastName}}</span >
此时虽然能够实现需求,但是插值表达式中的js表达式太长,不易阅读。同时该种写法vue也不推荐,虽然不会报错。
3 methods实现· 在插值表达式中调用对应的method来处理全名的输出显示。
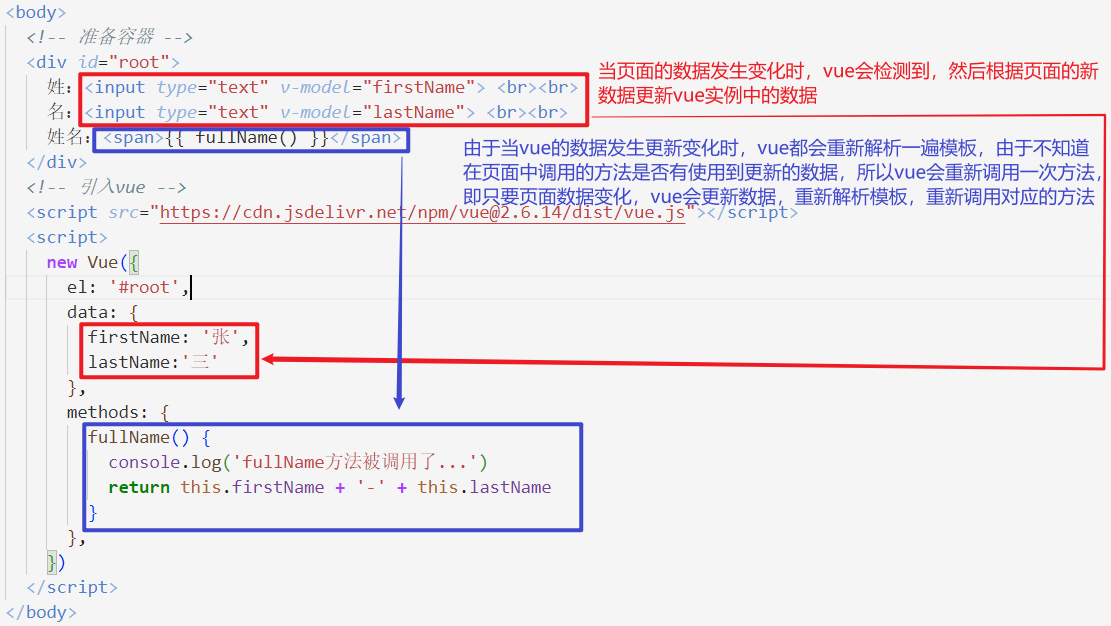
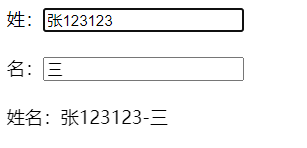
1 2 3 4 5 6 7 8 9 10 11 12 13 14 15 16 17 18 19 20 21 22 23 24 25 26 27 28 29 30 31 32 33 34 <!DOCTYPE html > <html lang ="en" > <head > <meta charset ="UTF-8" > <meta http-equiv ="X-UA-Compatible" content ="IE=edge" > <meta name ="viewport" content ="width=device-width, initial-scale=1.0" > <title > Document</title > </head > <body > <div id ="root" > 姓:<input type ="text" v-model ="firstName" > <br > <br > 名:<input type ="text" v-model ="lastName" > <br > <br > 姓名:<span > {{ fullName() }}</span > </div > <script src ="https://cdn.jsdelivr.net/npm/vue@2.6.14/dist/vue.js" > </script > <script > new Vue ({ el : '#root' , data : { firstName : '张' , lastName :'三' }, methods : { fullName ( console .log ('fullName方法被调用了...' ) return this .firstName + '-' + this .lastName } }, }) </script > </body > </html >
此时如果要实现输出显示的全名保留前三个字符,且需要对保留下来的字符进行反转等操作。代码可以写在对应的方法中,在插值表达式中只有一个方法的调用,不会新增其他代码。
使用methods能够实现的原理:
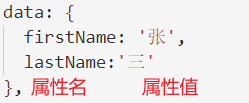
4 计算属性实现· 在vue中,只要是写在data中的,vue都认为是属性。
计算属性,即使用原有的data中的属性进行处理,处理后生成新的属性。
在vue中,计算属性写在配置项computed中,配置项computed需要书写成对象形式。
如果要使用计算属性,那么需要在计算属性中实现get()方法:
1 2 3 4 5 6 7 8 9 10 computed : { fullName : { get ( console .log ('get被调用' ) return this .firstName + '-' + this .lastName } } },
使用计算属性的方式与使用data中的属性的方式一样,直接使用即可。
1
2
3
4
5
6
7
8
9
10
11
12
13
14
15
16
17
18
19
20
21
22
23
24
25
26
27
28
29
30
31
32
33
34
35
36
37
38
<!DOCTYPE html > <html lang ="en" > <head > <meta charset ="UTF-8" > <meta http-equiv ="X-UA-Compatible" content ="IE=edge" > <meta name ="viewport" content ="width=device-width, initial-scale=1.0" > <title > Document</title > </head > <body > <div id ="root" > 姓:<input type ="text" v-model ="firstName" > <br > <br > 名:<input type ="text" v-model ="lastName" > <br > <br > 姓名:<span > {{ fullName }}</span > </div > <script src ="https://cdn.jsdelivr.net/npm/vue@2.6.14/dist/vue.js" > </script > <script > const vm = new Vue ({ el : '#root' , data : { firstName : '张' , lastName :'三' }, computed : { fullName : { get ( console .log ('get被调用' ) return this .firstName + '-' + this .lastName } } } }) </script > </body > </html >
由于计算属性会在处理完成后被挂载到vue的实例对象上,所以使用计算属性的方式与使用data中的属性的方式一样,直接使用即可。
get()被调用的时机:
初次读取计算属性
计算属性所依赖的数据发生变化
计算属性中函数(写成普通函数的形式)的this执行vue实例对象。
计算属性相比于methods的优势:
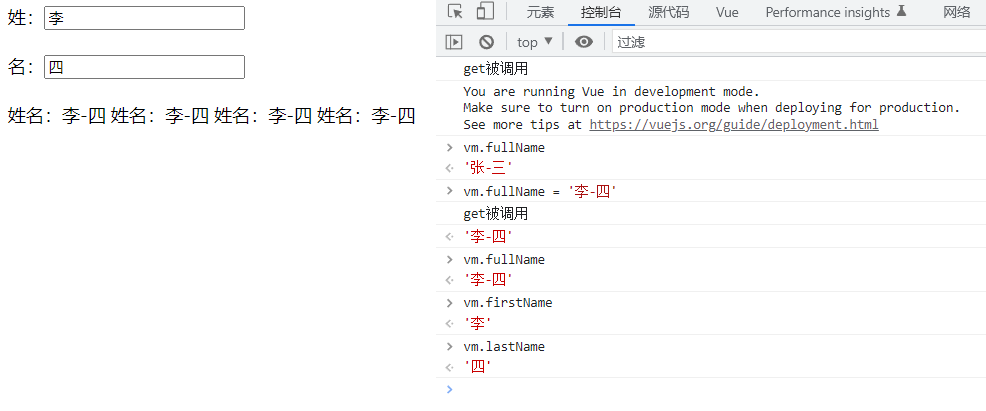
多次使用计算属性,计算属性只会计算一次,因为计算属性会将计算的结果进行缓存。(前提计算属性所依赖的数据不发生变化,依赖的数据变化计算属性会重新进行计算)
1 2 3 4 5 6 7 8 9 <div id ="root" > 姓:<input type ="text" v-model ="firstName" > <br > <br > 名:<input type ="text" v-model ="lastName" > <br > <br > 姓名:<span > {{ fullName }}</span > 姓名:<span > {{ fullName }}</span > 姓名:<span > {{ fullName }}</span > 姓名:<span > {{ fullName }}</span > </div >
相对于methods,计算属性的效率更高,因为methods不存在缓存,所以每次调用方法,方法都会重新执行一次,而计算属性只要依赖的数据不发生变化,计算属性的计算过程只有在第一次读取时执行。
修改计算属性,需要在计算属性中定义set()函数:
当计算属性被修改时,set()会被调用
1 2 3 4 5 6 7 8 9 10 11 12 13 14 15 16 17 18 19 20 computed : { fullName : { get ( console .log ('get被调用' ) return this .firstName + '-' + this .lastName }, set (val ) { strArr = val.split ("-" ) this .firstName = strArr[0 ] this .lastName = strArr[1 ] } } }
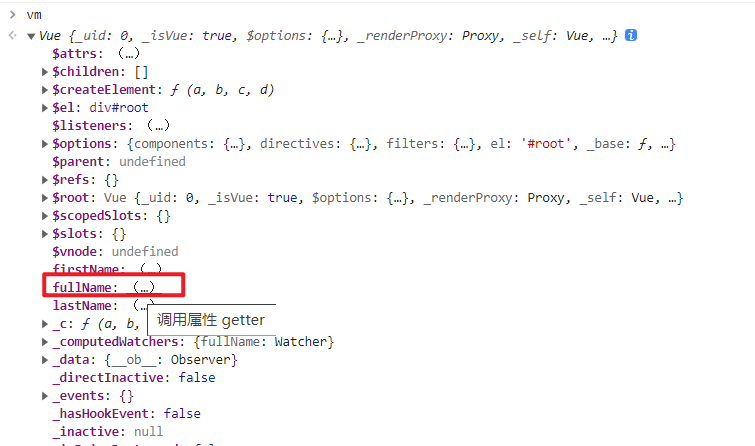
计算属性底层借助了Object.defineproperty方法提供的getter和setter。
5 计算属性简写· 计算属性更多是用于数据的展示,很少用于数据的修改。
当我们确定计算属性只读不改,此时我们可以使用计算属性的简写形式,即把计算属性写成函数形式,此时计算属性函数相当于之前对象形式写法里面的get()函数。
1 2 3 4 5 6 7 8 9 10 11 12 13 14 15 16 17 18 19 20 computed : { fullName ( console .log ('get被调用' ) return this .firstName + '-' + this .lastName } }
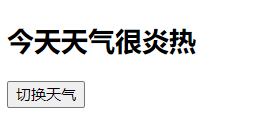
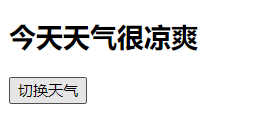
监视属性· 1. 实现效果·
2. methods实现· 1 2 3 4 5 6 7 8 9 10 11 12 13 14 15 16 17 18 19 20 21 22 23 24 25 26 27 28 29 30 31 32 33 34 35 36 <!DOCTYPE html > <html lang ="en" > <head > <meta charset ="UTF-8" > <meta http-equiv ="X-UA-Compatible" content ="IE=edge" > <meta name ="viewport" content ="width=device-width, initial-scale=1.0" > <title > Document</title > </head > <body > <div id ="root" > <h2 > 今天天气很{{info}}</h2 > <button @click ="changeWeather" > 切换天气</button > </div > </body > <script src ="https://cdn.jsdelivr.net/npm/vue@2.6.14/dist/vue.js" > </script > <script > const vm = new Vue ({ el : '#root' , data : { isHot : true }, computed : { info ( return this .isHot ? '炎热' : '凉爽' } }, methods : { changeWeather ( this .isHot = !this .isHot } }, }) </script > </html >
3. js表达式实现· 1 2 3 4 5 6 7 8 9 10 11 12 13 14 15 16 17 18 19 20 21 22 23 24 25 26 27 28 29 30 <!DOCTYPE html > <html lang ="en" > <head > <meta charset ="UTF-8" > <meta http-equiv ="X-UA-Compatible" content ="IE=edge" > <meta name ="viewport" content ="width=device-width, initial-scale=1.0" > <title > Document</title > </head > <body > <div id ="root" > <h2 > 今天天气很{{info}}</h2 > <button @click ="isHot = !isHot" > 切换天气</button > </div > </body > <script src ="https://cdn.jsdelivr.net/npm/vue@2.6.14/dist/vue.js" > </script > <script > const vm = new Vue ({ el : '#root' , data : { isHot : true }, computed : { info ( return this .isHot ? '炎热' : '凉爽' } } }) </script > </html >
4. 监视属性实现· 上述效果实现的代码,是通过修改isHot的值,当isHot的值改变时,Vue会重新解析模板,由于计算属性info依赖于isHot,当isHot改变时,info会被重新调用,从而实现效果。
监视属性使用watch侦听器实现,侦听器允许开发者监视数据的变化,从而针对数据的变化做特定的操作。这样子就不用使用另外单独书写的函数针对数据的变化进行相应的处理。
4.1 handler()· handler()为属性侦听器的回调函数,当被监视的属性值变化时,回调函数会自动调用,进行相应的处理
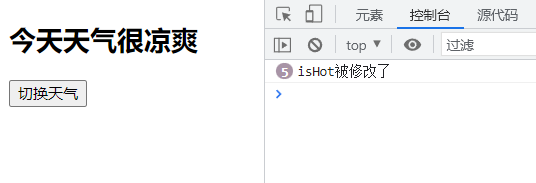
1 2 3 4 5 6 7 8 watch : { isHot : { handler ( console .log ('isHot被修改了' ) } } }
当被监视的属性值变化时,回调函数会自动调用,进行相应的处理,同时会向处理函数传入两个参数,第一个参数为改变后的值,第二个参数修改之前的值。
1 2 3 4 5 6 7 8 watch : { isHot : { handler (newVal, oldVal ) { console .log ('isHot被修改了' , '新的值为:' , newVal, '旧的值为:' , oldVal) } } }
immediate,默认值为false。
immediate的值设置为true,初始化数据元素时,立即调用属性侦听器的回调函数handler()。
1 2 3 4 5 6 7 8 9 10 watch : { isHot : { immediate : true , handler (newVal, oldVal ) { console .log ('isHot被修改了' , '新的值为:' , newVal, '旧的值为:' , oldVal) } } }
4.3 通过vue实例对象监视属性· 这种写法用于最开始不知道要监视什么属性,后期知道要监视的属性,需要添加监视属性时使用。
1 2 3 4 5 6 7 8 9 10 11 12 13 14 15 16 17 18 19 20 21 22 23 24 25 26 27 28 29 30 31 32 33 34 35 36 37 38 39 40 41 42 43 <!DOCTYPE html > <html lang ="en" > <head > <meta charset ="UTF-8" > <meta http-equiv ="X-UA-Compatible" content ="IE=edge" > <meta name ="viewport" content ="width=device-width, initial-scale=1.0" > <title > Document</title > </head > <body > <div id ="root" > <h2 > 今天天气很{{info}}</h2 > <button @click ="isHot = !isHot" > 切换天气</button > </div > </body > <script src ="https://cdn.jsdelivr.net/npm/vue@2.6.14/dist/vue.js" > </script > <script > const vm = new Vue ({ el : '#root' , data : { isHot : true }, computed : { info ( return this .isHot ? '炎热' : '凉爽' } } }) vm.$watch('isHot' , { immediate : true , handler (newVal, oldVal ) { console .log ('isHot被修改了' , '新的值为:' , newVal, '旧的值为:' , oldVal) } }) </script > </html >
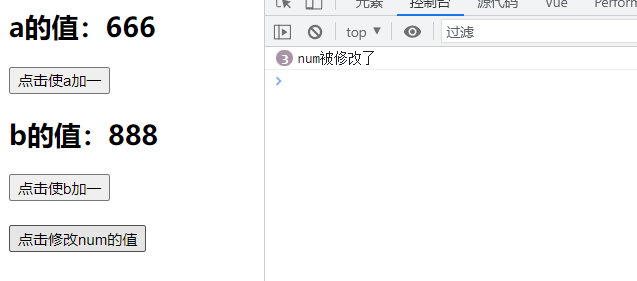
4.4 深度监视· 实现深度监视使用deep,默认值为false。vue提供的属性侦听器默认不能监视多级结构中某个属性的变化。
开启深度监视,能够监视多级结构中某个属性的变化。
vue自身可以监测对象内部值的改变,即vue能够监视多级结构中某个属性的变化,但是vue提供的watch默认不可以。
1 2 3 4 5 6 7 8 9 10 11 12 13 14 15 16 17 18 19 20 21 22 23 24 25 26 27 28 29 30 31 32 33 34 35 36 37 38 39 40 41 <!DOCTYPE html > <html lang ="en" > <head > <meta charset ="UTF-8" > <meta http-equiv ="X-UA-Compatible" content ="IE=edge" > <meta name ="viewport" content ="width=device-width, initial-scale=1.0" > <title > Document</title > </head > <body > <div id ="root" > <h2 > a的值:{{num.a}}</h2 > <button @click ="num.a++" > 点击使a加一</button > <h2 > b的值:{{num.b}}</h2 > <button @click ="num.b++" > 点击使b加一</button > <br > <br > <button @click ="num = {a: 666, b: 888}" > 点击修改num的值</button > </div > </body > <script src ="https://cdn.jsdelivr.net/npm/vue@2.6.14/dist/vue.js" > </script > <script > const vm = new Vue ({ el : '#root' , data : { isHot : true , num : { a : 1 , b : 2 } }, watch : { num : { deep : true , handler (newVal, oldVal ) { console .log ('num被修改了' ) } } } }) </script > </html >
4.5 监视属性的简写· 如果监视属性不需要设置初始化立即调用监视属性的回调函数,也不需要设置深度监视,可以使用监视属性的简写形式。
1 2 3 4 5 6 7 8 9 10 11 12 13 14 15 16 17 18 19 20 21 22 23 24 25 26 27 28 29 30 31 32 33 34 35 36 37 38 39 40 41 42 43 44 45 46 47 48 49 50 <!DOCTYPE html > <html lang ="en" > <head > <meta charset ="UTF-8" > <meta http-equiv ="X-UA-Compatible" content ="IE=edge" > <meta name ="viewport" content ="width=device-width, initial-scale=1.0" > <title > Document</title > </head > <body > <div id ="root" > <h2 > 今天天气很{{info}}</h2 > <button @click ="isHot = !isHot" > 切换天气</button > </div > </body > <script src ="https://cdn.jsdelivr.net/npm/vue@2.6.14/dist/vue.js" > </script > <script > const vm = new Vue ({ el : '#root' , data : { isHot : true , num : { a : 1 , b : 2 } }, computed : { info ( return this .isHot ? '炎热' : '凉爽' } }, watch : { isHot (newVal, oldVal ) { console .log ('isHot被修改了' , '新的值为:' , newVal, '旧的值为:' , oldVal) } } }) </script > </html >
4.6 $watch()监视属性的简写· 1 2 3 4 5 6 7 8 9 10 11 12 13 14 15 16 17 18 19 20 21 22 23 24 25 26 27 28 29 30 31 32 33 34 35 36 37 38 39 40 41 42 43 44 45 46 47 <!DOCTYPE html > <html lang ="en" > <head > <meta charset ="UTF-8" > <meta http-equiv ="X-UA-Compatible" content ="IE=edge" > <meta name ="viewport" content ="width=device-width, initial-scale=1.0" > <title > Document</title > </head > <body > <div id ="root" > <h2 > 今天天气很{{info}}</h2 > <button @click ="isHot = !isHot" > 切换天气</button > </div > </body > <script src ="https://cdn.jsdelivr.net/npm/vue@2.6.14/dist/vue.js" > </script > <script > const vm = new Vue ({ el : '#root' , data : { isHot : true , num : { a : 1 , b : 2 } }, computed : { info ( return this .isHot ? '炎热' : '凉爽' } } }) vm.$watch('isHot' , function ( console .log ('isHot被修改了' , '新的值为:' , newVal, '旧的值为:' , oldVal) }) </script > </html >
4.7 监视属性实现天气案例· 1 2 3 4 5 6 7 8 9 10 11 12 13 14 15 16 17 18 19 20 21 22 23 24 25 26 27 28 29 30 31 32 33 34 <!DOCTYPE html > <html lang ="en" > <head > <meta charset ="UTF-8" > <meta http-equiv ="X-UA-Compatible" content ="IE=edge" > <meta name ="viewport" content ="width=device-width, initial-scale=1.0" > <title > Document</title > </head > <body > <div id ="root" > <h2 > 今天天气很{{info}}</h2 > <button @click ="isHot = !isHot" > 切换天气</button > </div > </body > <script src ="https://cdn.jsdelivr.net/npm/vue@2.6.14/dist/vue.js" > </script > <script > const vm = new Vue ({ el : '#root' , data : { isHot : true , info : '' }, watch : { isHot : { immediate : true , handler (newVal ) { this .info = newVal ? '炎热' : '凉爽' console .log ('当前的天气为:' , this .info ) } } } }) </script > </html >
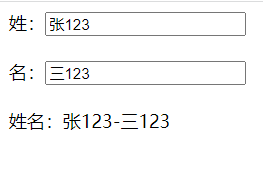
5. 监视属性与计算属性的对比· 5.1 监视属性实现姓名案例· 1 2 3 4 5 6 7 8 9 10 11 12 13 14 15 16 17 18 19 20 21 22 23 24 25 26 27 28 29 30 31 32 33 34 35 <!DOCTYPE html > <html lang ="en" > <head > <meta charset ="UTF-8" > <meta http-equiv ="X-UA-Compatible" content ="IE=edge" > <meta name ="viewport" content ="width=device-width, initial-scale=1.0" > <title > Document</title > </head > <body > <div id ="root" > 姓:<input type ="text" v-model ="firstname" > <br > <br > 名:<input type ="text" v-model ="lastname" > <br > <br > 姓名:<span > {{fullname}}</span > </div > </body > <script src ="https://cdn.jsdelivr.net/npm/vue@2.6.14/dist/vue.js" > </script > <script > const vm = new Vue ({ el : '#root' , data : { firstname : '张' , lastname : '三' , fullname : '张-三' }, watch : { firstname (newVal ) { this .fullname = newVal + '-' + this .lastname }, lastname (newVal ) { this .fullname = this .firstname + '-' + newVal } } }) </script > </html >
5.2 案例结果显示延时· 5.2.1 监视属性实现· 1 2 3 4 5 6 7 8 9 10 11 12 13 14 15 16 17 18 19 20 21 22 23 24 25 26 27 28 29 30 31 32 33 34 35 36 37 38 39 40 41 42 43 44 45 46 <!DOCTYPE html > <html lang ="en" > <head > <meta charset ="UTF-8" > <meta http-equiv ="X-UA-Compatible" content ="IE=edge" > <meta name ="viewport" content ="width=device-width, initial-scale=1.0" > <title > Document</title > </head > <body > <div id ="root" > 姓:<input type ="text" v-model ="firstname" > <br > <br > 名:<input type ="text" v-model ="lastname" > <br > <br > 姓名:<span > {{fullname}}</span > </div > </body > <script src ="https://cdn.jsdelivr.net/npm/vue@2.6.14/dist/vue.js" > </script > <script > const vm = new Vue ({ el : '#root' , data : { firstname : '张' , lastname : '三' , fullname : '张-三' }, watch : { firstname (newVal ) { setTimeout (()=> { this .fullname = newVal + '-' + this .lastname }, 1000 ) }, lastname (newVal ) { setTimeout (()=> { this .fullname = this .firstname + '-' + newVal }, 1000 ) } } }) </script > </html >
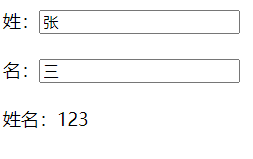
5.2.2 计算属性实现· 1 2 3 4 5 6 7 8 9 10 11 12 13 14 15 16 17 18 19 20 21 22 23 24 25 26 27 28 29 30 31 32 33 34 35 36 37 <!DOCTYPE html > <html lang ="en" > <head > <meta charset ="UTF-8" > <meta http-equiv ="X-UA-Compatible" content ="IE=edge" > <meta name ="viewport" content ="width=device-width, initial-scale=1.0" > <title > Document</title > </head > <body > <div id ="root" > 姓:<input type ="text" v-model ="firstname" > <br > <br > 名:<input type ="text" v-model ="lastname" > <br > <br > 姓名:<span > {{fullname}}</span > </div > </body > <script src ="https://cdn.jsdelivr.net/npm/vue@2.6.14/dist/vue.js" > </script > <script > const vm = new Vue ({ el : '#root' , data : { firstname : '张' , lastname : '三' , }, computed : { fullname ( setTimeout (()=> { return this .firstname + '-' + this .lastname }, 1000 ) return 123 } } }) </script > </html >
1 2 3 4 5 6 7 8 9 10 11 computed : { fullname ( let t = '' setTimeout (()=> { t = this .firstname + '-' + this .lastname }, 1000 ) return t } }
5.3 监视属性与计算属性的对比总结· computed和watch之间的区别:computed能完成的功能,watch都可以完成 watch能完成的功能,computed不一定能完成,例如:watch可以进行异步操作 两个重要的小原则:所有被Vue管理的函数,最好写成普通函数,这样this的指向才是vue实例对象或 组件实例对象 所有不被Vue所管理的函数(定时器的回调函数、ajax的回调函数等、Promise的回调函数),最好写成箭头函数,这样this的指向才是vue实例对象或 组件实例对象。 样式绑定· 1. 绑定class样式· 1.1 class 样式· 1 2 3 4 5 6 7 8 9 10 11 12 13 14 15 16 17 18 19 20 21 22 23 24 25 26 27 28 29 30 31 32 <style > .basic { width : 400px ; height : 100px ; border : 1px solid black; } .happy { border : 4px solid red;; background-color : rgba (255 , 255 , 0 , 0.644 ); background : linear-gradient (30deg ,yellow,pink,orange,yellow); } .sad { border : 4px dashed rgb (2 , 197 , 2 ); background-color : gray; } .normal { background-color : skyblue; } .atguigu1 { background-color : yellowgreen; } .atguigu2 { font-size : 30px ; text-shadow :2px 2px 10px red; } .atguigu3 { border-radius : 20px ; } </style >
1.2 绑定class样式字符串写法· 字符串写法适用于样式类名不确定需要动态指定的情况
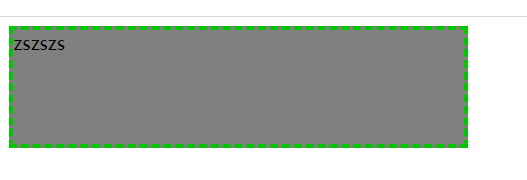
1 2 3 4 5 6 7 8 9 10 11 12 13 14 15 16 17 18 19 20 21 22 23 24 25 26 27 28 29 30 31 32 33 34 35 36 37 38 39 40 41 42 43 44 45 46 47 48 49 50 51 52 53 54 55 56 57 58 59 60 61 62 63 64 65 66 67 68 69 70 <!DOCTYPE html > <html lang ="en" > <head > <meta charset ="UTF-8" > <meta http-equiv ="X-UA-Compatible" content ="IE=edge" > <meta name ="viewport" content ="width=device-width, initial-scale=1.0" > <title > Document</title > <style > .basic { width : 400px ; height : 100px ; border : 1px solid black; } .happy { border : 4px solid red;; background-color : rgba (255 , 255 , 0 , 0.644 ); background : linear-gradient (30deg ,yellow,pink,orange,yellow); } .sad { border : 4px dashed rgb (2 , 197 , 2 ); background-color : gray; } .normal { background-color : skyblue; } .atguigu1 { background-color : yellowgreen; } .atguigu2 { font-size : 30px ; text-shadow :2px 2px 10px red; } .atguigu3 { border-radius : 20px ; } </style > </head > <body > <div id ="root" > <div class ="basic" :class ="mood" @click ="changeMood" > {{name}}</div > </div > </body > <script src ="https://cdn.jsdelivr.net/npm/vue@2.6.14/dist/vue.js" > </script > <script > const vm = new Vue ({ el : '#root' , data : { name : 'zszszs' , mood : 'normal' }, methods : { changeMood ( const moodArr = ['normal' , 'sad' , 'happy' ] const idx = Math .floor (Math .random ()*3 ) this .mood = moodArr[idx] } }, }) </script > </html >
1.3 绑定class样式数组写法· 数组写法适用于要绑定的样式个数不确定、名字也不确定的情况
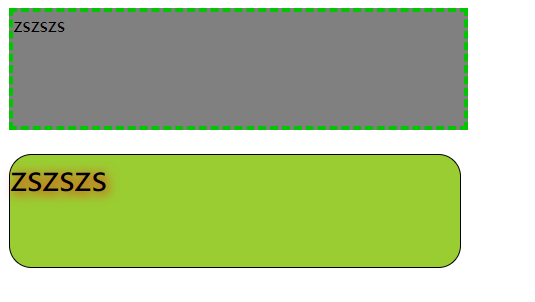
1 2 3 4 5 6 7 8 9 10 11 12 13 14 15 16 17 18 19 20 21 22 23 24 25 26 27 28 29 30 31 32 33 34 35 36 37 38 39 40 41 42 43 44 45 46 47 48 49 50 51 52 53 54 55 56 57 58 59 60 61 62 63 64 65 66 67 68 69 70 71 <!DOCTYPE html > <html lang ="en" > <head > <meta charset ="UTF-8" > <meta http-equiv ="X-UA-Compatible" content ="IE=edge" > <meta name ="viewport" content ="width=device-width, initial-scale=1.0" > <title > Document</title > <style > .basic { width : 400px ; height : 100px ; border : 1px solid black; } .happy { border : 4px solid red;; background-color : rgba (255 , 255 , 0 , 0.644 ); background : linear-gradient (30deg ,yellow,pink,orange,yellow); } .sad { border : 4px dashed rgb (2 , 197 , 2 ); background-color : gray; } .normal { background-color : skyblue; } .atguigu1 { background-color : yellowgreen; } .atguigu2 { font-size : 30px ; text-shadow :2px 2px 10px red; } .atguigu3 { border-radius : 20px ; } </style > </head > <body > <div id ="root" > <div class ="basic" :class ="mood" @click ="changeMood" > {{name}}</div > <br > <div class ="basic" :class ="classArr" @click ="changeMood" > {{name}}</div > </div > </body > <script src ="https://cdn.jsdelivr.net/npm/vue@2.6.14/dist/vue.js" > </script > <script > const vm = new Vue ({ el : '#root' , data : { name : 'zszszs' , mood : 'normal' , classArr : ['atguigu1' , 'atguigu2' , 'atguigu3' ] }, methods : { changeMood ( const moodArr = ['normal' , 'sad' , 'happy' ] const idx = Math .floor (Math .random ()*3 ) this .mood = moodArr[idx] } }, }) </script > </html >
1.4 绑定class样式对象写法· 对象写法适用于要绑定的样式个数确定、名字确定,但是需要动态决定样式用不用的情况
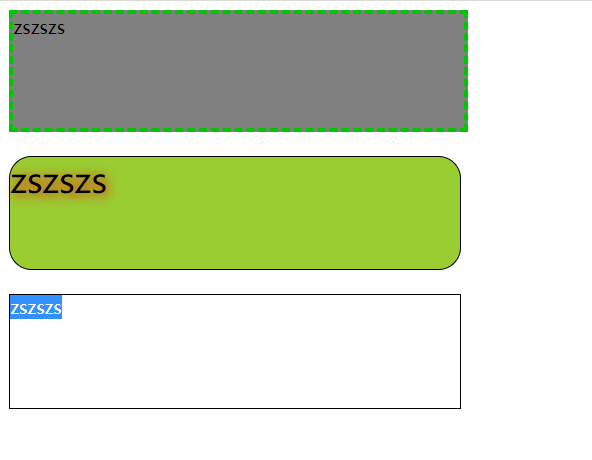
1 2 3 4 5 6 7 8 9 10 11 12 13 14 15 16 17 18 19 20 21 22 23 24 25 26 27 28 29 30 31 32 33 34 35 36 37 38 39 40 41 42 43 44 45 46 47 48 49 50 51 52 53 54 55 56 57 58 59 60 61 62 63 64 65 66 67 68 69 70 71 72 73 74 75 76 77 78 79 80 81 <!DOCTYPE html > <html lang ="en" > <head > <meta charset ="UTF-8" > <meta http-equiv ="X-UA-Compatible" content ="IE=edge" > <meta name ="viewport" content ="width=device-width, initial-scale=1.0" > <title > Document</title > <style > .basic { width : 400px ; height : 100px ; border : 1px solid black; } .happy { border : 4px solid red;; background-color : rgba (255 , 255 , 0 , 0.644 ); background : linear-gradient (30deg ,yellow,pink,orange,yellow); } .sad { border : 4px dashed rgb (2 , 197 , 2 ); background-color : gray; } .normal { background-color : skyblue; } .atguigu1 { background-color : yellowgreen; } .atguigu2 { font-size : 30px ; text-shadow :2px 2px 10px red; } .atguigu3 { border-radius : 20px ; } </style > </head > <body > <div id ="root" > <div class ="basic" :class ="mood" @click ="changeMood" > {{name}}</div > <br > <div class ="basic" :class ="classArr" @click ="changeMood" > {{name}}</div > <br > <div class ="basic" :class ="classObj" @click ="changeMood" > {{name}}</div > </div > </body > <script src ="https://cdn.jsdelivr.net/npm/vue@2.6.14/dist/vue.js" > </script > <script > const vm = new Vue ({ el : '#root' , data : { name : 'zszszs' , mood : 'normal' , classArr : ['atguigu1' , 'atguigu2' , 'atguigu3' ], classObj : { atguigu1 : false , atguigu2 : false , atguigu3 : false } }, methods : { changeMood ( const moodArr = ['normal' , 'sad' , 'happy' ] const idx = Math .floor (Math .random ()*3 ) this .mood = moodArr[idx] } }, }) </script > </html >
2. 绑定style样式· 2.1 绑定style样式对象写法· 绑定style样式对象写法,style样式对象写在data中,对象中写样式及其对应的值。
如果原来的样式不同单词之间使用-进行连接,需要更改为小驼峰的写法。如:font-size 改写为 fontSize
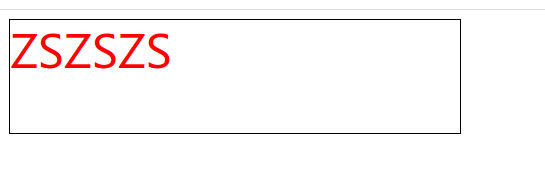
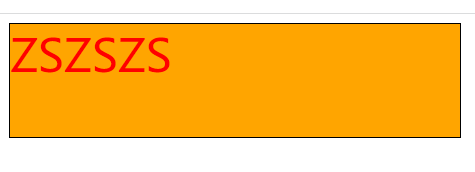
1 2 3 4 5 6 7 8 9 10 11 12 13 14 15 16 17 18 19 20 21 22 23 24 25 26 27 28 29 30 31 32 33 34 35 36 <!DOCTYPE html > <html lang ="en" > <head > <meta charset ="UTF-8" > <meta http-equiv ="X-UA-Compatible" content ="IE=edge" > <meta name ="viewport" content ="width=device-width, initial-scale=1.0" > <title > Document</title > <style > .basic { width : 400px ; height : 100px ; border : 1px solid black; } </style > </head > <body > <div id ="root" > <div class ="basic" :style ="styleObj" > {{name}}</div > </div > </body > <script src ="https://cdn.jsdelivr.net/npm/vue@2.6.14/dist/vue.js" > </script > <script > const vm = new Vue ({ el : '#root' , data : { name : 'ZSZSZS' , styleObj : { fontSize : '40px' , color : 'red' } } }) </script > </html >
2.2 绑定style样式数组写法· 2.2.1 写法一· 1 2 3 4 5 6 7 8 9 10 11 12 13 14 15 16 17 18 19 20 21 22 23 24 25 26 27 28 29 30 31 32 33 34 35 36 37 38 <!DOCTYPE html > <html lang ="en" > <head > <meta charset ="UTF-8" > <meta http-equiv ="X-UA-Compatible" content ="IE=edge" > <meta name ="viewport" content ="width=device-width, initial-scale=1.0" > <title > Document</title > <style > .basic { width : 400px ; height : 100px ; border : 1px solid black; } </style > </head > <body > <div id ="root" > <div class ="basic" :style ="[styleObj1, styleObj2]" > {{name}}</div > </div > </body > <script src ="https://cdn.jsdelivr.net/npm/vue@2.6.14/dist/vue.js" > </script > <script > const vm = new Vue ({ el : '#root' , data : { name : 'ZSZSZS' , styleObj1 : { fontSize : '40px' , color : 'red' }, styleObj2 : { backgroundColor : 'orange' } } }) </script > </html >
2.2.2 写法2· 1 2 3 4 5 6 7 8 9 10 11 12 13 14 15 16 17 18 19 20 21 22 23 24 25 26 27 28 29 30 31 32 33 34 35 36 37 38 39 40 <!DOCTYPE html > <html lang ="en" > <head > <meta charset ="UTF-8" > <meta http-equiv ="X-UA-Compatible" content ="IE=edge" > <meta name ="viewport" content ="width=device-width, initial-scale=1.0" > <title > Document</title > <style > .basic { width : 400px ; height : 100px ; border : 1px solid black; } </style > </head > <body > <div id ="root" > <div class ="basic" :style ="styleArr" > {{name}}</div > </div > </body > <script src ="https://cdn.jsdelivr.net/npm/vue@2.6.14/dist/vue.js" > </script > <script > const vm = new Vue ({ el : '#root' , data : { name : 'ZSZSZS' , styleArr : [ { fontSize : '40px' , color : 'black' }, { backgroundColor : 'red' } ] } }) </script > </html >
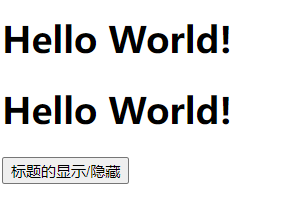
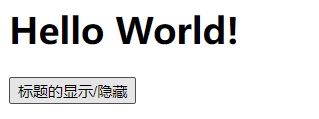
条件渲染· 1 2 3 4 5 6 7 8 9 10 11 12 13 14 15 16 17 18 19 20 21 22 23 24 25 26 27 28 29 30 31 32 33 <!DOCTYPE html > <html lang ="en" > <head > <meta charset ="UTF-8" > <meta http-equiv ="X-UA-Compatible" content ="IE=edge" > <meta name ="viewport" content ="width=device-width, initial-scale=1.0" > <title > Document</title > </head > <body > <div id ="root" > <h1 v-show ="isShow" > Hello World!</h1 > <h1 v-show ="1 == 1" > Hello World!</h1 > <button @click ="changeIsShow" > 标题的显示/隐藏</button > </div > </body > <script src ="https://cdn.jsdelivr.net/npm/vue@2.6.14/dist/vue.js" > </script > <script > const vm = new Vue ({ el : '#root' , data : { isShow : true }, methods : { changeIsShow ( this .isShow = !this .isShow } } }) </script > </html >
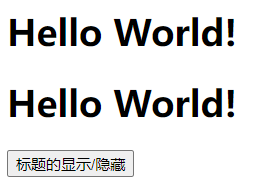
2. 使用v-if做条件渲染· 1 2 3 4 5 6 7 8 9 10 11 12 13 14 15 16 17 18 19 20 21 22 23 24 25 26 27 28 29 30 31 32 33 <!DOCTYPE html > <html lang ="en" > <head > <meta charset ="UTF-8" > <meta http-equiv ="X-UA-Compatible" content ="IE=edge" > <meta name ="viewport" content ="width=device-width, initial-scale=1.0" > <title > Document</title > </head > <body > <div id ="root" > <h1 v-if ="isShow" > Hello World!</h1 > <h1 v-if ="1 == 1" > Hello World!</h1 > <button @click ="changeIsShow" > 标题的显示/隐藏</button > </div > </body > <script src ="https://cdn.jsdelivr.net/npm/vue@2.6.14/dist/vue.js" > </script > <script > const vm = new Vue ({ el : '#root' , data : { isShow : true }, methods : { changeIsShow ( this .isShow = !this .isShow } } }) </script > </html >
注意:使用 v-else-if 与 v-else 的前面必须有 v-if ,否则会报错,且条件判断渲染也不能正常实现。
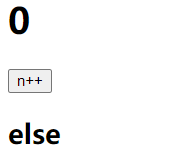
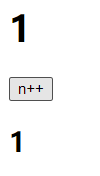
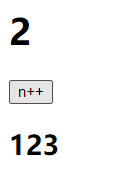
1 2 3 4 5 6 7 8 9 10 11 12 13 14 15 16 17 18 19 20 21 22 23 24 25 26 27 28 <!DOCTYPE html > <html lang ="en" > <head > <meta charset ="UTF-8" > <meta http-equiv ="X-UA-Compatible" content ="IE=edge" > <meta name ="viewport" content ="width=device-width, initial-scale=1.0" > <title > Document</title > </head > <body > <div id ="root" > <h1 > {{n}}</h1 > <button @click ="n++;" > n++</button > <h2 v-if ="n === 1" > 1</h2 > <h2 v-else-if ="n === 1" > 2</h2 > <h2 v-else-if ="n === 1" > 3</h2 > <h2 v-else > else</h2 > </div > </body > <script src ="https://cdn.jsdelivr.net/npm/vue@2.6.14/dist/vue.js" > </script > <script > const vm = new Vue ({ el : '#root' , data : { n : 0 } }) </script > </html >
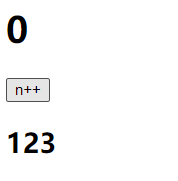
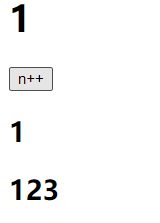
注意:如果使用v-if ... v-else-if ... v-else中间不能被打断
1 2 3 4 5 6 7 8 9 10 11 12 13 14 15 16 17 18 19 20 21 22 23 24 25 26 27 28 29 <!DOCTYPE html > <html lang ="en" > <head > <meta charset ="UTF-8" > <meta http-equiv ="X-UA-Compatible" content ="IE=edge" > <meta name ="viewport" content ="width=device-width, initial-scale=1.0" > <title > Document</title > </head > <body > <div id ="root" > <h1 > {{n}}</h1 > <button @click ="n++;" > n++</button > <h2 v-if ="n === 1" > 1</h2 > <h2 > 123</h2 > <h2 v-else-if ="n === 2" > 2</h2 > <h2 v-else-if ="n === 3" > 3</h2 > <h2 v-else > else</h2 > </div > </body > <script src ="https://cdn.jsdelivr.net/npm/vue@2.6.14/dist/vue.js" > </script > <script > const vm = new Vue ({ el : '#root' , data : { n : 0 } }) </script > </html >
4. template· 使用template标签可以实现同时控制多个元素的显示与隐藏,同时不影响元素标签之间的结构,但是template只能配合v-if使用,不能与v-show一起使用。
1 2 3 4 5 6 7 8 9 10 11 12 13 14 15 16 17 18 19 20 21 22 23 24 25 26 27 28 29 30 31 <!DOCTYPE html > <html lang ="en" > <head > <meta charset ="UTF-8" > <meta http-equiv ="X-UA-Compatible" content ="IE=edge" > <meta name ="viewport" content ="width=device-width, initial-scale=1.0" > <title > Document</title > </head > <body > <div id ="root" > <h1 > {{n}}</h1 > <button @click ="n++;" > n++</button > <template v-if ="n===1" > <h2 > 1</h2 > <h2 > 123</h2 > <h2 > 2</h2 > <h2 > 3</h2 > <h2 > else</h2 > </template > </div > </body > <script src ="https://cdn.jsdelivr.net/npm/vue@2.6.14/dist/vue.js" > </script > <script > const vm = new Vue ({ el : '#root' , data : { n : 0 } }) </script > </html >
5. v-if 和 v-show 的区别· 实现原理不同:
性能消耗不同:
v-if 有更高的切换开销(进行动态的创建和移除元素),而 v-show 有更高的初始渲染开销(一开始就有进行元素的渲染,v-if为false一开始不会进行渲染)。 如果需要非常频繁地切换,则使用 v-show 较好 如果在运行时条件很少改变,则使用 v-if 较好 列表渲染· 1. 列表渲染· 1.1 v-for· vue 提供了 v-for 指令,用来辅助开发者基于数组、对象、字符串(用的很少)、指定次数(用的很少)等来循环渲染相似的 UI 结构。 v-for 指令需要使用item in items 或 item of items 的特殊语法,其中:
items 是待循环的数据 item 是当前的循环项 1.2 v-for 中的索引· v-for 指令除了可以获取当前正在循环的项,还支持一个可选的第二个参数,即当前项的索引。语法格式为 (item, index) in items 或 (item, index) of items。
v-for 指令中的 item 项和 index 索引都是形参,可以根据需要进行重命名。例如 (username, idx) in userlist。
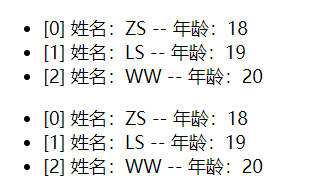
2. v-for 遍历数组· 1 2 3 4 5 6 7 8 9 10 11 12 13 14 15 16 17 18 19 20 21 22 23 24 25 26 27 28 29 30 31 32 33 34 35 36 37 <!DOCTYPE html > <html lang ="en" > <head > <meta charset ="UTF-8" > <meta http-equiv ="X-UA-Compatible" content ="IE=edge" > <meta name ="viewport" content ="width=device-width, initial-scale=1.0" > <title > Document</title > </head > <body > <div id ="root" > <ul > <li v-for ="(person, index) in persons" > [{{index}}] 姓名:{{person.name}} -- 年龄:{{person.age}} </li > </ul > <ul > <li v-for ="(person, index) of persons" > [{{index}}] 姓名:{{person.name}} -- 年龄:{{person.age}} </li > </ul > </div > </body > <script src ="https://cdn.jsdelivr.net/npm/vue@2.6.14/dist/vue.js" > </script > <script > const vm = new Vue ({ el : '#root' , data : { persons : [ {id : 101 , name : 'ZS' , age : 18 }, {id : 102 , name : 'LS' , age : 19 }, {id : 103 , name : 'WW' , age : 20 } ] } }) </script > </html >
3. v-for 遍历对象· 使用 v-for 遍历对象,可以获取到三个参数,第一个参数为当前项的值,第二个参数为当前项对应的键,第三个参数为当前项的索引。
1 2 3 4 5 6 7 8 9 10 11 12 13 14 15 16 17 18 19 20 21 22 23 24 25 26 27 28 29 30 31 32 <!DOCTYPE html > <html lang ="en" > <head > <meta charset ="UTF-8" > <meta http-equiv ="X-UA-Compatible" content ="IE=edge" > <meta name ="viewport" content ="width=device-width, initial-scale=1.0" > <title > Document</title > </head > <body > <div id ="root" > <ul > <li v-for ="(value, key, index) in zs" > {{index}} {{key}} : {{value}} </li > </ul > </div > </body > <script src ="https://cdn.jsdelivr.net/npm/vue@2.6.14/dist/vue.js" > </script > <script > const vm = new Vue ({ el : '#root' , data : { persons : [ {id : 101 , name : 'ZS' , age : 18 }, {id : 102 , name : 'LS' , age : 19 }, {id : 103 , name : 'WW' , age : 20 } ], zs : {id : 101 , name : 'ZS' , age : 18 } } }) </script > </html >
4. v-for 遍历字符串· 使用 v-for 遍历字符串,可以获取到两个参数,第一个参数为当前正在遍历的字符,第二个参数为当前字符对应的索引或下标。
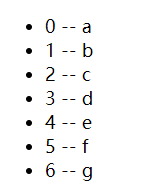
1 2 3 4 5 6 7 8 9 10 11 12 13 14 15 16 17 18 19 20 21 22 23 24 25 26 27 28 29 30 31 32 33 <!DOCTYPE html > <html lang ="en" > <head > <meta charset ="UTF-8" > <meta http-equiv ="X-UA-Compatible" content ="IE=edge" > <meta name ="viewport" content ="width=device-width, initial-scale=1.0" > <title > Document</title > </head > <body > <div id ="root" > <ul > <li v-for ="(char, index) in my_str" > {{index}} -- {{char}} </li > </ul > </div > </body > <script src ="https://cdn.jsdelivr.net/npm/vue@2.6.14/dist/vue.js" > </script > <script > const vm = new Vue ({ el : '#root' , data : { persons : [ {id : 101 , name : 'ZS' , age : 18 }, {id : 102 , name : 'LS' , age : 19 }, {id : 103 , name : 'WW' , age : 20 } ], zs : {id : 101 , name : 'ZS' , age : 18 }, my_str : 'abcdefg' } }) </script > </html >
5. v-for 遍历指定次数· 使用 v-for 遍历指定次数,可以获取到两个参数,第一个参数为当前的数,第二个参数为当前的数对于的索引。
1 2 3 4 5 6 7 8 9 10 11 12 13 14 15 16 17 18 19 20 21 22 23 24 25 26 27 28 29 30 31 32 33 <!DOCTYPE html > <html lang ="en" > <head > <meta charset ="UTF-8" > <meta http-equiv ="X-UA-Compatible" content ="IE=edge" > <meta name ="viewport" content ="width=device-width, initial-scale=1.0" > <title > Document</title > </head > <body > <div id ="root" > <ul > <li v-for ="(number, index) in 3" > {{index}} -- {{number}} </li > </ul > </div > </body > <script src ="https://cdn.jsdelivr.net/npm/vue@2.6.14/dist/vue.js" > </script > <script > const vm = new Vue ({ el : '#root' , data : { persons : [ {id : 101 , name : 'ZS' , age : 18 }, {id : 102 , name : 'LS' , age : 19 }, {id : 103 , name : 'WW' , age : 20 } ], zs : {id : 101 , name : 'ZS' , age : 18 }, my_str : 'abcdefg' } }) </script > </html >
6. key的作用与原理· 6.1 key· key 在 v-for 循环渲染中,可以为每个循环渲染出来的元素节点添加一个唯一的身份标识。
在使用 v-for 循环渲染时,最好写上 key
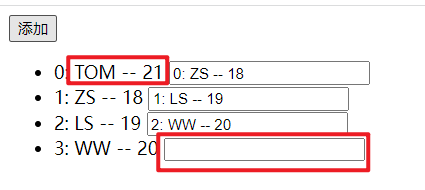
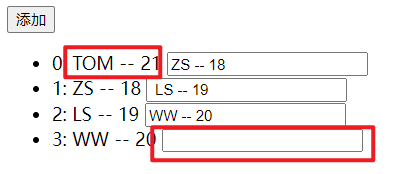
6.2 key错误演示· 6.2.1 index作为key· 1 2 3 4 5 6 7 8 9 10 11 12 13 14 15 16 17 18 19 20 21 22 23 24 25 26 27 28 29 30 31 32 33 34 35 36 37 38 39 <!DOCTYPE html > <html lang ="en" > <head > <meta charset ="UTF-8" > <meta http-equiv ="X-UA-Compatible" content ="IE=edge" > <meta name ="viewport" content ="width=device-width, initial-scale=1.0" > <title > Document</title > </head > <body > <div id ="root" > <button @click ="addPerson" > 添加</button > <ul > <li v-for ="(person, index) in persons" :key ="index" > {{index}}: {{person.name}} -- {{person.age}} <input type ="text" > </li > </ul > </div > </body > <script src ="https://cdn.jsdelivr.net/npm/vue@2.6.14/dist/vue.js" > </script > <script > const vm = new Vue ({ el : '#root' , data : { persons : [ {id : 101 , name : 'ZS' , age : 18 }, {id : 102 , name : 'LS' , age : 19 }, {id : 103 , name : 'WW' , age : 20 } ] }, methods : { addPerson ( this .persons .unshift ({id : 104 , name : 'TOM' , age : 21 }) } }, }) </script > </html >
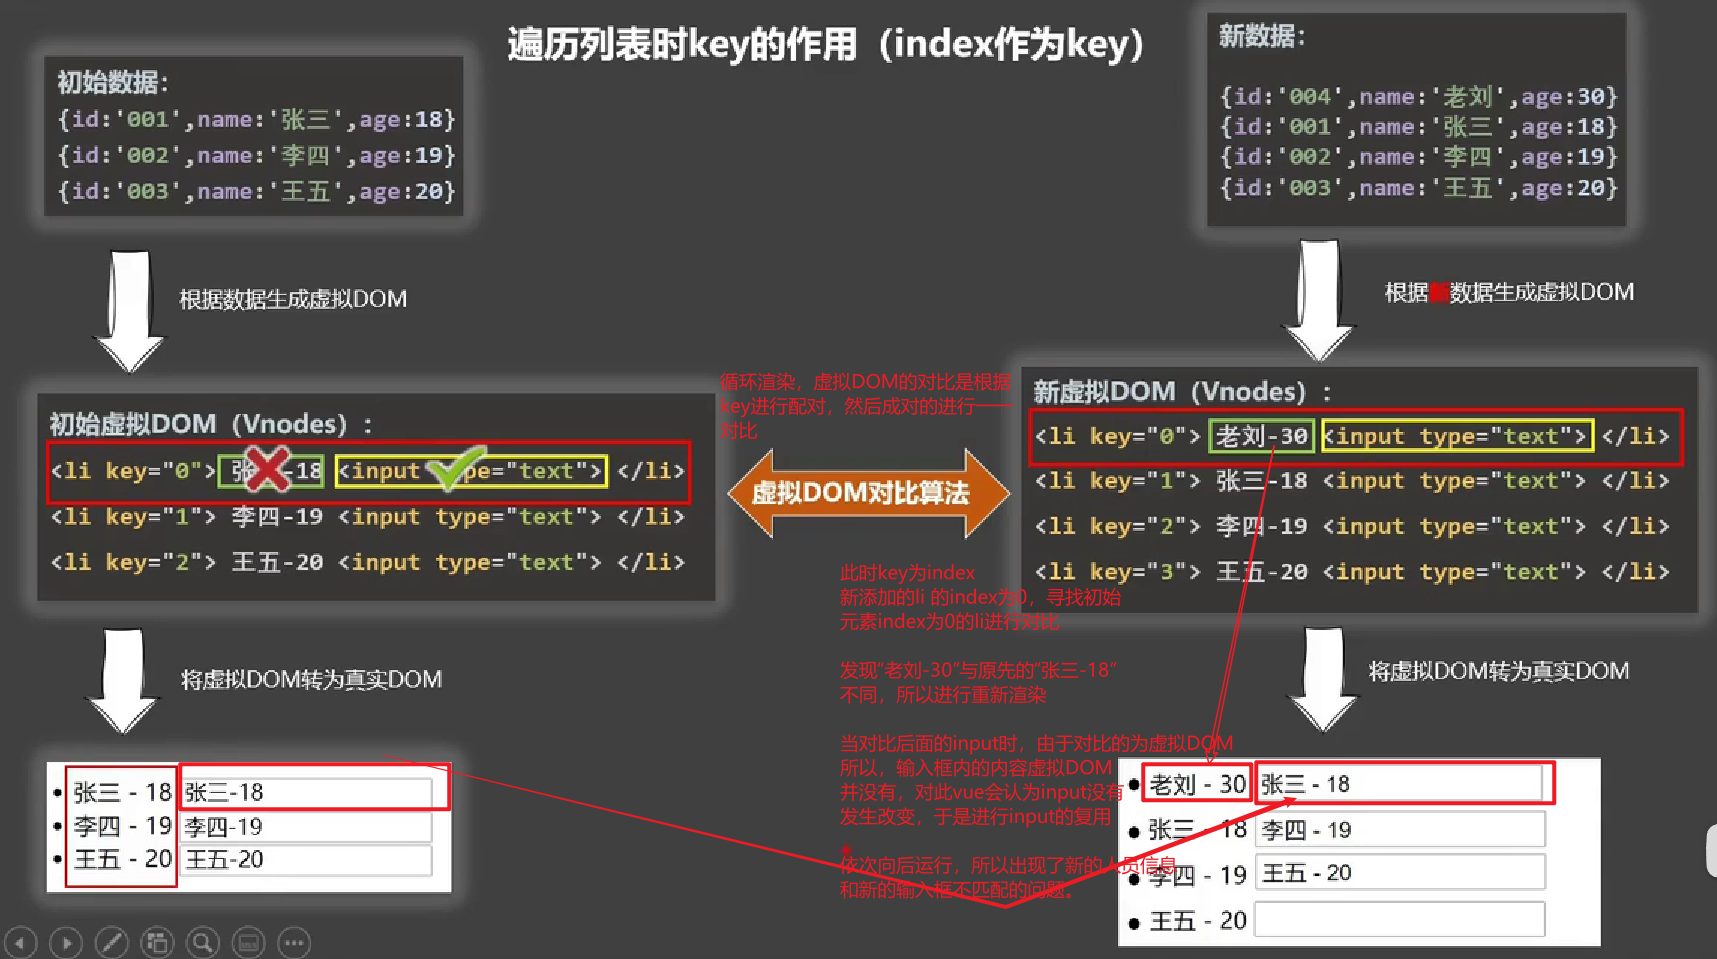
通过观察上面的代码和运行结果,发现新的人员信息和新的输入框在添加到页面后出现了显示位置不匹配的问题。
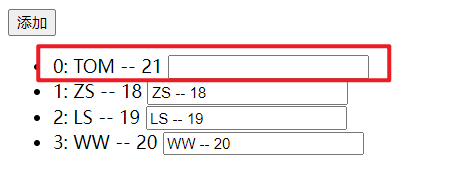
6.2.2 不写key· 1 2 3 4 5 6 7 8 9 10 11 12 13 14 15 16 17 18 19 20 21 22 23 24 25 26 27 28 29 30 31 32 33 34 35 36 37 38 <!DOCTYPE html > <html lang ="en" > <head > <meta charset ="UTF-8" > <meta http-equiv ="X-UA-Compatible" content ="IE=edge" > <meta name ="viewport" content ="width=device-width, initial-scale=1.0" > <title > Document</title > </head > <body > <div id ="root" > <button @click ="addPerson" > 添加</button > <ul > <li v-for ="(person, index) in persons" > {{index}}: {{person.name}} -- {{person.age}} <input type ="text" > </li > </ul > </div > </body > <script src ="https://cdn.jsdelivr.net/npm/vue@2.6.14/dist/vue.js" > </script > <script > const vm = new Vue ({ el : '#root' , data : { persons : [ {id : 101 , name : 'ZS' , age : 18 }, {id : 102 , name : 'LS' , age : 19 }, {id : 103 , name : 'WW' , age : 20 } ] }, methods : { addPerson ( this .persons .unshift ({id : 104 , name : 'TOM' , age : 21 }) } }, }) </script > </html >
通过观察,发现新的人员信息和新的输入框在添加到页面后依旧出现了显示位置不匹配的问题。
6.2.3 出现错误的解释· 使用 v-for 进行循环渲染时,不写 key 时,vue 为自动为DOM元素设置一个 key ,key 的值为 index。即不写 key 与使用 index 作为 key 一样。
6.3 可以对数组数据进行唯一标识的作为key· 6.3.1 示例· 在提供的数据数组中,每个对象的 id 可以对该对象进行唯一标识,所以可以使用 id 作为key。
1 2 3 4 5 6 7 8 9 10 11 12 13 14 15 16 17 18 19 20 21 22 23 24 25 26 27 28 29 30 31 32 33 34 35 36 37 38 <!DOCTYPE html > <html lang ="en" > <head > <meta charset ="UTF-8" > <meta http-equiv ="X-UA-Compatible" content ="IE=edge" > <meta name ="viewport" content ="width=device-width, initial-scale=1.0" > <title > Document</title > </head > <body > <div id ="root" > <button @click ="addPerson" > 添加</button > <ul > <li v-for ="(person, index) in persons" :key ="person.id" > {{index}}: {{person.name}} -- {{person.age}} <input type ="text" > </li > </ul > </div > </body > <script src ="https://cdn.jsdelivr.net/npm/vue@2.6.14/dist/vue.js" > </script > <script > const vm = new Vue ({ el : '#root' , data : { persons : [ {id : 101 , name : 'ZS' , age : 18 }, {id : 102 , name : 'LS' , age : 19 }, {id : 103 , name : 'WW' , age : 20 } ] }, methods : { addPerson ( this .persons .unshift ({id : 104 , name : 'TOM' , age : 21 }) } }, }) </script > </html >
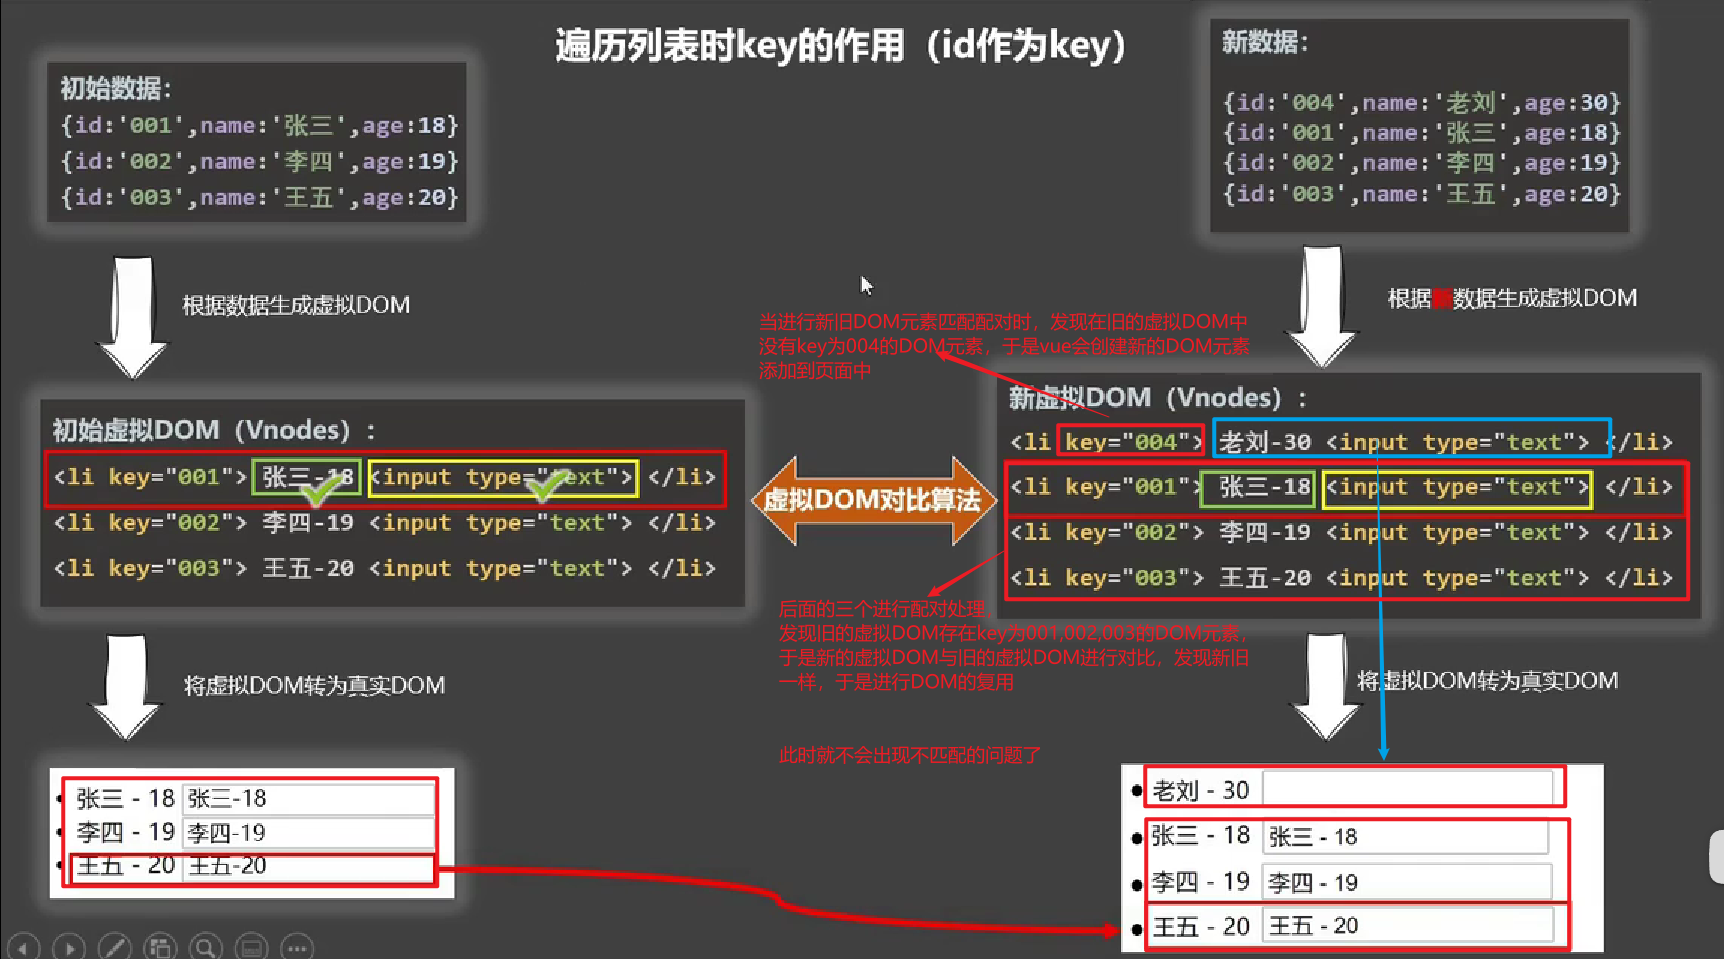
提供观察结果发现,新的人员信息和新的输入框在加入页面显示后,没有出现不匹配的问题。
6.3.2 解释·
6.4 key的作用· 虚拟DOM中key的作用:key是虚拟DOM对象的标识,当数据发生变化时,Vue会根据【新数据】生成【新的虚拟DOM】,随后Vue进行【新虚拟DOM】与【旧虚拟DOM】的差异比较,比较规则如下:(1).旧虚拟DOM中找到了与新虚拟DOM相同的key:①.若虚拟DOM中内容没变, 直接使用之前的真实DOM! ②.若虚拟DOM中内容变了, 则生成新的真实DOM,随后替换掉页面中之前的真实DOM。 (2).旧虚拟DOM中未找到与新虚拟DOM相同的key 6.5 用index作为key可能会引发的问题· 若对数据进行:逆序添加、逆序删除等破坏顺序操作:会产生没有必要的真实DOM更新 ==> 界面效果没问题, 但效率低。 如果结构中还包含输入类的DOM: 如果不对数据进行破坏顺序操作,则使用index作为key不会引发问题。
1 2 3 4 5 6 7 8 9 10 11 12 13 14 15 16 17 18 19 20 21 22 23 24 25 26 27 28 29 30 31 32 33 34 35 36 37 38 <!DOCTYPE html > <html lang ="en" > <head > <meta charset ="UTF-8" > <meta http-equiv ="X-UA-Compatible" content ="IE=edge" > <meta name ="viewport" content ="width=device-width, initial-scale=1.0" > <title > Document</title > </head > <body > <div id ="root" > <button @click ="addPerson" > 添加</button > <ul > <li v-for ="(person, index) in persons" :key ="idnex" > {{index}}: {{person.name}} -- {{person.age}} <input type ="text" > </li > </ul > </div > </body > <script src ="https://cdn.jsdelivr.net/npm/vue@2.6.14/dist/vue.js" > </script > <script > const vm = new Vue ({ el : '#root' , data : { persons : [ {id : 101 , name : 'ZS' , age : 18 }, {id : 102 , name : 'LS' , age : 19 }, {id : 103 , name : 'WW' , age : 20 } ] }, methods : { addPerson ( this .persons .push ({id : 104 , name : 'TOM' , age : 21 }) } }, }) </script > </html >
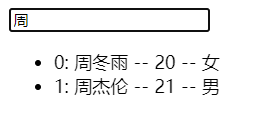
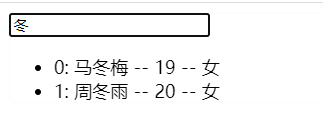
6.6 开发中如何选择key· 最好使用每条数据的唯一标识作为key,比如id、手机号、身份证号、学号等唯一值。 如果不存在对数据的逆序添加、逆序删除等破坏顺序操作,仅用于渲染列表用于展示,使用index作为key是没有问题的。 7. 列表过滤· 7.1 监视属性实现· 1 2 3 4 5 6 7 8 9 10 11 12 13 14 15 16 17 18 19 20 21 22 23 24 25 26 27 28 29 30 31 32 33 34 35 36 37 38 39 40 41 42 43 44 45 46 47 48 49 50 51 52 53 54 55 56 <!DOCTYPE html > <html lang ="en" > <head > <meta charset ="UTF-8" /> <meta http-equiv ="X-UA-Compatible" content ="IE=edge" /> <meta name ="viewport" content ="width=device-width, initial-scale=1.0" /> <title > Document</title > </head > <body > <div id ="root" > <input type ="text" placeholder ="请输入姓名..." v-model ="keyWord" /> <ul > <li v-for ="(person, index) in filterPerson" :key ="person.id" > {{index}}: {{person.name}} -- {{person.age}} -- {{person.sex}}</li > </ul > </div > </body > <script src ="https://cdn.jsdelivr.net/npm/vue@2.6.14/dist/vue.js" > </script > <script > const vm = new Vue ({ el : '#root' , data : { keyWord : '' , persons : [ { id : '001' , name : '马冬梅' , age : 19 , sex : '女' }, { id : '002' , name : '周冬雨' , age : 20 , sex : '女' }, { id : '003' , name : '周杰伦' , age : 21 , sex : '男' }, { id : '004' , name : '温兆伦' , age : 22 , sex : '男' }, ], filterPerson : [], }, watch : { keyWord : { immediate : true , handler (newVal ) { this .filterPerson = this .persons .filter ((person ) => { return person.name .indexOf (newVal) !== -1 }) }, }, }, }) </script > </html >
7.2 计算属性实现· 计算属性与监视属性都能实现的功能,优先使用计算属性。
1 2 3 4 5 6 7 8 9 10 11 12 13 14 15 16 17 18 19 20 21 22 23 24 25 26 27 28 29 30 31 32 33 34 35 36 37 38 39 40 41 42 43 44 45 46 <!DOCTYPE html > <html lang ="en" > <head > <meta charset ="UTF-8" /> <meta http-equiv ="X-UA-Compatible" content ="IE=edge" /> <meta name ="viewport" content ="width=device-width, initial-scale=1.0" /> <title > Document</title > </head > <body > <div id ="root" > <input type ="text" placeholder ="请输入姓名..." v-model ="keyWord" /> <ul > <li v-for ="(person, index) in filterPerson" :key ="person.id" > {{index}}: {{person.name}} -- {{person.age}} -- {{person.sex}}</li > </ul > </div > </body > <script src ="https://cdn.jsdelivr.net/npm/vue@2.6.14/dist/vue.js" > </script > <script > const vm = new Vue ({ el : '#root' , data : { keyWord : '' , persons : [ { id : '001' , name : '马冬梅' , age : 19 , sex : '女' }, { id : '002' , name : '周冬雨' , age : 20 , sex : '女' }, { id : '003' , name : '周杰伦' , age : 21 , sex : '男' }, { id : '004' , name : '温兆伦' , age : 22 , sex : '男' }, ] }, computed : { filterPerson ( return this .persons .filter ((person )=> { return person.name .indexOf (this .keyWord ) !== -1 }) } } }) </script > </html >
8. 列表排序· 1 2 3 4 5 6 7 8 9 10 11 12 13 14 15 16 17 18 19 20 21 22 23 24 25 26 27 28 29 30 31 32 33 34 35 36 37 38 39 40 41 42 43 44 45 46 47 48 49 50 51 52 53 54 55 56 57 58 59 60 <!DOCTYPE html > <html lang ="en" > <head > <meta charset ="UTF-8" /> <meta http-equiv ="X-UA-Compatible" content ="IE=edge" /> <meta name ="viewport" content ="width=device-width, initial-scale=1.0" /> <title > Document</title > </head > <body > <div id ="root" > <input type ="text" placeholder ="请输入姓名..." v-model ="keyWord" /> <button @click ="sortType = 2" > 年龄升序</button > <button @click ="sortType = 1" > 年龄降序</button > <button @click ="sortType = 0" > 原顺序</button > <ul > <li v-for ="(person, index) in filterPerson" :key ="person.id" > {{index}}: {{person.name}} -- {{person.age}} -- {{person.sex}}</li > </ul > </div > </body > <script src ="https://cdn.jsdelivr.net/npm/vue@2.6.14/dist/vue.js" > </script > <script > const vm = new Vue ({ el : '#root' , data : { keyWord : '' , sortType : 0 , persons : [ { id : '001' , name : '马冬梅' , age : 19 , sex : '女' }, { id : '002' , name : '周冬雨' , age : 20 , sex : '女' }, { id : '003' , name : '周杰伦' , age : 21 , sex : '男' }, { id : '004' , name : '温兆伦' , age : 22 , sex : '男' }, ], }, computed : { filterPerson ( const personArr = this .persons .filter ((person ) => { return person.name .indexOf (this .keyWord ) !== -1 }) if (this .sortType ) { personArr.sort ((p1, p2 ) => { return this .sortType === 1 ? p2.age - p1.age : p1.age - p2.age }) } return personArr }, }, }) </script > </html >
Vue监测数据的原理· 1. Vue数据更新时的一个问题· 通过数组的索引对数组的元素进行修改,vue监测不到,不会对页面中的数据进行更新。
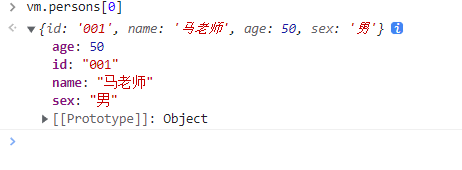
1 2 3 4 5 6 7 8 9 10 11 12 13 14 15 16 17 18 19 20 21 22 23 24 25 26 27 28 29 30 31 32 33 34 35 36 37 38 39 40 41 42 43 44 45 <!DOCTYPE html > <html > <head > <meta charset ="UTF-8" /> <title > 更新时的一个问题</title > <script src ="https://cdn.jsdelivr.net/npm/vue@2.6.14/dist/vue.js" > </script > </head > <body > <div id ="root" > <h2 > 人员列表</h2 > <button @click ="updateMei" > 更新马冬梅的信息</button > <ul > <li v-for ="(p,index) of persons" :key ="p.id" > {{p.name}}-{{p.age}}-{{p.sex}} </li > </ul > </div > <script type ="text/javascript" > Vue .config .productionTip = false const vm = new Vue ({ el :'#root' , data :{ persons :[ {id :'001' ,name :'马冬梅' ,age :30 ,sex :'女' }, {id :'002' ,name :'周冬雨' ,age :31 ,sex :'女' }, {id :'003' ,name :'周杰伦' ,age :18 ,sex :'男' }, {id :'004' ,name :'温兆伦' ,age :19 ,sex :'男' } ] }, methods : { updateMei ( this .persons [0 ] = {id :'001' ,name :'马老师' ,age :50 ,sex :'男' } } } }) </script > </html >
观察运行结果发现,点击按钮后,对数组中的一个对象元素整个进行了更改,但是Vue并没有监测到,没有对页面进行更新。
2. Vue监测对象数据的原理· Vue监测对象类型的数据主要是通过Object.defineProperty()方法向vue实例对象中添加各个属性对应的getter和setter方法,当页面的数据发生更改时,会触发对应属性的setter方法,在setter方法中会调用方法重新进行模板的解析,从而实现页面数据的更新。
Vue监测对象数据的简单模拟:
注意:通过Object.defineProperty()方法向vue实例对象中添加各个属性对应的getter和setter方法实现数据的监视,不能在要监视的对象数据上直接操作,否则会死规(堆栈溢出)。
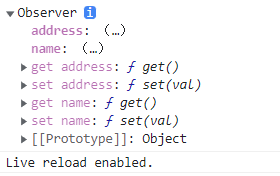
1 2 3 4 5 6 7 8 9 10 11 12 13 14 15 16 17 18 19 20 21 22 23 24 25 26 27 28 29 30 31 32 33 34 35 36 37 38 39 40 41 42 43 44 45 46 47 48 49 <!DOCTYPE html > <html > <head > <meta charset ="UTF-8" /> <title > Document</title > </head > <body > <script type ="text/javascript" > let data = { name :'尚硅谷' , address :'北京' , } function Observer (obj ){ const keys = Object .keys (obj) keys.forEach ((k )=> { Object .defineProperty (this ,k,{ get ( return obj[k] }, set (val ){ console .log (`${k} 被改了,我要去解析模板,生成虚拟DOM.....我要开始忙了` ) obj[k] = val } }) }) } const obs = new Observer (data) console .log (obs) let vm = {} vm._data = data = obs </script > </body > </html >
这只能实现一层数据的监视,vue能监视多层的数据,是由于vue采用递归的方式向对象内继续查找。
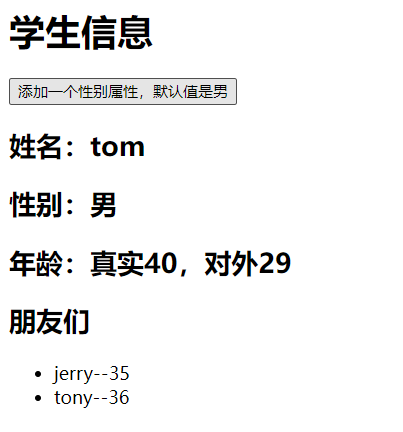
3. Vue.set()· Vue.set()方法,可以用于向data中的对象数据动态的添加属性。
不能使用该方法向vue实例对象上添加属性,也不能使用该方法向vue中的data添加属性。
语法:
1 Vue.set(target, key, value)
target:为要进行属性添加的对象数据 key:为将要添加的属性名 value:为将要添加的属性值 vue 实例对象中的$set()方法与Vue.set()方法的用法一样。
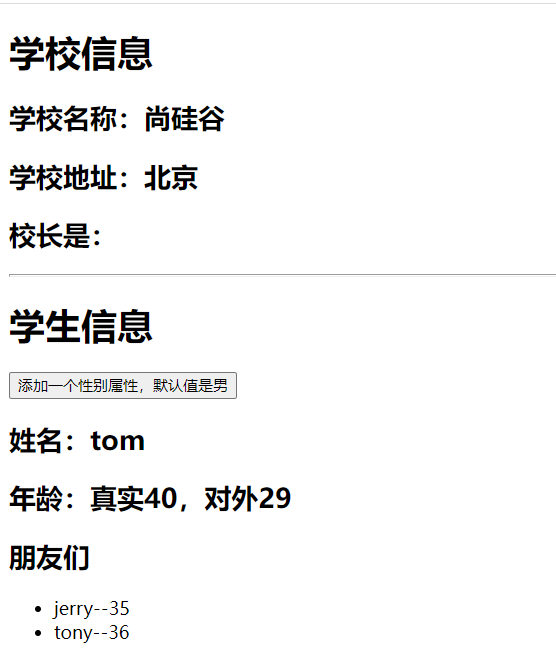
1 2 3 4 5 6 7 8 9 10 11 12 13 14 15 16 17 18 19 20 21 22 23 24 25 26 27 28 29 30 31 32 33 34 35 36 37 38 39 40 41 42 43 44 45 46 47 48 49 50 51 52 53 54 55 56 57 58 59 60 61 62 <!DOCTYPE html > <html > <head > <meta charset ="UTF-8" /> <title > Vue监测数据改变的原理</title > <script src ="https://cdn.jsdelivr.net/npm/vue@2.6.14/dist/vue.js" > </script > </head > <body > <div id ="root" > <h1 > 学校信息</h1 > <h2 > 学校名称:{{school.name}}</h2 > <h2 > 学校地址:{{school.address}}</h2 > <h2 > 校长是:{{school.leader}}</h2 > <hr /> <h1 > 学生信息</h1 > <button @click ="addSex" > 添加一个性别属性,默认值是男</button > <h2 > 姓名:{{student.name}}</h2 > <h2 v-if ="student.sex" > 性别:{{student.sex}}</h2 > <h2 > 年龄:真实{{student.age.rAge}},对外{{student.age.sAge}}</h2 > <h2 > 朋友们</h2 > <ul > <li v-for ="(f,index) in student.friends" :key ="index" > {{f.name}}--{{f.age}} </li > </ul > </div > </body > <script type ="text/javascript" > Vue .config .productionTip = false const vm = new Vue ({ el :'#root' , data :{ school :{ name :'尚硅谷' , address :'北京' , }, student :{ name :'tom' , age :{ rAge :40 , sAge :29 , }, friends :[ {name :'jerry' ,age :35 }, {name :'tony' ,age :36 } ] } }, methods : { addSex ( this .$set(this .student ,'sex' ,'男' ) } } }) </script > </html >
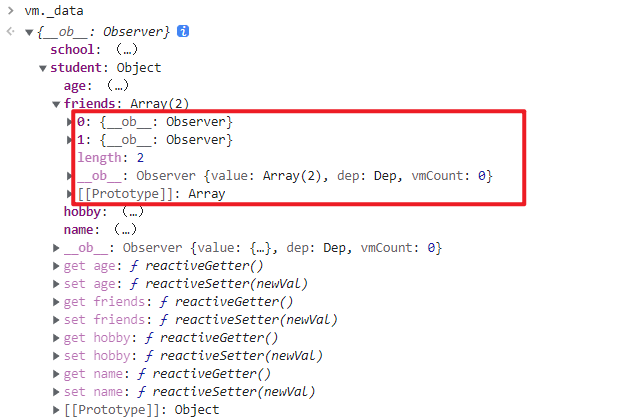
4. Vue监测数组数据的原理· 在vue实例对象上的数组,不像对象类型的数据那样,会为对象数据中的每个属性添加一个getter和setter方法,vue不会为数组数据中的每个元素添加一个getter和setter,即没有数组索引所对应的getter和setter方法。
1 中vue数据更新时问题的解释。
但是vue对数组Array上的会对原数组进行修改的方法进行了包装处理,使用vue包装的方法对数组进行修改,可以被vue监测到,从而实现页面的更新。
Vue包装的Array方法如下:push() pop() shift() unshift() splice() sort() reverse()
使用set方法对数组的元素进行修改,vue也可以监测得到
如果使用上述的方法向数组中添加对象类型的数据,vue为新的对象数据中的属性添加对应的getter和setter方法。
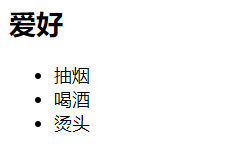
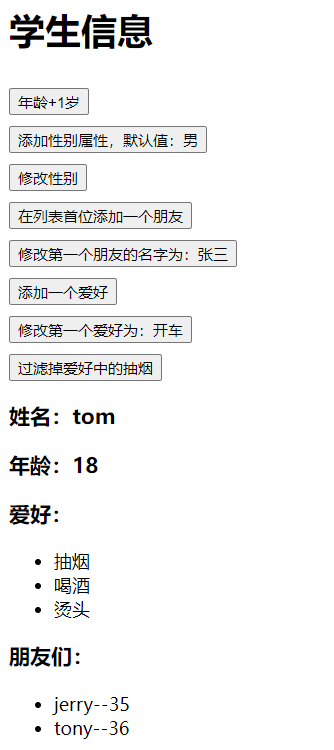
5. 练习· 5.1 题· 1 2 3 4 5 6 7 8 9 10 11 12 13 14 15 16 17 18 19 20 21 22 23 24 25 26 27 28 29 30 31 32 33 34 35 36 37 38 39 40 41 42 43 44 45 46 47 48 49 50 51 52 53 54 55 56 57 58 59 60 61 62 63 64 65 <!DOCTYPE html > <html > <head > <meta charset ="UTF-8" /> <title > 总结数据监视</title > <style > button { margin-top : 10px ; } </style > <script src ="https://cdn.jsdelivr.net/npm/vue@2.6.14/dist/vue.js" > </script > </head > <body > <div id ="root" > <h1 > 学生信息</h1 > <button @click ="" > 年龄+1岁</button > <br /> <button @click ="" > 添加性别属性,默认值:男</button > <br /> <button @click ="" > 修改性别</button > <br /> <button @click ="" > 在列表首位添加一个朋友</button > <br /> <button @click ="" > 修改第一个朋友的名字为:张三</button > <br /> <button @click ="" > 添加一个爱好</button > <br /> <button @click ="" > 修改第一个爱好为:开车</button > <br /> <button @click ="" > 过滤掉爱好中的抽烟</button > <br /> <h3 > 姓名:{{student.name}}</h3 > <h3 > 年龄:{{student.age}}</h3 > <h3 v-if ="student.sex" > 性别:{{student.sex}}</h3 > <h3 > 爱好:</h3 > <ul > <li v-for ="(h,index) in student.hobby" :key ="index" > {{h}} </li > </ul > <h3 > 朋友们:</h3 > <ul > <li v-for ="(f,index) in student.friends" :key ="index" > {{f.name}}--{{f.age}} </li > </ul > </div > </body > <script type ="text/javascript" > Vue .config .productionTip = false const vm = new Vue ({ el :'#root' , data :{ student :{ name :'tom' , age :18 , hobby :['抽烟' ,'喝酒' ,'烫头' ], friends :[ {name :'jerry' ,age :35 }, {name :'tony' ,age :36 } ] } }, methods : { } }) </script > </html >
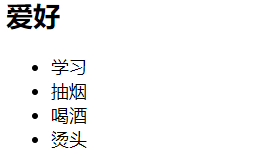
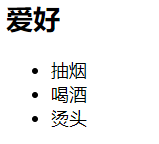
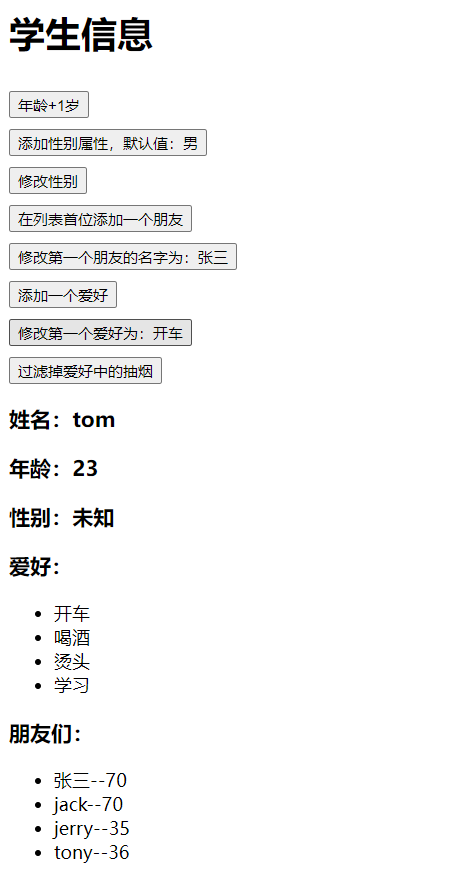
5.2 功能实现· 1 2 3 4 5 6 7 8 9 10 11 12 13 14 15 16 17 18 19 20 21 22 23 24 25 26 27 28 29 30 31 32 33 34 35 36 37 38 39 40 41 42 43 44 45 46 47 48 49 50 51 52 53 54 55 56 57 58 59 60 61 62 63 64 65 66 67 68 69 70 71 72 73 74 75 76 77 78 79 80 81 82 83 84 85 86 87 88 89 90 91 92 93 94 <!DOCTYPE html > <html > <head > <meta charset ="UTF-8" /> <title > 总结数据监视</title > <style > button { margin-top : 10px ; } </style > <script src ="https://cdn.jsdelivr.net/npm/vue@2.6.14/dist/vue.js" > </script > </head > <body > <div id ="root" > <h1 > 学生信息</h1 > <button @click ="student.age++" > 年龄+1岁</button > <br /> <button @click ="addSex" > 添加性别属性,默认值:男</button > <br /> <button @click ="student.sex = '未知' " > 修改性别</button > <br /> <button @click ="addFriend" > 在列表首位添加一个朋友</button > <br /> <button @click ="updateFirstFriendName" > 修改第一个朋友的名字为:张三</button > <br /> <button @click ="addHobby" > 添加一个爱好</button > <br /> <button @click ="updateHobby" > 修改第一个爱好为:开车</button > <br /> <button @click ="removeSmoke" > 过滤掉爱好中的抽烟</button > <br /> <h3 > 姓名:{{student.name}}</h3 > <h3 > 年龄:{{student.age}}</h3 > <h3 v-if ="student.sex" > 性别:{{student.sex}}</h3 > <h3 > 爱好:</h3 > <ul > <li v-for ="(h,index) in student.hobby" :key ="index" > {{h}} </li > </ul > <h3 > 朋友们:</h3 > <ul > <li v-for ="(f,index) in student.friends" :key ="index" > {{f.name}}--{{f.age}} </li > </ul > </div > </body > <script type ="text/javascript" > Vue .config .productionTip = false const vm = new Vue ({ el :'#root' , data :{ student :{ name :'tom' , age :18 , hobby :['抽烟' ,'喝酒' ,'烫头' ], friends :[ {name :'jerry' ,age :35 }, {name :'tony' ,age :36 } ] } }, methods : { addSex ( this .$set(this .student ,'sex' ,'男' ) }, addFriend ( this .student .friends .unshift ({name :'jack' ,age :70 }) }, updateFirstFriendName ( this .student .friends [0 ].name = '张三' }, addHobby ( this .student .hobby .push ('学习' ) }, updateHobby ( this .$set(this .student .hobby ,0 ,'开车' ) }, removeSmoke ( this .student .hobby = this .student .hobby .filter ((h )=> { return h !== '抽烟' }) } } }) </script > </html >
6. 总结 Vue监视数据的原理· vue会监视data中所有层次的数据。 如何监测对象中的数据?通过setter实现监视,且要在new Vue时就传入要监测的数据。(1).对象中后追加的属性,Vue默认不做响应式处理 (2).如需给后添加的属性做响应式,请使用如下API:Vue.set(target,propertyName/index,value) 或vm.$set(target,propertyName/index,value) 如何监测数组中的数据?通过包裹数组更新元素的方法实现,本质就是做了两件事:(1).调用原生对应的方法对数组进行更新。 (2).重新解析模板,进而更新页面。 在Vue修改数组中的某个元素一定要用如下方法:1.使用这些API:push()、pop()、shift()、unshift()、splice()、sort()、reverse() 2.Vue.set() 或 vm.$set() 3.对于不会修改原数组的方法,如:filter()、concat() 和 slice(),它们不会变更原始数组,而总是返回一个新数组。当使用非变更方法时,可以用新数组替换旧数组 特别注意:Vue.set() 和 vm.$set() 不能给 vm 或 vm的根数据对象 添加属性 ! ! ! 数据劫持,数据由原来的形式变为具有getter和setter的形式。
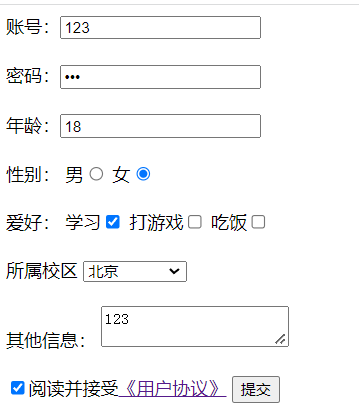
v-model收集表单数据· 1. 用于数据收集的页面· 1 2 3 4 5 6 7 8 9 10 11 12 13 14 15 16 17 18 19 20 21 22 23 24 25 26 27 28 29 30 31 32 33 34 35 36 37 38 39 <!DOCTYPE html > <html > <head > <meta charset ="UTF-8" /> <title > 收集表单数据</title > <script src ="https://cdn.jsdelivr.net/npm/vue@2.6.14/dist/vue.js" > </script > </head > <body > <div id ="root" > <form @submit.prevent ="demo" > 账号:<input type ="text" > <br /> <br /> 密码:<input type ="password" > <br /> <br /> 年龄:<input type ="number" > <br /> <br /> 性别: 男<input type ="radio" name ="sex" > 女<input type ="radio" name ="sex" > <br /> <br /> 爱好: 学习<input type ="checkbox" > 打游戏<input type ="checkbox" > 吃饭<input type ="checkbox" > <br /> <br /> 所属校区 <select > <option value ="" > 请选择校区</option > <option value ="beijing" > 北京</option > <option value ="shanghai" > 上海</option > <option value ="shenzhen" > 深圳</option > <option value ="wuhan" > 武汉</option > </select > <br /> <br /> 其他信息: <textarea > </textarea > <br /> <br /> <input type ="checkbox" > 阅读并接受<a href ="http://www.atguigu.com" > 《用户协议》</a > <button > 提交</button > </form > </div > </body > </html >
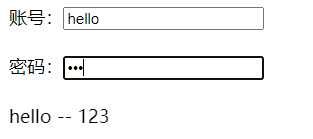
2. 输入框的数据收集· 1 2 3 4 5 6 7 8 9 10 11 12 13 14 15 16 17 18 19 20 21 22 23 24 25 26 27 <!DOCTYPE html > <html lang ="en" > <head > <meta charset ="UTF-8" /> <meta http-equiv ="X-UA-Compatible" content ="IE=edge" /> <meta name ="viewport" content ="width=device-width, initial-scale=1.0" /> <title > Document</title > </head > <body > <div id ="root" > 账号:<input type ="text" v-model ="account" /> <br /> <br /> 密码:<input type ="password" v-model ="password" /> <br /> <br /> {{account}} -- {{password}} </div > </body > <script src ="https://cdn.jsdelivr.net/npm/vue@2.6.14/dist/vue.js" > </script > <script > const vm = new Vue ({ el : '#root' , data : { account : '' , password : '' }, }) </script > </html >
3. 单选框(radio)的数据收集· 由于v-model默认收集的为表单的value属性的值,所以使用v-model收集单选框的数据时,需要先为单选框标签设置value及其对应的值。
1 2 3 4 5 6 7 8 9 10 11 12 13 14 15 16 17 18 19 20 21 22 23 24 25 26 27 28 29 30 31 32 33 34 <!DOCTYPE html > <html lang ="en" > <head > <meta charset ="UTF-8" /> <meta http-equiv ="X-UA-Compatible" content ="IE=edge" /> <meta name ="viewport" content ="width=device-width, initial-scale=1.0" /> <title > Document</title > </head > <body > <div id ="root" > 性别: 男<input type ="radio" name ="s" v-model ="sex" value ="male" > 女<input type ="radio" name ="s" v-model ="sex" value ="female" > <br /> <br /> 性别:{{sex}} </div > </body > <script src ="https://cdn.jsdelivr.net/npm/vue@2.6.14/dist/vue.js" > </script > <script > const vm = new Vue ({ el : '#root' , data : { sex : 'male' }, }) </script > </html >
4. 复选框(checkbox)的数据收集· 对于复选框,如果没有指定value属性,则v-model默认收集的为复选框表单上的checked属性的值(true/false)。
1 2 3 4 5 6 7 8 9 10 11 12 13 14 15 16 17 18 19 20 21 22 23 24 25 26 27 28 29 30 31 32 <!DOCTYPE html > <html lang ="en" > <head > <meta charset ="UTF-8" /> <meta http-equiv ="X-UA-Compatible" content ="IE=edge" /> <meta name ="viewport" content ="width=device-width, initial-scale=1.0" /> <title > Document</title > </head > <body > <div id ="root" > 爱好: 学习<input type ="checkbox" v-model ="hobby" value ="study" > 打游戏<input type ="checkbox" v-model ="hobby" value ="game" > 吃饭<input type ="checkbox" v-model ="hobby" value ="eat" > <br /> <br /> 爱好:{{hobby}} </div > </body > <script src ="https://cdn.jsdelivr.net/npm/vue@2.6.14/dist/vue.js" > </script > <script > const vm = new Vue ({ el : '#root' , data : { hobby : [] }, }) </script > </html >
5. 下拉选择框(select)的数据收集· 1 2 3 4 5 6 7 8 9 10 11 12 13 14 15 16 17 18 19 20 21 22 23 24 25 26 27 28 29 30 31 32 33 34 <!DOCTYPE html > <html lang ="en" > <head > <meta charset ="UTF-8" /> <meta http-equiv ="X-UA-Compatible" content ="IE=edge" /> <meta name ="viewport" content ="width=device-width, initial-scale=1.0" /> <title > Document</title > </head > <body > <div id ="root" > 所属校区: <select v-model ="city" > <option value ="" > 请选择校区</option > <option value ="beijing" > 北京</option > <option value ="shanghai" > 上海</option > <option value ="shenzhen" > 深圳</option > <option value ="wuhan" > 武汉</option > </select > <br /> <br /> 所属校区: {{city}} </div > </body > <script src ="https://cdn.jsdelivr.net/npm/vue@2.6.14/dist/vue.js" > </script > <script > const vm = new Vue ({ el : '#root' , data : { city : 'beijing' }, }) </script > </html >
6. textarea的数据收集· 1 2 3 4 5 6 7 8 9 10 11 12 13 14 15 16 17 18 19 20 21 22 23 24 25 26 <!DOCTYPE html > <html lang ="en" > <head > <meta charset ="UTF-8" /> <meta http-equiv ="X-UA-Compatible" content ="IE=edge" /> <meta name ="viewport" content ="width=device-width, initial-scale=1.0" /> <title > Document</title > </head > <body > <div id ="root" > 其他信息: <textarea v-model ="other" > </textarea > <br /> <br /> 其他信息: {{other}} </div > </body > <script src ="https://cdn.jsdelivr.net/npm/vue@2.6.14/dist/vue.js" > </script > <script > const vm = new Vue ({ el : '#root' , data : { other : '' }, }) </script > </html >
7. 复选框收集checked值· 1 <input type ="checkbox" > 阅读并接受<a href ="http://www.atguigu.com" > 《用户协议》</a >
对于此种情况的复选框,我们只需要收集复选框选择/不选的信息即可,此时不要value值,所以不需要配置value值,可以直接收集其checked的值即可。
1 2 3 4 5 6 7 8 9 10 11 12 13 14 15 16 17 18 19 20 21 22 23 24 25 <!DOCTYPE html > <html lang ="en" > <head > <meta charset ="UTF-8" /> <meta http-equiv ="X-UA-Compatible" content ="IE=edge" /> <meta name ="viewport" content ="width=device-width, initial-scale=1.0" /> <title > Document</title > </head > <body > <div id ="root" > <input type ="checkbox" v-model ="agree" > 阅读并接受<a href ="http://www.atguigu.com" > 《用户协议》</a > 是否同意: {{agree}} </div > </body > <script src ="https://cdn.jsdelivr.net/npm/vue@2.6.14/dist/vue.js" > </script > <script > const vm = new Vue ({ el : '#root' , data : { agree : '' }, }) </script > </html >
8. v-model修饰符· 为了方便对用户输入的内容进行处理,vue 为 v-model 指令提供了 3 个修饰符,分别是:
修饰符 作用 示例 .number 自动将用户的输入值转为数值类型 <input v-model.number="age" />.trim 自动去除用户输入的首尾空白字符 <input v-model.trim="msg" />.lazy 在失去焦点时更新数据 <input v-model.lazy="msg" />
9. v-model收集表单数据完整代码· 1 2 3 4 5 6 7 8 9 10 11 12 13 14 15 16 17 18 19 20 21 22 23 24 25 26 27 28 29 30 31 32 33 34 35 36 37 38 39 40 41 42 43 44 45 46 47 48 49 50 51 52 53 54 55 56 57 58 59 60 61 62 63 64 65 <!DOCTYPE html > <html > <head > <meta charset ="UTF-8" /> <title > 收集表单数据</title > <script src ="https://cdn.jsdelivr.net/npm/vue@2.6.14/dist/vue.js" > </script > </head > <body > <div id ="root" > <form @submit.prevent ="demo" > 账号:<input type ="text" v-model.trim ="userInfo.account" /> <br /> <br /> 密码:<input type ="password" v-model ="userInfo.password" /> <br /> <br /> 年龄:<input type ="number" v-model.number ="userInfo.age" /> <br /> <br /> 性别: 男<input type ="radio" name ="sex" v-model ="userInfo.sex" value ="male" /> 女<input type ="radio" name ="sex" v-model ="userInfo.sex" value ="female" /> <br /> <br /> 爱好: 学习<input type ="checkbox" v-model ="userInfo.hobby" value ="study" /> 打游戏<input type ="checkbox" v-model ="userInfo.hobby" value ="game" /> 吃饭<input type ="checkbox" v-model ="userInfo.hobby" value ="eat" /> <br /> <br /> 所属校区 <select v-model ="userInfo.city" > <option value ="" > 请选择校区</option > <option value ="beijing" > 北京</option > <option value ="shanghai" > 上海</option > <option value ="shenzhen" > 深圳</option > <option value ="wuhan" > 武汉</option > </select > <br /> <br /> 其他信息: <textarea v-model.lazy ="userInfo.other" > </textarea > <br /> <br /> <input type ="checkbox" v-model ="userInfo.agree" /> 阅读并接受<a href ="http://www.atguigu.com" > 《用户协议》</a > <button > 提交</button > </form > </div > </body > <script type ="text/javascript" > Vue .config .productionTip = false new Vue ({ el : '#root' , data : { userInfo : { account : '' , password : '' , age : 18 , sex : 'female' , hobby : [], city : 'beijing' , other : '' , agree : '' , }, }, methods : { demo ( console .log (JSON .stringify (this .userInfo )) }, }, }) </script > </html >
10. 总结 收集表单数据· 若:<input type="text"/>,则v-model收集的是value值,用户输入的就是value值。 若:<input type="radio"/>,则v-model收集的是value值,且要给标签配置value值。 若:<input type="checkbox"/>1.没有配置input的value属性,那么收集的就是checked(勾选 or 未勾选,是布尔值) 2.配置input的value属性:(1)v-model的初始值是非数组,那么收集的就是checked(勾选 or 未勾选,是布尔值) (2)v-model的初始值是数组,那么收集的的就是value组成的数组 备注:v-model的三个修饰符:lazy:失去焦点再收集数据 number:输入字符串转为有效的数字 trim:输入首尾空格过滤 过滤器· 1. 需要实现的案例效果·
2. 时间格式化包· 第三方包获取:BootCDN
2.1 moment.js· moment.js
Moment.js 是一个 JavaScript 日期处理类库,用于解析、检验、操作、以及显示日期。
moment.js中文文档
2.2 day.js· day.js
Day.js 是一个轻量的处理时间和日期的 JavaScript 库,和 Moment.js 的 API 设计保持完全一样.
day.js的GitHub仓库(参考文档)
这里使用的是day.js
3. 计算属性与方法实现· 3.1 计算属性实现· 1 2 3 4 5 6 7 8 9 10 11 12 13 14 15 16 17 18 19 20 21 22 23 24 25 26 27 28 29 30 31 32 33 34 35 <!DOCTYPE html > <html lang ="en" > <head > <meta charset = "UTF-8" > <meta http-equiv ="X-UA-Compatible" content ="IE=edge" > <meta name ="viewport" content ="width=device-width, initial-scale=1.0" > <title > Document</title > </head > <body > <div id ="root" > <h1 > 时间戳转换</h1 > <h2 > 当前时间的时间戳:{{time}}</h2 > <h2 > 当前时间:{{nowDateTime}}</h2 > </div > </body > <script src ="https://cdn.bootcdn.net/ajax/libs/dayjs/1.11.5/dayjs.min.js" > </script > <script src ="https://cdn.jsdelivr.net/npm/vue@2.6.14/dist/vue.js" > </script > <script > const vm = new Vue ({ el : '#root' , data : { time : Date .now () }, computed : { nowDateTime ( return dayjs (this .time ).format ('YYYY-MM-DD HH:mm:ss' ); } } }) </script > </html >
3.2 方法实现· 1 2 3 4 5 6 7 8 9 10 11 12 13 14 15 16 17 18 19 20 21 22 23 24 25 26 27 28 29 30 31 32 33 34 35 <!DOCTYPE html > <html lang ="en" > <head > <meta charset = "UTF-8" > <meta http-equiv ="X-UA-Compatible" content ="IE=edge" > <meta name ="viewport" content ="width=device-width, initial-scale=1.0" > <title > Document</title > </head > <body > <div id ="root" > <h1 > 时间戳转换</h1 > <h2 > 当前时间的时间戳:{{time}}</h2 > <h2 > 当前时间:{{getDateTime()}}</h2 > </div > </body > <script src ="https://cdn.bootcdn.net/ajax/libs/dayjs/1.11.5/dayjs.min.js" > </script > <script src ="https://cdn.jsdelivr.net/npm/vue@2.6.14/dist/vue.js" > </script > <script > const vm = new Vue ({ el : '#root' , data : { time : Date .now () }, methods : { getDateTime ( return dayjs (this .time ).format ('YYYY-MM-DD HH:mm:ss' ); } }, }) </script > </html >
4. 过滤器· Vue3 弃用
过滤器(Filters)是 vue 为开发者提供的功能,常用于文本或数据的格式化。例如上述时间戳的格式化。
过滤器可以用在两个地方:插值表达式和 v-bind 属性绑定。
4.1 语法· 过滤器应该被添加在 JavaScript 表达式的尾部,由“管道符 |”进行调用
过滤器的本质为函数
1 2 3 使用在插值表达式中: {{需要格式化的数据 | 过滤器函数}}
4.2 过滤器实现时间戳的转换· 在 filters 节点中定义过滤器。
1 2 3 4 5 6 7 8 9 10 11 12 13 14 15 16 17 18 19 20 21 22 23 24 25 26 27 28 29 30 31 32 33 34 35 36 <!DOCTYPE html > <html lang ="en" > <head > <meta charset = "UTF-8" > <meta http-equiv ="X-UA-Compatible" content ="IE=edge" > <meta name ="viewport" content ="width=device-width, initial-scale=1.0" > <title > Document</title > </head > <body > <div id ="root" > <h1 > 时间戳转换</h1 > <h2 > 当前时间的时间戳:{{time}}</h2 > <h2 > 当前时间:{{time | getDateTime}}</h2 > </div > </body > <script src ="https://cdn.bootcdn.net/ajax/libs/dayjs/1.11.5/dayjs.min.js" > </script > <script src ="https://cdn.jsdelivr.net/npm/vue@2.6.14/dist/vue.js" > </script > <script > const vm = new Vue ({ el : '#root' , data : { time : Date .now () }, filters : { getDateTime ( return dayjs (this .time ).format ('YYYY-MM-DD HH:mm:ss' ); } } }) </script > </html >
4.3 过滤器的执行过程·
4.4 向过滤器传递其他参数· 现在要实现一个功能,在使用过滤器处理对应的数据时,可以传递参数来指定处理后的数据的格式。
1 2 3 4 5 6 7 8 9 10 11 12 13 14 15 16 17 18 19 20 21 22 23 24 25 26 27 28 29 30 31 32 33 34 35 36 37 38 39 40 41 <!DOCTYPE html > <html lang ="en" > <head > <meta charset = "UTF-8" > <meta http-equiv ="X-UA-Compatible" content ="IE=edge" > <meta name ="viewport" content ="width=device-width, initial-scale=1.0" > <title > Document</title > </head > <body > <div id ="root" > <h1 > 时间戳转换</h1 > <h2 > 当前时间的时间戳:{{time}}</h2 > <h2 > 当前时间:{{time | getDateTime('YYYY/MM/DD')}}</h2 > </div > </body > <script src ="https://cdn.bootcdn.net/ajax/libs/dayjs/1.11.5/dayjs.min.js" > </script > <script src ="https://cdn.jsdelivr.net/npm/vue@2.6.14/dist/vue.js" > </script > <script > const vm = new Vue ({ el : '#root' , data : { time : Date .now () }, filters : { getDateTime (value, formatStr='YYYY-MM-DD HH:mm:ss' ) { return dayjs (value).format (formatStr); } } }) </script > </html >
4.5 串联调用过滤器· 串联调用过滤器,过滤器的执行顺序为从左到右,第一个调用的过滤器的参数为将要进行格式化处理的数据,此后每个过滤器的参数为前一个过滤器的返回结果。
1 2 3 4 5 6 7 8 9 10 11 12 13 14 15 16 17 18 19 20 21 22 23 24 25 26 27 28 29 30 31 32 33 34 35 36 37 <!DOCTYPE html > <html lang ="en" > <head > <meta charset = "UTF-8" > <meta http-equiv ="X-UA-Compatible" content ="IE=edge" > <meta name ="viewport" content ="width=device-width, initial-scale=1.0" > <title > Document</title > </head > <body > <div id ="root" > <h1 > 时间戳转换</h1 > <h2 > 当前时间的时间戳:{{time}}</h2 > <h2 > 当前时间:{{time | getDateTime('YYYY/MM/DD') | mySlice}}</h2 > </div > </body > <script src ="https://cdn.bootcdn.net/ajax/libs/dayjs/1.11.5/dayjs.min.js" > </script > <script src ="https://cdn.jsdelivr.net/npm/vue@2.6.14/dist/vue.js" > </script > <script > const vm = new Vue ({ el : '#root' , data : { time : Date .now () }, filters : { getDateTime (value, formatStr='YYYY-MM-DD HH:mm:ss' ) { return dayjs (value).format (formatStr); }, mySlice (value ) { return value.slice (0 , 4 ) } } }) </script > </html >
4.6 定义全局过滤器· 以上的过滤器都是定义在一个vue实例中,为局部过滤器。
定义全局过滤器的语法:
1 Vue .filter ('过滤器名' , 对应的处理函数)
1 2 3 4 5 6 7 8 9 10 11 12 13 14 15 16 17 18 19 20 21 22 23 24 25 26 27 28 29 30 31 32 33 34 35 36 37 38 39 40 41 42 43 44 45 46 47 48 49 50 51 52 53 54 55 <!DOCTYPE html > <html lang ="en" > <head > <meta charset = "UTF-8" > <meta http-equiv ="X-UA-Compatible" content ="IE=edge" > <meta name ="viewport" content ="width=device-width, initial-scale=1.0" > <title > Document</title > </head > <body > <div id ="root" > <h1 > 时间戳转换</h1 > <h2 > 当前时间的时间戳:{{time}}</h2 > <h2 > 当前时间:{{time | getDateTime('YYYY/MM/DD') | mySlice}}</h2 > </div > <div id ="root2" > <h1 > 时间戳转换</h1 > <h2 > 当前时间:{{time}}</h2 > <h2 > 当前时间:{{time | mySlice}}</h2 > </div > </body > <script src ="https://cdn.bootcdn.net/ajax/libs/dayjs/1.11.5/dayjs.min.js" > </script > <script src ="https://cdn.jsdelivr.net/npm/vue@2.6.14/dist/vue.js" > </script > <script > Vue .filter ('mySlice' , function (value ) { return value.slice (0 , 4 ) }) const vm = new Vue ({ el : '#root' , data : { time : Date .now () }, filters : { getDateTime (value, formatStr='YYYY-MM-DD HH:mm:ss' ) { return dayjs (value).format (formatStr); } } }) const vm2 = new Vue ({ el : '#root2' , data : { time : '2022/10/10' } }) </script > </html >
4.7 在v-bind中使用过滤器· 语法:
1 v-bind:属性 = "xxx | 过滤器名"
1 2 3 4 5 6 7 8 9 10 11 12 13 14 15 16 17 18 19 20 21 22 23 24 25 26 27 28 29 30 31 32 33 34 35 36 37 38 39 40 41 <!DOCTYPE html > <html lang ="en" > <head > <meta charset = "UTF-8" > <meta http-equiv ="X-UA-Compatible" content ="IE=edge" > <meta name ="viewport" content ="width=device-width, initial-scale=1.0" > <title > Document</title > </head > <body > <div id ="root" > <h1 > 时间戳转换</h1 > <h2 > 当前时间的时间戳:{{time}}</h2 > <h2 > 当前时间:{{time | getDateTime('YYYY/MM/DD') | mySlice}}</h2 > <p :x ="time | getDateTime('YYYY/MM/DD') | mySlice" > </p > </div > </body > <script src ="https://cdn.bootcdn.net/ajax/libs/dayjs/1.11.5/dayjs.min.js" > </script > <script src ="https://cdn.jsdelivr.net/npm/vue@2.6.14/dist/vue.js" > </script > <script > Vue .filter ('mySlice' , function (value ) { return value.slice (0 , 4 ) }) const vm = new Vue ({ el : '#root' , data : { time : Date .now () }, filters : { getDateTime (value, formatStr='YYYY-MM-DD HH:mm:ss' ) { return dayjs (value).format (formatStr); } } }) </script > </html >
5. 总结 过滤器· 定义:对要显示的数据进行特定格式化后再显示(适用于一些简单逻辑的处理)。 语法:1.注册过滤器:Vue.filter(name,callback) 或 new Vue{filters:{}} 2.使用过滤器:{{ xxx | 过滤器名}} 或 v-bind:属性 = "xxx | 过滤器名" 备注:1.过滤器也可以接收额外参数、多个过滤器也可以串联 2.并没有改变原本的数据, 是产生新的对应的数据 Vue的其他内置指令· 1. 学过的指令的总结· v-bind : 单向绑定解析表达式, 可简写为 :xxx v-model : 双向数据绑定 v-for : 遍历数组/对象/字符串 v-on : 绑定事件监听, 可简写为@ v-if : 条件渲染(动态控制节点是否存存在) v-else : 条件渲染(动态控制节点是否存存在) v-show : 条件渲染 (动态控制节点是否展示) 2. v-text 指令· v-text 指令的作用:向其所在的节点中渲染文本内容。
v-text 指令与插值语法的区别:v-text会替换掉节点中的内容,即会覆盖元素内部原有的内容,而插值语法则不会。
1 2 3 4 5 6 7 8 9 10 11 12 13 14 15 16 17 18 19 20 21 22 23 24 <!DOCTYPE html > <html lang ="en" > <head > <meta charset = "UTF-8" > <meta http-equiv ="X-UA-Compatible" content ="IE=edge" > <meta name ="viewport" content ="width=device-width, initial-scale=1.0" > <title > Document</title > </head > <body > <div id ="root" > <h2 > 你好,{{name}}</h2 > <h2 v-text ="name" > 你好,</h2 > </div > </body > <script src ="https://cdn.jsdelivr.net/npm/vue@2.6.14/dist/vue.js" > </script > <script > const vm = new Vue ({ el : '#root' , data : { name : '张三' } }) </script > </html >
3. v-html 指令· v-text和插值表达式只能渲染纯文本内容,如果要把包含html标签的字符串渲染为页面的html元素,需要使用v-html。
v-html 指令可以向指定节点中渲染包含html结构的内容。
v-html 也会替换掉节点中的内容,即会覆盖元素内部原有的内容。
3.1 示例· 1 2 3 4 5 6 7 8 9 10 11 12 13 14 15 16 17 18 19 20 21 22 23 24 25 <!DOCTYPE html > <html lang ="en" > <head > <meta charset = "UTF-8" > <meta http-equiv ="X-UA-Compatible" content ="IE=edge" > <meta name ="viewport" content ="width=device-width, initial-scale=1.0" > <title > Document</title > </head > <body > <div id ="root" > <div > {{str}}</div > <div v-text ="str" > 你好</div > <div v-html ="str" > 你好</div > </div > </body > <script src ="https://cdn.jsdelivr.net/npm/vue@2.6.14/dist/vue.js" > </script > <script > const vm = new Vue ({ el : '#root' , data : { str : '<h1>hello world</h1>' } }) </script > </html >
3.2 v-html 的安全性问题· 1 2 3 4 5 6 7 8 9 10 11 12 13 14 15 16 17 18 19 20 21 22 23 24 25 26 27 28 29 30 31 32 33 34 35 36 <!DOCTYPE html > <html > <head > <meta charset ="UTF-8" /> <title > v-html指令</title > <script src ="https://cdn.jsdelivr.net/npm/vue@2.6.14/dist/vue.js" > </script > </head > <body > <div id ="root" > <div > 你好,{{name}}</div > <div v-html ="str" > </div > <div v-html ="str2" > </div > </div > </body > <script type ="text/javascript" > Vue .config .productionTip = false new Vue ({ el :'#root' , data :{ name :'尚硅谷' , str :'<h3>你好啊!</h3>' , str2 :'<a href=javascript:location.href="http://www.baidu.com?"+document.cookie>兄弟我找到你想要的资源了,快来!</a>' , } }) </script > </html >
3.3 v-html 总结· v-html 作用:向指定节点中渲染包含html结构的内容。 与插值语法的区别:(1).v-html会替换掉节点中所有的内容,则不会。 (2).v-html可以识别html结构。 严重注意:v-html有安全性问题!!!!(1).在网站上动态渲染任意HTML是非常危险的,容易导致XSS攻击(冒充用户之手) 。 (2).一定要在可信的内容上使用v-html,永不要用在用户提交的内容上! 4. v-cloak 指令· v-cloak指令没有值,本质是一个特殊属性,Vue实例创建完毕并接管容器后,会删掉v-cloak属性。使用css配合v-cloak可以解决网速慢时页面展示出的问题。
1 2 3 4 5 6 7 8 9 10 11 12 13 14 15 16 17 18 19 20 21 22 23 24 25 26 27 28 29 30 31 32 33 34 35 36 37 38 <!DOCTYPE html > <html > <head > <meta charset ="UTF-8" /> <title > v-cloak指令</title > <style > [v-cloak] { display :none; } </style > </head > <body > <div id ="root" > <h2 v-cloak > {{name}}</h2 > </div > <script type ="text/javascript" src ="http://localhost:8080/resource/5s/vue.js" > </script > </body > <script type ="text/javascript" > console .log (1 ) Vue .config .productionTip = false new Vue ({ el :'#root' , data :{ name :'尚硅谷' } }) </script > </html >
5. v-once 指令· v-once 所在节点在初次动态渲染后,就视为静态内容了。以后数据的改变不会引起v-once所在结构的更新,可以用于优化性能。
示例:
1 2 3 4 5 6 7 8 9 10 11 12 13 14 15 16 17 18 19 20 21 22 23 24 25 26 27 28 29 30 <!DOCTYPE html > <html > <head > <meta charset ="UTF-8" /> <title > v-once指令</title > <script src ="https://cdn.jsdelivr.net/npm/vue@2.6.14/dist/vue.js" > </script > </head > <body > <div id ="root" > <h2 v-once > 初始化的n值是:{{n}}</h2 > <h2 > 当前的n值是:{{n}}</h2 > <button @click ="n++" > 点我n+1</button > </div > </body > <script type ="text/javascript" > Vue .config .productionTip = false new Vue ({ el :'#root' , data :{ n :1 } }) </script > </html >
6. v-pre 指令· v-pre指令能够使vue跳过其所在节点的编译过程,即在代码中写的什么样在页面中就显示什么,vue不会对v-pre所在的节点进行渲染。
可利用 v-pre 指令跳过 没有使用指令语法、没有使用插值语法 的节点,会加快编译。
1 2 3 4 5 6 7 8 9 10 11 12 13 14 15 16 17 18 19 20 21 22 23 24 25 26 27 28 29 30 <!DOCTYPE html > <html > <head > <meta charset ="UTF-8" /> <title > v-pre指令</title > <script type ="text/javascript" src ="../js/vue.js" > </script > </head > <body > <div id ="root" > <h2 v-pre > Vue其实很简单</h2 > <h2 v-pre > 当前的n值是:{{n}}</h2 > <button v-pre @click ="n++" > 点我n+1</button > <h2 > 当前的n值是:{{n}}</h2 > <button @click ="n++" > 点我n+1</button > </div > </body > <script type ="text/javascript" > Vue .config .productionTip = false new Vue ({ el :'#root' , data :{ n :1 } }) </script > </html >
自定义指令· 1. 自定义指令· 在vue中支持自定义指令,自定义指令声明在vue的directives节点中。
自定义指令本质为一个函数。
1.1 语法· 定义自定义指令有两种形式的写法:
函数形式
1 2 3 4 5 new Vue ({ directives : { 指令名(参数列表) {} } })
对象形式
1 2 3 4 5 6 7 8 9 new Vue ({ directives : { 指令名: { k : v, k : v, ... } } })
使用自定义指令,需要使用v-指令名的形式。
1.2 自定义指令的参数· 自定义指令的处理函数接收两个参数,第一个参数为使用自定义指令的DOM元素(element),第二个参数为指令的绑定信息(binding)。
2. 自定义指令实现数值放大10倍· 需要实现的需求:定义一个v-big指令,和v-text功能类似,但会把绑定的数值放大10倍。
2.1 查看自定义指令的参数· 1 2 3 4 5 6 7 8 9 10 11 12 13 14 15 16 17 18 19 20 21 22 23 24 25 26 27 28 29 30 31 32 33 34 <!DOCTYPE html > <html lang ="en" > <head > <meta charset ="UTF-8" /> <meta http-equiv ="X-UA-Compatible" content ="IE=edge" /> <meta name ="viewport" content ="width=device-width, initial-scale=1.0" /> <title > Document</title > </head > <body > <div id ="root" > <h2 > n的值为: {{n}}</h2 > <h2 > n放大10倍对应的值为: <span v-big ="n" > </span > </h2 > <button @click ="n++" > n++</button > </div > </body > <script src ="https://cdn.jsdelivr.net/npm/vue@2.6.14/dist/vue.js" > </script > <script > const vm = new Vue ({ el : '#root' , data : { n : 0 , }, directives : { big (element, bingding ) { console .log ('element: ' ) console .log (element) console .log ('binding: ' ) console .log (bingding) }, }, }) </script > </html >
2.2 需求的实现· 实现把绑定的数值放大10倍,然后将放大后的数值放到DOM元素上,需要我们操作DOM元素。
1 2 3 4 5 6 7 8 9 10 11 12 13 14 15 16 17 18 19 20 21 22 23 24 25 26 27 28 29 30 31 32 33 <!DOCTYPE html > <html lang ="en" > <head > <meta charset ="UTF-8" /> <meta http-equiv ="X-UA-Compatible" content ="IE=edge" /> <meta name ="viewport" content ="width=device-width, initial-scale=1.0" /> <title > Document</title > </head > <body > <div id ="root" > <h2 > n的值为: {{n}}</h2 > <h2 > n放大10倍对应的值为: <span v-big ="n" > </span > </h2 > <button @click ="n++" > n++</button > </div > </body > <script src ="https://cdn.jsdelivr.net/npm/vue@2.6.14/dist/vue.js" > </script > <script > const vm = new Vue ({ el : '#root' , data : { n : 0 , }, directives : { big (element, bingding ) { element.innerText = bingding.value * 10 }, }, }) </script > </html >
2.3 自定义指令调用的时机· 2.3.1 指令与元素成功绑定时(初始化页面)· 1 2 3 4 5 6 7 8 9 10 11 12 13 14 15 16 17 18 19 20 21 22 23 24 25 26 27 28 29 30 31 <!DOCTYPE html > <html lang ="en" > <head > <meta charset ="UTF-8" /> <meta http-equiv ="X-UA-Compatible" content ="IE=edge" /> <meta name ="viewport" content ="width=device-width, initial-scale=1.0" /> <title > Document</title > </head > <body > <div id ="root" > <h2 > n的值为: {{n}}</h2 > <h2 > n放大10倍对应的值为: <span v-big ="n" > </span > </h2 > <button @click ="n++" > n++</button > </div > </body > <script src ="https://cdn.jsdelivr.net/npm/vue@2.6.14/dist/vue.js" > </script > <script > const vm = new Vue ({ el : '#root' , data : { n : 0 , }, directives : { big (element, bingding ) { console .log ('自定义指令 big 被调用...' ) element.innerText = bingding.value * 10 }, }, }) </script > </html >
2.3.2 所在的模板被重新解析时· 自定义指令被调用的时机,不仅是在与自定义指令相关的数据改变时,只要自定义指令所在的模板被重新解析,自定义指令就会被调用。
1 2 3 4 5 6 7 8 9 10 11 12 13 14 15 16 17 18 19 20 21 22 23 24 25 26 27 28 29 30 31 32 33 34 35 <!DOCTYPE html > <html lang ="en" > <head > <meta charset ="UTF-8" /> <meta http-equiv ="X-UA-Compatible" content ="IE=edge" /> <meta name ="viewport" content ="width=device-width, initial-scale=1.0" /> <title > Document</title > </head > <body > <div id ="root" > <h2 > n的值为: {{n}}</h2 > <h2 > n放大10倍对应的值为: <span v-big ="n" > </span > </h2 > <button @click ="n++" > n++</button > <h2 > x的值为: {{x}}</h2 > <button @click ="x++" > x++</button > </div > </body > <script src ="https://cdn.jsdelivr.net/npm/vue@2.6.14/dist/vue.js" > </script > <script > const vm = new Vue ({ el : '#root' , data : { n : 0 , x : 100 }, directives : { big (element, bingding ) { console .log ('自定义指令 big 被调用...' ) element.innerText = bingding.value * 10 }, }, }) </script > </html >
需要实现的需求:定义一个v-fbind指令,和v-bind功能类似,但可以让其所绑定的input元素默认获取焦点。
3.1 需求实现· 1 2 3 4 5 6 7 8 9 10 11 12 13 14 15 16 17 18 19 20 21 22 23 24 25 26 27 28 29 30 31 32 33 34 35 36 37 38 39 <!DOCTYPE html > <html lang ="en" > <head > <meta charset ="UTF-8" /> <meta http-equiv ="X-UA-Compatible" content ="IE=edge" /> <meta name ="viewport" content ="width=device-width, initial-scale=1.0" /> <title > Document</title > </head > <body > <div id ="root" > <h2 > n的值为: {{n}}</h2 > <h2 > n放大10倍对应的值为: <span v-big ="n" > </span > </h2 > <button @click ="n++" > n++</button > <br > <br > <input type ="text" v-fbind:value ="n" > </div > </body > <script src ="https://cdn.jsdelivr.net/npm/vue@2.6.14/dist/vue.js" > </script > <script > const vm = new Vue ({ el : '#root' , data : { n : 0 }, directives : { big (element, bingding ) { element.innerText = bingding.value * 10 }, fbind (element, binding ) { element.value = binding.value element.focus () } }, }) </script > </html >
观察运行结果发现,input输入框并没有在最开始默认获取焦点,而是在点击按钮n+1后才自动获取焦点。
3.2 需求未实现的解释· 通过操作DOM元素,让input输入框获取焦点,操作时,input输入框必须出现在页面上,否则input输入框获取焦点的代码不会在正常的时机生效,就达不到我们所需要的效果。
使用js操作DOM进行模拟
1 2 3 4 5 6 7 8 9 10 11 12 13 14 15 16 17 18 19 20 21 22 23 24 25 26 <!DOCTYPE html > <html > <head > <meta charset ="UTF-8" /> <title > Document</title > </head > <body > <button id ="btn" > 创建一个输入框</button > <script type ="text/javascript" > const btn = document .getElementById ('btn' ) btn.onclick = ()=> { const input = document .createElement ('input' ) input.value = 99 document .body .appendChild (input) input.focus () console .log (input.parentElement ) } </script > </body > </html >
新建输入框并默认获取焦点的效果正常实现
1 2 3 4 5 6 7 8 9 10 11 12 13 14 15 16 17 18 19 20 21 22 23 24 25 26 27 28 29 <!DOCTYPE html > <html > <head > <meta charset ="UTF-8" /> <title > Document</title > </head > <body > <button id ="btn" > 创建一个输入框</button > <script type ="text/javascript" > const btn = document .getElementById ('btn' ) btn.onclick = ()=> { const input = document .createElement ('input' ) input.value = 99 input.focus () console .log (input.parentElement ) document .body .appendChild (input) } </script > </body > </html >
由于input输入框还未放入页面,所以无法操作input使其获取焦点,同时也无法获取input输入框的父元素。
与上述示例代码同理,在页面进行初始化时,vue会先进行解析,页面解析完成后才会将元素放入页面并进行展示,vue在解析时会先将指令与元素进行绑定,这个时候自定义指令中的处理函数会先执行一次,但是此时由于页面中的元素还未在页面上,所以处理函数中的让输入框获取焦点的代码无法正常生效。
点击按钮n+1后,input输入框会获取焦点,是由于n值改变,vue会对页面重新进行解析,此时输入框已经出现在页面中了,所以获取焦点的代码能够生效。
3.3 对象形式自定义指令· 为了解决该问题,可以使用对象形式自定义指令,在自定义指令对应的对象中,可以设置不同的函数,在自定义指令执行的不同时刻,vue会调用不同的函数。
对象形式自定义指令:
1 2 3 4 5 6 7 8 9 10 11 12 new Vue ({ directives : { 指令名: { bind ( inserted ( update ( } } })
1 2 3 4 5 6 7 8 9 10 11 12 13 14 15 16 17 18 19 20 21 22 23 24 25 26 27 28 29 30 31 32 33 34 35 36 37 38 39 40 41 42 43 44 45 46 47 <!DOCTYPE html > <html lang ="en" > <head > <meta charset ="UTF-8" /> <meta http-equiv ="X-UA-Compatible" content ="IE=edge" /> <meta name ="viewport" content ="width=device-width, initial-scale=1.0" /> <title > Document</title > </head > <body > <div id ="root" > <h2 > n的值为: {{n}}</h2 > <h2 > n放大10倍对应的值为: <span v-big ="n" > </span > </h2 > <button @click ="n++" > n++</button > <br /> <br /> <input type ="text" v-fbind:value ="n" /> </div > </body > <script src ="https://cdn.jsdelivr.net/npm/vue@2.6.14/dist/vue.js" > </script > <script > const vm = new Vue ({ el : '#root' , data : { n : 0 , }, directives : { big (element, bingding ) { element.innerText = bingding.value * 10 }, fbind : { bind ( console .log ('bind' ) }, inserted ( console .log ('inserted' ) }, update ( console .log ('update' ) }, }, }, }) </script > </html >
3.4 对象形式自定义指令实现需求· 1 2 3 4 5 6 7 8 9 10 11 12 13 14 15 16 17 18 19 20 21 22 23 24 25 26 27 28 29 30 31 32 33 34 35 36 37 38 39 40 41 42 43 44 45 46 47 48 49 50 51 <!DOCTYPE html > <html lang ="en" > <head > <meta charset ="UTF-8" /> <meta http-equiv ="X-UA-Compatible" content ="IE=edge" /> <meta name ="viewport" content ="width=device-width, initial-scale=1.0" /> <title > Document</title > </head > <body > <div id ="root" > <h2 > n的值为: {{n}}</h2 > <h2 > n放大10倍对应的值为: <span v-big ="n" > </span > </h2 > <button @click ="n++" > n++</button > <br /> <br /> <input type ="text" v-fbind:value ="n" /> </div > </body > <script src ="https://cdn.jsdelivr.net/npm/vue@2.6.14/dist/vue.js" > </script > <script > const vm = new Vue ({ el : '#root' , data : { n : 0 , }, directives : { big (element, bingding ) { element.innerText = bingding.value * 10 }, fbind : { bind (element,binding ) { element.value = binding.value }, inserted (element,binding ) { element.focus () }, update (element,binding ) { element.value = binding.value }, }, }, }) </script > </html >
4. 自定义指令注意点· 4.1 指令名多个单词之间使用短线符连接· 指令名多个单词之间使用短线符连接之后,在自定义指令的声明定义时,需要使用引号进行包裹。
1 2 3 4 5 6 7 8 9 10 directives : { 'big-number' (element, bingding) { element.innerText = bingding.value * 10 }, },
1 2 3 4 5 6 7 8 9 10 11 12 13 14 15 16 17 18 19 20 21 22 23 24 25 26 27 28 29 30 31 32 33 34 35 36 <!DOCTYPE html > <html lang ="en" > <head > <meta charset ="UTF-8" /> <meta http-equiv ="X-UA-Compatible" content ="IE=edge" /> <meta name ="viewport" content ="width=device-width, initial-scale=1.0" /> <title > Document</title > </head > <body > <div id ="root" > <h2 > n的值为: {{n}}</h2 > <h2 > n放大10倍对应的值为: <span v-big-number ="n" > </span > </h2 > <button @click ="n++" > n++</button > <br /> <br /> </div > </body > <script src ="https://cdn.jsdelivr.net/npm/vue@2.6.14/dist/vue.js" > </script > <script > const vm = new Vue ({ el : '#root' , data : { n : 0 , }, directives : { 'big-number' (element, bingding) { element.innerText = bingding.value * 10 }, }, }) </script > </html >
4.2 自定义指令中的this· 自定义指令中的this都指向window,不指向vue实例对象。
1 2 3 4 5 6 7 8 9 10 11 12 13 14 15 16 17 18 19 20 21 22 23 24 25 26 27 28 29 30 31 32 33 <!DOCTYPE html > <html lang ="en" > <head > <meta charset ="UTF-8" /> <meta http-equiv ="X-UA-Compatible" content ="IE=edge" /> <meta name ="viewport" content ="width=device-width, initial-scale=1.0" /> <title > Document</title > </head > <body > <div id ="root" > <h2 > n的值为: {{n}}</h2 > <h2 > n放大10倍对应的值为: <span v-big-number ="n" > </span > </h2 > <button @click ="n++" > n++</button > <br /> <br /> </div > </body > <script src ="https://cdn.jsdelivr.net/npm/vue@2.6.14/dist/vue.js" > </script > <script > const vm = new Vue ({ el : '#root' , data : { n : 0 , }, directives : { 'big-number' (element, bingding) { element.innerText = bingding.value * 10 console .log (this ) }, }, }) </script > </html >
5. 定义全局自定义指令· 5.1 语法· 5.1.1 函数形式· 1 Vue .directive ( '指令名' , 回调函数 )
5.1.2 对象形式· 1 Vue .directive ( '指令名' , 配置对象 )
5.2 全局自定义指令实现需求· 1 2 3 4 5 6 7 8 9 10 11 12 13 14 15 16 17 18 19 20 21 22 23 24 25 26 27 28 29 30 31 32 33 34 35 36 37 38 39 40 41 42 43 44 45 46 47 48 49 50 51 52 53 54 55 56 57 58 59 60 61 <!DOCTYPE html > <html lang ="en" > <head > <meta charset ="UTF-8" /> <meta http-equiv ="X-UA-Compatible" content ="IE=edge" /> <meta name ="viewport" content ="width=device-width, initial-scale=1.0" /> <title > Document</title > </head > <body > <div id ="root" > <h2 > n的值为: {{n}}</h2 > <h2 > n放大10倍对应的值为: <span v-big ="n" > </span > </h2 > <button @click ="n++" > n++</button > <br /> <br /> <input type ="text" v-fbind:value ="n" > </div > <hr /> <div id ="root2" > <h2 > n的值为: {{n}}</h2 > <h2 > n放大10倍对应的值为: <span v-big ="n" > </span > </h2 > <button @click ="n++" > n++</button > <br /> <br /> <input type ="text" v-fbind:value ="n" > </div > </body > <script src ="https://cdn.jsdelivr.net/npm/vue@2.6.14/dist/vue.js" > </script > <script > Vue .directive ('big' , function (element, bingding ) { element.innerText = bingding.value * 10 }) Vue .directive ('fbind' , { bind (element, binding ) { element.value = binding.value }, inserted (element, binding ) { element.focus () }, update (element, binding ) { element.value = binding.value }, }) const vm = new Vue ({ el : '#root' , data : { n : 0 , }, }) new Vue ({ el : '#root2' , data : { n : 0 , }, }) </script > </html >
6. 自定义指令 总结· 一、定义语法:
(1).局部指令:
1 2 3 new Vue ({ directives :{指令名:配置对象} })
1 2 3 new Vue ({ directives{指令名:回调函数} })
(2).全局指令:
二、配置对象中常用的3个回调:
(1).bind:指令与元素成功绑定时调用。 (2).inserted:指令所在元素被插入页面时调用。 (3).update:指令所在模板结构被重新解析时调用。 三、备注:
1.指令定义时不加v-,但使用时要加v-; 2.指令名如果是多个单词,要使用kebab-case命名方式,不要用camelCase命名。 生命周期· 1. 生命周期· 生命周期,又名:生命周期回调函数、生命周期函数、生命周期钩子。生命周期是Vue在关键时刻帮我们调用的一些特殊名称的函数。生命周期函数的名字不可更改,但函数的具体内容是程序员根据需求编写的。生命周期函数中的this指向是vm 或 组件实例对象。
生命周期函数的书写位置与data、methods同级
2. 生命周期流程·
2.1 初始化·
初始化阶段模板未解析,页面显示的内容为代码中的样式,代码写什么样就显示什么样。
2.1.1 beforeCreate()· 1 2 3 4 5 6 7 8 9 10 11 12 13 14 15 16 17 18 19 20 21 22 23 24 25 26 27 28 29 30 31 32 33 34 35 36 37 <!DOCTYPE html > <html lang ="en" > <head > <meta charset = "UTF-8" > <meta http-equiv ="X-UA-Compatible" content ="IE=edge" > <meta name ="viewport" content ="width=device-width, initial-scale=1.0" > <title > Document</title > </head > <body > <div id ="root" > <h2 > n的值:{{n}}</h2 > <button @click ="add" > 点击n++</button > </div > </body > <script src ="https://cdn.jsdelivr.net/npm/vue@2.6.14/dist/vue.js" > </script > <script > const vm = new Vue ({ el : '#root' , data : { n : 0 }, methods : { add ( this .n ++ } }, beforeCreate ( console .log ('---- beforeCreate ----' ) console .log (this ._data ) console .log (this .n ) console .log (this .add ) debugger }, }) </script > </html >
2.1.2 created()· 1 2 3 4 5 6 7 8 9 10 11 12 13 14 15 16 17 18 19 20 21 22 23 24 25 26 27 28 29 30 31 32 33 34 35 36 37 38 39 40 41 42 43 44 45 <!DOCTYPE html > <html lang ="en" > <head > <meta charset = "UTF-8" > <meta http-equiv ="X-UA-Compatible" content ="IE=edge" > <meta name ="viewport" content ="width=device-width, initial-scale=1.0" > <title > Document</title > </head > <body > <div id ="root" > <h2 > n的值:{{n}}</h2 > <button @click ="add" > 点击n++</button > </div > </body > <script src ="https://cdn.jsdelivr.net/npm/vue@2.6.14/dist/vue.js" > </script > <script > const vm = new Vue ({ el : '#root' , data : { n : 0 }, methods : { add ( this .n ++ } }, beforeCreate ( console .log ('---- beforeCreate ----' ) }, created ( console .log ('---- created ----' ) console .log (this ._data ) console .log (this .n ) console .log (this .add ) debugger }, }) </script > </html >
2.2 模板的编译·
2.2.1 outerHTML & innerHTML·
2.2.2 beforeMount()· 1 2 3 4 beforeMount ( console .log ('---- beforeMount ----' ) debugger },
2.2.3 mounted()· 1 2 3 4 mounted ( console .log ('---- mounted ----' ) debugger },
此时对DOM元素操作有效
2.2.4 template配置项提供模板· 使用template配置项提供模板,提供的目标只能有一个根节点,使用template配置项提供模板,vue不会编译解析提前提供的容器,即只解析提供的innerHTML。
不能使用template标签作为根节点
不使用template配置项提供模板,vue编译解析的为outerHTML。
1 2 3 4 5 6 7 8 9 10 11 12 13 14 15 16 17 18 19 20 21 22 23 24 25 26 27 28 29 30 31 32 33 34 35 36 37 38 39 40 41 42 43 44 45 46 47 <!DOCTYPE html > <html lang ="en" > <head > <meta charset = "UTF-8" > <meta http-equiv ="X-UA-Compatible" content ="IE=edge" > <meta name ="viewport" content ="width=device-width, initial-scale=1.0" > <title > Document</title > </head > <body > <div id ="root" :x ="n" > </div > </body > <script src ="https://cdn.jsdelivr.net/npm/vue@2.6.14/dist/vue.js" > </script > <script > const vm = new Vue ({ el : '#root' , template : ` <div> <h2>n的值:{{n}}</h2> <button @click="add">点击n++</button> </div> ` , data : { n : 0 }, methods : { add ( this .n ++ } }, beforeCreate ( console .log ('---- beforeCreate ----' ) }, created ( console .log ('---- created ----' ) }, beforeMount ( console .log ('---- beforeMount ----' ) }, mounted ( console .log ('---- mounted ----' ) }, }) </script > </html >
2.2.5 $el· 1 2 3 4 5 6 mounted ( console .log ('---- mounted ----' ) console .log (this .$el ) console .log (this .$el instanceof HTMLElement ) },
2.3 数据更新·
2.3.1 beforeUpdate()· 1 2 3 4 5 6 beforeUpdate ( console .log ('---- beforeUpdate ----' ) console .log (this .n ) debugger },
2.3.2 update()· 1 2 3 4 5 6 updated ( console .log ('---- updated ----' ) console .log (this .n ) debugger },
2.4 销毁·
销毁vue实例对象,调用vm.$destroy()方法,在开发中一般不使用该方法。
2.4.1 beforeDestroy()· 1 2 3 4 5 6 7 8 9 10 11 12 13 14 15 16 17 18 19 20 21 22 23 24 25 26 27 28 29 30 31 32 33 34 35 36 37 38 39 40 41 42 43 44 45 46 47 48 49 50 51 52 53 54 55 56 57 58 59 60 61 62 63 64 65 66 67 68 69 70 71 72 73 74 75 76 77 78 79 80 <!DOCTYPE html > <html lang ="en" > <head > <meta charset ="UTF-8" /> <meta http-equiv ="X-UA-Compatible" content ="IE=edge" /> <meta name ="viewport" content ="width=device-width, initial-scale=1.0" /> <title > Document</title > </head > <body > <div id ="root" :x ="n" > <h2 > n的值:{{n}}</h2 > <button @click ="add" > 点击n++</button > <button @click ="destroy" > 点击销毁</button > </div > </body > <script src ="https://cdn.jsdelivr.net/npm/vue@2.6.14/dist/vue.js" > </script > <script > const vm = new Vue ({ el : '#root' , data : { n : 0 , }, methods : { add ( this .n ++ }, destroy ( this .$destroy() }, }, beforeCreate ( console .log ('---- beforeCreate ----' ) }, created ( console .log ('---- created ----' ) }, beforeMount ( console .log ('---- beforeMount ----' ) }, mounted ( console .log ('---- mounted ----' ) }, beforeUpdate ( console .log ('---- beforeUpdate ----' ) }, updated ( console .log ('---- updated ----' ) }, beforeDestroy ( console .log ('---- beforeDestroy ----' ) this .add () console .log (this .n ) debugger }, }) </script > </html >
2.4.2 destroy()· 3. 生命周期 总结· vue不同函数间使用同一个变量,可以将变量挂在vue实例上(this->vue实例vm)。
常用的生命周期钩子:1.mounted: 发送ajax请求、启动定时器、绑定自定义事件、订阅消息等【初始化操作】。 2.beforeDestroy: 清除定时器、解绑自定义事件、取消订阅消息等【收尾工作】。 关于销毁Vue实例1.销毁后借助Vue开发者工具看不到任何信息。 2.销毁后自定义事件会失效,但原生DOM事件依然有效。 3.一般不会在beforeDestroy操作数据,因为即便操作数据,也不会再触发更新流程了。 1. 对组件的理解· 1.1 传统方式编写网页·
对于传统方式编写网页:
实现了代码复用,页面的顶部和底部的css样式以及页面顶部和底部的js实现了代码的复用,但是页面的代码复用率不高,页面的结构代码html没有得到复用。 页面的依赖关系混乱,一个页面引入多个css和js,一个css代码和js代码又被多个页面引用,如果此时css代码和js代码之间又存在相互引用,则此时代码间的关系更加混乱,这个情况下代码不利于维护,可能牵一发而动全身。 上述图片中js代码实现了模块化。 模块化:当应用中的 js 都以模块来编写的,那这个应用就是一个模块化的应用。即将一个庞大的js代码文件,根据需求和功能进行模块的拆分,将一个庞大的js代码文件拆分成多个js代码文件。
1.2 组件方式编写页面·
对于组件方式编写页面:
整个组件,包含html、css、js,都能实现复用,需要某个组件时,只要将对应的组件整个引入即可,提高了代码的复用性。 在组件化编程中,各个组件都有属于自己的html、css、js,每个组件之间不会相互影响,不会出现页面的依赖关系混乱,不利于维护的情况。 在组件化编程中也可以实现模块化,在一个组件中,也可以将该组件的js代码进行拆分,根据功能和需求拆分多个js代码。 组件化:当应用中的功能都是多组件的方式来编写的,那这个应用就是一个组件化的应用。即将一个页面拆分成多个部分(组件),每个组件都有属于自己的代码和资源,单独编写自己的html、css、js。不同组件间可以进行引用。
2. 定义/创建组件· 在vue中,组件有两种形式,非单文件组件和单文件组件。
2.1 非单文件组件· 非单文件组件:一个文件中包含n个组件。
2.1.1 创建组件· 创建组件语法:
1 2 3 4 5 6 7 8 9 10 11 12 const 组件名 = Vue .extend ({ template : '' , data ( return { k : v, k : v, ... } } })
在组件定义时,一定不要写el配置项,因为最终所有的组件都要被一个vm管理,由vm决定服务于哪个容器。 在组件定义时,data配置项一定要写成函数形式。 1 2 3 4 5 6 7 8 9 10 11 12 13 14 15 16 17 18 19 20 21 22 23 24 25 26 27 28 29 30 31 32 33 34 35 36 const school = Vue .extend ({ template : ` <div> <h2>学校名: {{name}}</h2> <h2>学校地址:{{address}}</h2> </div> ` , data ( return { name : 'SGG' , address : 'Beijing' } } }) const student = Vue .extend ({ template : ` <div> <h2>姓名: {{name}}</h2> <h2>年龄:{{age}}</h2> <button @click="age++">点击年龄++</button> </div> ` , data ( return { name : 'ZS' , age : 18 } } })
2.1.2 注册组件(局部注册)· 在vue实例vm中注册组件,使用components配置项。
语法:
1 2 3 4 5 6 7 8 new Vue ({ el : '#root' , components : { 组件使用时的名字: 创建时的组件名, 组件使用时的名字: 创建时的组件名, ... } })
1 2 3 4 5 6 7 8 9 new Vue ({ el : '#root' , components : { 创建时的组件名, 创建时的组件名, ... } })
1 2 3 4 5 6 7 8 9 10 11 12 13 14 const vm = new Vue ({ el : '#root' , data : { msg : 'hello world!' }, components : { school, student } })
2.1.3 使用组件· 使用组件,只需要在页面中需要使用组件的位置编写对应组件的组件标签即可。
1 2 3 4 5 6 7 8 9 10 11 <body > <div id ="root" > <h1 > {{msg}}</h1 > <hr /> <school > </school > <hr /> <student > </student > <student > </student > </div > </body >
2.1.4 页面完整代码· 1 2 3 4 5 6 7 8 9 10 11 12 13 14 15 16 17 18 19 20 21 22 23 24 25 26 27 28 29 30 31 32 33 34 35 36 37 38 39 40 41 42 43 44 45 46 47 48 49 50 51 52 53 54 55 56 57 58 59 60 61 62 63 64 65 66 67 68 69 70 71 72 73 <!DOCTYPE html > <html lang ="en" > <head > <meta charset ="UTF-8" /> <meta http-equiv ="X-UA-Compatible" content ="IE=edge" /> <meta name ="viewport" content ="width=device-width, initial-scale=1.0" /> <title > Document</title > </head > <body > <div id ="root" > <h1 > {{msg}}</h1 > <hr /> <school > </school > <hr /> <student > </student > <student > </student > </div > </body > <script src ="https://cdn.jsdelivr.net/npm/vue@2.6.14/dist/vue.js" > </script > <script > const school = Vue .extend ({ template : ` <div> <h2>学校名: {{name}}</h2> <h2>学校地址:{{address}}</h2> </div> ` , data ( return { name : 'SGG' , address : 'Beijing' , } }, }) const student = Vue .extend ({ template : ` <div> <h2>姓名: {{name}}</h2> <h2>年龄:{{age}}</h2> <button @click="age++">点击年龄++</button> </div> ` , data ( return { name : 'ZS' , age : 18 , } }, }) const vm = new Vue ({ el : '#root' , data : { msg : 'hello world!' , }, components : { school, student, }, }) </script > </html >
2.1.5 注册组件(全局注册)· 1 2 Vue .component ('school' , school)
1 2 3 4 5 6 7 8 9 10 11 12 13 14 15 16 17 18 19 20 21 22 23 24 25 26 27 28 29 30 31 32 33 34 35 36 37 38 39 40 41 42 43 44 45 46 47 48 49 50 51 52 53 54 55 56 57 58 59 60 61 62 63 64 65 66 67 68 69 70 71 72 73 74 75 76 77 78 79 80 81 82 83 <!DOCTYPE html > <html lang ="en" > <head > <meta charset ="UTF-8" /> <meta http-equiv ="X-UA-Compatible" content ="IE=edge" /> <meta name ="viewport" content ="width=device-width, initial-scale=1.0" /> <title > Document</title > </head > <body > <div id ="root" > <h1 > {{msg}}</h1 > <hr /> <school > </school > <hr /> <student > </student > <student > </student > </div > <hr > <hr > <div id ="root2" > <school > </school > </div > </body > <script src ="https://cdn.jsdelivr.net/npm/vue@2.6.14/dist/vue.js" > </script > <script > const school = Vue .extend ({ template : ` <div> <h2>学校名: {{name}}</h2> <h2>学校地址:{{address}}</h2> </div> ` , data ( return { name : 'SGG' , address : 'Beijing' , } }, }) const student = Vue .extend ({ template : ` <div> <h2>姓名: {{name}}</h2> <h2>年龄:{{age}}</h2> <button @click="age++">点击年龄++</button> </div> ` , data ( return { name : 'ZS' , age : 18 , } }, }) Vue .component ('school' , school) const vm = new Vue ({ el : '#root' , data : { msg : 'hello world!' , }, components : { student }, }) new Vue ({ el : '#root2' }) </script > </html >
2.1.6 非单文件组件 总结· Vue中使用组件的三大步骤:一、定义组件(创建组件) 二、注册组件 三、使用组件(写组件标签) 一、如何定义一个组件?使用Vue.extend(options)创建,其中options和new Vue(options)时传入的那个options几乎一样,但也有点区别; 区别如下:1.el不要写,为什么? ——— 最终所有的组件都要经过一个vm的管理,由vm中的el决定服务哪个容器。 2.data必须写成函数,为什么? ———— 避免组件被复用时,数据存在引用关系。 备注:使用template可以配置组件结构。 二、如何注册组件?1.局部注册:靠new Vue的时候传入components选项 2.全局注册:靠Vue.component('组件名',组件) 三、编写组件标签: 2.2 组件的注意点· 2.2.1 组件的名称由一个单词组成· 组件的名称由一个单词组成时,可以使用首字母大写的写法,这种写法可以与vue的开发者工具相呼应。
1 2 3 4 5 6 7 8 9 10 11 12 13 14 15 16 17 18 19 20 21 22 23 24 25 26 27 28 29 30 31 32 33 34 35 36 37 38 39 40 41 42 43 44 <!DOCTYPE html > <html lang ="en" > <head > <meta charset ="UTF-8" /> <meta http-equiv ="X-UA-Compatible" content ="IE=edge" /> <meta name ="viewport" content ="width=device-width, initial-scale=1.0" /> <title > Document</title > </head > <body > <div id ="root" > <School > </School > </div > </body > <script src ="https://cdn.jsdelivr.net/npm/vue@2.6.14/dist/vue.js" > </script > <script > const school = Vue .extend ({ template : ` <div> <h2>学校名: {{name}}</h2> <h2>学校地址:{{address}}</h2> </div> ` , data ( return { name : 'SGG' , address : 'Beijing' , } }, }) const vm = new Vue ({ el : '#root' , data : { msg : 'hello world!' , }, components : { School : school }, }) </script > </html >
2.2.2 组件的名称由多个单词组成· 2.2.2.1 写法一(kebab-case命名)· 组件的名称由多个单词组成时,使用短线连接不同单词的写法。此时,组件名要使用引号进行包裹。这种写法vue开发者工具会将不同单词取出每个单词首字母大写进行显示。
1 2 3 4 5 6 7 8 9 10 11 12 13 14 15 16 17 18 19 20 21 22 23 24 25 26 27 28 29 30 31 32 33 34 35 36 37 38 39 40 41 42 43 44 45 <!DOCTYPE html > <html lang ="en" > <head > <meta charset ="UTF-8" /> <meta http-equiv ="X-UA-Compatible" content ="IE=edge" /> <meta name ="viewport" content ="width=device-width, initial-scale=1.0" /> <title > Document</title > </head > <body > <div id ="root" > <my-school > </my-school > </div > </body > <script src ="https://cdn.jsdelivr.net/npm/vue@2.6.14/dist/vue.js" > </script > <script > const school = Vue .extend ({ template : ` <div> <h2>学校名: {{name}}</h2> <h2>学校地址:{{address}}</h2> </div> ` , data ( return { name : 'SGG' , address : 'Beijing' , } }, }) const vm = new Vue ({ el : '#root' , data : { msg : 'hello world!' , }, components : { 'my-school' : school }, }) </script > </html >
2.2.2.2 写法二(CamelCase命名)· 组件的名称由多个单词组成时,使用每个单词首字母大写的写法,此种写法需要脚手架的环境下使用。
1 2 3 components: { MySchool: school },
组件名尽可能回避HTML中已有的元素名称,例如:h2、H2都不行。
2.2.3 组件的name配置项· 可以使用name配置项指定组件在开发者工具中呈现的名字。
1 2 3 4 5 6 7 8 9 10 11 12 13 14 15 16 17 18 19 20 21 22 23 24 25 26 27 28 29 30 31 32 33 34 35 36 37 38 39 40 41 42 43 44 45 46 <!DOCTYPE html > <html lang ="en" > <head > <meta charset ="UTF-8" /> <meta http-equiv ="X-UA-Compatible" content ="IE=edge" /> <meta name ="viewport" content ="width=device-width, initial-scale=1.0" /> <title > Document</title > </head > <body > <div id ="root" > <my-school > </my-school > </div > </body > <script src ="https://cdn.jsdelivr.net/npm/vue@2.6.14/dist/vue.js" > </script > <script > const school = Vue .extend ({ name : 'hhhhhhhhhhh' , template : ` <div> <h2>学校名: {{name}}</h2> <h2>学校地址:{{address}}</h2> </div> ` , data ( return { name : 'SGG' , address : 'Beijing' , } }, }) const vm = new Vue ({ el : '#root' , data : { msg : 'hello world!' , }, components : { 'my-school' : school }, }) </script > </html >
2.2.4 创建组件的简写形式· 1 2 3 4 5 const school = Vue .extend (options) 可简写为: const school = options
const school = options此种写法,在vue的底层会自动调用Vue.extend()
1 2 3 4 5 6 7 8 9 10 11 12 13 14 15 16 17 18 19 20 21 22 23 24 25 26 27 28 29 30 31 32 33 34 35 36 37 38 39 40 41 42 43 44 45 <!DOCTYPE html > <html lang ="en" > <head > <meta charset ="UTF-8" /> <meta http-equiv ="X-UA-Compatible" content ="IE=edge" /> <meta name ="viewport" content ="width=device-width, initial-scale=1.0" /> <title > Document</title > </head > <body > <div id ="root" > <my-school > </my-school > </div > </body > <script src ="https://cdn.jsdelivr.net/npm/vue@2.6.14/dist/vue.js" > </script > <script > const school = { name : 'MySchool' , template : ` <div> <h2>学校名: {{name}}</h2> <h2>学校地址:{{address}}</h2> </div> ` , data ( return { name : 'SGG' , address : 'Beijing' , } }, } const vm = new Vue ({ el : '#root' , data : { msg : 'hello world!' , }, components : { 'my-school' : school }, }) </script > </html >
2.3 组件的嵌套· 注意:被使用的组件需要先定义,组件定义完成后才能进行注册使用。
在开发中,通常会定义一个名为App的组件,用于管理其他全部的组件,而App组件收到vm的管理。
1 2 3 4 5 6 7 8 9 10 11 12 13 14 15 16 17 18 19 20 21 22 23 24 25 26 27 28 29 30 31 32 33 34 35 36 37 38 39 40 41 42 43 44 45 46 47 48 49 50 51 52 53 54 55 56 57 58 59 60 61 62 63 64 65 66 67 68 69 70 71 72 73 74 75 76 77 78 79 80 81 82 83 84 85 86 87 88 89 90 91 92 93 94 95 96 <!DOCTYPE html > <html lang ="en" > <head > <meta charset ="UTF-8" /> <meta http-equiv ="X-UA-Compatible" content ="IE=edge" /> <meta name ="viewport" content ="width=device-width, initial-scale=1.0" /> <title > Document</title > </head > <body > <div id ="root" > </div > </body > <script src ="https://cdn.jsdelivr.net/npm/vue@2.6.14/dist/vue.js" > </script > <script > // 定义student组件 在school中注册使用 const student = Vue.extend({ name: 'Student', template: ` <div > <h2 > 姓名: {{name }} </h2 > <h2 > 年龄: {{age }} </h2 > </div > `, data() { return { name: 'ZS', age: 18, } }, }) // 定义school组件 const school = Vue.extend({ name: 'School', template: ` <div > <h2 > 学校名: {{name }} </h2 > <h2 > 学校地址: {{address }} </h2 > <hr > <student > </student > </div > `, data() { return { name: 'SGG', address: 'Beijing', } }, components: { // 注册student组件 student, }, }) // 定义hello组件 与school组件平级 const hello = Vue.extend({ name: 'Hello', template: ` <div > <h1 > Hello World!</h1 > </div > `, }) // 定义app组件用于管理所有的组件 const app = Vue.extend({ name: 'App', template:` <div > <hello > </hello > <school > </school > </div > `, components: { // 注册hello与school组件 hello, school, } }) const vm = new Vue({ el: '#root', // 使用app组件 template: `<app > </app > `, components: { // 注册App组件 app }, }) </script > </html >
2.4 VueComponent· 2.4.1 组件为VueComponent的构造函数· 组件本质是一个名为VueComponent构造函数,且不是程序员定义的,是Vue.extend生成的。
在页面中使用了组件,才会进行vue组件实例对象的创建。
1 2 3 4 5 6 7 8 9 10 11 12 13 14 15 16 17 18 const school = Vue .extend ({ name : 'School' , template : ` <div> <h2>学校名: {{name}}</h2> <h2>学校地址:{{address}}</h2> </div> ` , data ( return { name : 'SGG' , address : 'Beijing' , } } }) console .log (school)
1 2 3 4 5 6 7 8 9 10 11 Vue .extend = function (extendOptions ) { var Sub = function VueComponent (options) { this ._init (options); }; return Sub };
由Vue.extend()的源代码可知,在Vue.extend()内创建了一个VueComponent函数,并将该函数进行了返回。所以组件是一个名为VueComponent构造函数,且是由Vue.extend生成的。
2.4.2 使用组件自动调用new VueComponent()· 以school组件为例,我们只需要写<school/>或<school></school>,Vue解析时会帮我们创建 school 组件的实例对象 ,即Vue帮我们执行的:new VueComponent(options)。
修改vue.js中Vue.extend()源代码:
1 2 3 4 var Sub = function VueComponent (options ) { console .log ('VueComponent被调用...' ) this ._init (options); };
使用两次school组件:
1 2 3 4 5 6 7 8 9 10 11 12 13 14 15 16 17 18 19 20 21 22 23 24 25 26 27 28 29 30 31 32 33 34 35 36 37 38 39 40 41 42 43 44 <!DOCTYPE html > <html lang ="en" > <head > <meta charset ="UTF-8" /> <meta http-equiv ="X-UA-Compatible" content ="IE=edge" /> <meta name ="viewport" content ="width=device-width, initial-scale=1.0" /> <title > Document</title > </head > <body > <div id ="root" > <school > </school > <school > </school > </div > </body > <script src ="../js/vue.js" > </script > <script > const school = Vue .extend ({ name : 'School' , template : ` <div> <h2>学校名: {{name}}</h2> <h2>学校地址:{{address}}</h2> </div> ` , data ( return { name : 'SGG' , address : 'Beijing' , } } }) console .log (school) const vm = new Vue ({ el : '#root' , components : { school }, }) </script > </html >
2.4.3 每次创建组件返回全新的VueComponent· 每次调用Vue.extend,返回的都是一个全新的VueComponent。
1 2 3 4 5 6 7 8 9 10 11 12 13 14 15 16 17 18 19 20 21 22 23 24 25 26 27 28 29 30 31 32 33 <script > const school = Vue .extend ({ name : 'School' , template : ` <div> <h2>学校名: {{name}}</h2> <h2>学校地址:{{address}}</h2> </div> ` , data ( return { name : 'SGG' , address : 'Beijing' , } } }) const hello = Vue .extend ({ name : 'Hello' , template : ` <div> <h2>Hello World!</h2> </div> ` }) console .log (school) console .log (hello) console .log (hello === school) </script >
2.4.4 this的指向· (1).组件配置中:data函数、methods中的函数、watch中的函数、computed中的函数 它们的this均是【VueComponent实例对象】。 (2).new Vue(options)配置中:data函数、methods中的函数、watch中的函数、computed中的函数 它们的this均是【Vue实例对象】。 1 2 3 4 5 6 7 8 9 10 11 12 13 14 15 16 17 18 19 20 21 22 23 24 25 26 27 28 29 30 31 32 33 34 35 36 37 38 39 40 41 42 43 44 45 46 47 48 49 50 51 52 53 54 <!DOCTYPE html > <html lang ="en" > <head > <meta charset ="UTF-8" /> <meta http-equiv ="X-UA-Compatible" content ="IE=edge" /> <meta name ="viewport" content ="width=device-width, initial-scale=1.0" /> <title > Document</title > </head > <body > <div id ="root" > <button @click ="showThis" > 点击打印this</button > <hr /> <school > </school > </div > </body > <script src ="../js/vue.js" > </script > <script > const school = Vue .extend ({ name : 'School' , template : ` <div> <h2>学校名: {{name}}</h2> <h2>学校地址:{{address}}</h2> <button @click="showThis">点击打印this</button> </div> ` , data ( return { name : 'SGG' , address : 'Beijing' , } }, methods : { showThis ( console .log ('VueComponent: ' , this ) }, }, }) const vm = new Vue ({ el : '#root' , components : { school, }, methods : { showThis ( console .log ('Vue: ' , this ) }, }, }) </script > </html >
2.5 一个重要的内置关系· JavaScript – 原型与原型链
只要是对象就有隐式原型属性,只要是函数就有显示原型属性,隐式原型属性永远指向对象缔造者(构造函数)的显示原型属性指向的原型对象。使用构造函数的显示原型属性向原型对象上添加属性或方法,构造出来的对象使用隐式原型属性查找添加的属性或方法。
在Vue中,VueComponent()的原型对象的原型对象为Vue()的原型对象。即组件的原型对象的原型对象为Vue()的原型对象。
1 VueComponent .prototype __proto__ === Vue .prototype
Vue()为vue实例的构造函数,VueComponent()为组件实例的构造函数。
这个重要的内置关系的作用:让组件实例对象(vc)可以访问到 Vue原型上的属性、方法。这样子就不用再VueComponent的原型对象上再添加一份与Vue原型对象上相同的属性和方法。
1 2 3 4 5 6 7 8 9 10 11 12 13 14 15 16 17 18 19 20 21 22 23 24 25 26 27 28 29 30 31 32 33 34 35 36 37 38 39 40 41 42 43 44 45 46 47 48 49 50 51 52 53 <!DOCTYPE html > <html lang ="en" > <head > <meta charset ="UTF-8" /> <meta http-equiv ="X-UA-Compatible" content ="IE=edge" /> <meta name ="viewport" content ="width=device-width, initial-scale=1.0" /> <title > Document</title > </head > <body > <div id ="root" > <school > </school > </div > </body > <script src ="../js/vue.js" > </script > <script > Vue .prototype x = 999 const school = Vue .extend ({ name : 'School' , template : ` <div> <h2>学校名: {{name}}</h2> <h2>学校地址:{{address}}</h2> <button @click="showX">点击打印X</button> </div> ` , data ( return { name : 'SGG' , address : 'Beijing' , } }, methods : { showX ( console .log ('School x: ' , this .x ) }, }, }) const vm = new Vue ({ el : '#root' , components : { school, } }) </script > </html >
2.6 单文件组件· 单文件组件:一个文件中只包含一个组件。
在单文件组件中,一个组件就是一个.vue文件。
vue组件文件的命名
单个单词:school.vue 多个单词:my-school.vue 使用首字母大写单词:(推荐)
单个单词:School.vue 多个单词:MySchool.vue 2.6.1 单文件组件代码的书写位置· 1 2 3 4 5 6 7 8 9 10 11 12 13 14 <template > <div > </div > </template > <script > </script > <style > </style >
.vue文件中,代码高亮显示插件<v + 回车
2.6.2 组件js代码的暴露· 1.分别暴露
1 2 3 <script > export 需要暴露的方法或变量 </script >
2.统一暴露
1 2 3 4 5 6 <script > export { 需要暴露的方法或变量, ... } </script >
3.默认暴露
当暴露的东西为一个时,一般使用默认暴露,引入时直接import xxx from xxx
1 2 3 <script > export default 需要暴露的方法或变量 </script >
2.6.3 组件的创建与使用· School组件:
1 2 3 4 5 6 7 8 9 10 11 12 13 14 15 16 17 18 19 20 21 22 23 24 25 26 27 28 29 30 31 32 33 34 35 <template > <div class ="demo" > <h2 > 学校名: {{name}}</h2 > <h2 > 学校地址:{{address}}</h2 > <button @click ="showX" > 点击打印X</button > </div > </template > <script > export default { name : 'School' , data ( return { name : 'SGG' , address : 'Beijing' } }, methods : { showX ( console .log ('School x: ' , this .x ) } } } </script > <style > .demo { background-color : orange; } </style >
Student组件:
1 2 3 4 5 6 7 8 9 10 11 12 13 14 15 16 17 18 19 20 21 <template > <div > <h2 > 学生姓名:{{name}}</h2 > <h2 > 学生年龄:{{age}}</h2 > </div > </template > <script > export default { name : 'Student' , data ( return { name : '张三' , age : 18 } } } </script > <style > </style >
App组件:
1 2 3 4 5 6 7 8 9 10 11 12 13 14 15 16 17 18 19 20 21 <template > <div > <School > </School > <Student > </Student > </div > </template > <script > import School from './School.vue' import Student from './Student.vue' export default { name :'App' , components :{ School , Student } } </script >
编写入口文件main.js,创建vue实例,注册App组件:
1 2 3 4 5 6 7 8 import App from './App.vue' new Vue ({ el :'#root' , template :`<App></App>` , components :{App }, })
编写页面,提供容器使用组件:
当前这个页面在浏览器不能正常运行,因为main.js中的import为es6语法,浏览器不支持解析es6语法。需要使用脚手架。
1 2 3 4 5 6 7 8 9 10 11 12 13 14 <!DOCTYPE html > <html > <head > <meta charset ="UTF-8" /> <title > 练习一下单文件组件的语法</title > </head > <body > <div id ="root" > </div > <script type ="text/javascript" src ="../js/vue.js" > </script > <script type ="text/javascript" src ="./main.js" > </script > </body > </html >
vue cli· 1. Vue 脚手架(CLI)· Vue 脚手架(CLI)是 Vue 官方提供的标准化开发工具(开发平台)
Vue 脚手架(CLI)官网
vue cli的特点:
开箱即用 基于 webpack 功能丰富且易于扩展 支持创建 vue2 和 vue3 的项目 2. Vue CLI 的安装· vue-cli 是基于 Node.js 开发出来的工具,因此需要使用 npm 将它安装为全局可用的工具。
2.1 全局安装 Vue CLI· 如果出现下载缓慢可以将下载地址配置为淘宝镜像:
1 npm config set registry https:
2.2 检验是否安装成功· 查看 Vue CLI 的版本,检验 Vue CLI 是否安装成功.
或者
能查看安装的 Vue CLI 的版本,即为安装成功。
3. 使用 Vue CLI 创建项目· Vue CLI 提供了创建项目的两种方式:
基于命令行的方式创建 vue 项目
基于可视化面板创建 vue 项目
3.1 基于命令行的方式创建 vue 项目· 基于命令行的方式创建 vue 项目,可以使用 Vue CLI 提供的默认预设,也可以自己手动进行预设的配置。
如果之前有自己手动进行预设的配置,并且将配置的预设进行保存,也可以选择直接使用之前的预设配置。
3.1.1 使用 Vue CLI 提供的默认预设创建 vue2 项目· 键盘上下箭头按键进行选择,enter确定选择
进入创建的项目的目录
运行项目
访问项目页面
3.1.2 手动配置预设创建 vue2 项目· 步骤1:在终端下运行 vue create 命令·
步骤2:选择要安装的功能·
步骤3:选择 vue 的版本·
由于选择安装的功能不同,接下来的选择个数会有所不同·
步骤5:使用上下箭头选择如何存储插件的配置信息· 通常选择把插件的配置信息存储到单独的文件
步骤6:是否将刚才的配置保存为预设· 根据需要选择是否保存
项目创建完成·
运行项目· 1 2 cd vue_my_test2 npm run serve
3.2 停止项目运行· 停止项目运行: ctrl + c
3.3 基于可视化面板创建 vue 项目· 进入可视化面板
3.3.1 创建 vue2 项目·
这里只演示手动配置项目
4. 分析脚手架创建的项目结构· 以使用脚手架创建项目后自带的hello项目为例
4.1 项目文件目录·
4.2 package.json·
4.3 main.js· 1 2 3 4 5 6 7 8 9 10 11 12 13 14 15 16 17 18 import Vue from 'vue' import App from './App.vue' Vue .config .productionTip = false new Vue ({ render : h =>h (App ), }).$mount('#app' )
4.3.1 render()· 在main.js中使用render()函数将App组件放入容器中,是由于在脚手架中默认引入的vue不是完整的vue,而是缺少模板解析器的vue。
vue.js与vue.runtime.xxx.js的区别:
模板解析器是用于解析vue配置项中的template配置项。将vue中的模板解析器去除后,可以节省项目的占用空间,同时也更加符合逻辑,因为项目构建后已经是浏览器可以解析的html、css、js等文件,不再需要模板解析器。
1 2 3 4 5 6 7 8 9 10 11 12 13 14 15 16 new Vue ({ render (createElement ) { return createElement (App ) } }).$mount('#app' )
1 2 3 4 5 6 7 8 9 10 11 12 13 14 15 16 17 18 19 20 21 new Vue ({ render (createElement ) { return createElement ('h1' , 'hello world' ) } }).$mount('#app' )
App组件外的其他组件使用模板<template>标签能够被放入页面,是由于vue脚手架为其配置了模板编译的第三方包。
4.4 App.vue· 1 2 3 4 5 6 7 8 9 10 11 12 13 14 15 16 17 18 19 20 21 22 23 24 25 26 27 28 29 30 31 32 33 34 // 框架 <template > <div id ="app" > <img alt ="Vue logo" src ="./assets/logo.png" > <HelloWorld msg ="Welcome to Your Vue.js App" /> </div > </template > // 交互 <script > import HelloWorld from './components/HelloWorld.vue' export default { name : 'App' , components : { HelloWorld } } </script > // 样式 <style > #app { font-family : Avenir, Helvetica, Arial, sans-serif; -webkit-font-smoothing : antialiased; -moz-osx-font-smoothing : grayscale; text-align : center; color : #2c3e50 ; margin-top : 60px ; } </style >
4.5 index.html· 1 2 3 4 5 6 7 8 9 10 11 12 13 14 15 16 17 18 19 20 21 22 23 24 25 <!DOCTYPE html > <html lang ="" > <head > <meta charset ="utf-8" > <meta http-equiv ="X-UA-Compatible" content ="IE=edge" > <meta name ="viewport" content ="width=device-width,initial-scale=1.0" > <link rel ="icon" href ="<%= BASE_URL %>favicon.ico" > <title > <%= htmlWebpackPlugin.options.title %></title > </head > <body > <noscript > <strong > We're sorry but <%= htmlWebpackPlugin.options.title %> doesn't work properly without JavaScript enabled. Please enable it to continue.</strong > </noscript > <div id ="app" > </div > </body > </html >
<%= htmlWebpackPlugin.options.title %> 会到项目的package.json文件中寻找项目的name配置项
5. 修改默认配置· 5.1 查看项目的默认配置· Vue 脚手架隐藏了所有 webpack 相关的配置,若想查看具体的 webpakc 配置,终端运行:
5.2 修改项目的默认配置· 可以修改的配置项以及如何修改可以参考官网:Vue CLI 官网 配置参考
在项目文件夹下新建 vue.config.js 文件,要修改的配置项都写在该文件中。vue脚手架会将修改的配置项与默认的配置项进行整合。
只要在 vue.config.js 文件中修改了配置项,就要重新启动项目。
5.2.1 修改入口文件名· 1 2 3 4 5 6 7 8 9 10 11 12 13 const { defineConfig } = require ('@vue/cli-service' )module .exports = defineConfig ({ pages : { index : { entry : 'src/my_main.js' } } })
5.2.2 关闭代码语法检查· 1 2 3 4 5 6 7 8 9 10 11 12 13 14 15 const { defineConfig } = require ('@vue/cli-service' )module .exports = defineConfig ({ pages : { index : { entry : 'src/my_main.js' } }, lintOnSave : false })
ref属性· 1. ref 属性· ref 属性被用来给元素或子组件注册引用信息(id的替代者),相当于对页面元素或子组件标识,使用 ref 属性标识页面元素或子组件之后,被标识的元素或子组件会被所在的组件实例对象收集,挂载在所在组件实例对象的$ref属性上。
1.1 ref 属性的使用方式· 1.1.1 标识元素或子组件· 标记 html 标签元素:
1 <h1 ref ="xxx" > .....</h1 >
标记子组件:
1 <School ref ="xxx" > </School >
1.1.2 获取标识的元素或子组件· 其中,this为被标记的元素或子组件所在的组件实例对象。
1.2 使用 ref 属性标记 html 标签元素· ref 属性应用在 html 标签元素上,获取的是对应的真实 DOM 元素
1 2 3 4 5 6 7 8 9 10 11 12 13 14 15 16 17 18 19 20 21 22 <template > <div > <h1 ref ="hello" > Hello World</h1 > <button @click ="showH1" > showH1</button > </div > </template > <script > export default { name : 'App' methods : { showH1 ( console .log (this .$refs .hello ) console .log (this .$refs ) } } } </script > <style > </style >
1.3 使用 ref 属性标记子组件· ref 属性应用在组件标签上,获取的是对应组件实例对象
MySchool组件:
1 2 3 4 5 6 7 8 9 10 11 12 13 14 15 16 17 18 19 20 21 22 23 24 <template > <div class ="demo" > <h2 > 学校:{{name}}</h2 > <h2 > 地址:{{address}}</h2 > </div > </template > <script > export default { name : 'MySchool' , data ( return { name : 'SGG' , address : 'Beijing' } }, } </script > <style > .demo { background-color : chocolate; } </style >
App组件:
1 2 3 4 5 6 7 8 9 10 11 12 13 14 15 16 17 18 19 20 21 22 23 24 25 26 27 28 29 30 31 32 33 34 <template > <div > <h1 ref ="hello" > Hello World</h1 > <MySchool ref ="myschool" > </MySchool > <button @click ="showH1" > showH1</button > <br > <br > <button @click ="showMySchool" > showMySchool</button > </div > </template > <script > import MySchool from './components/MySchool.vue' export default { name : 'App' , components : { MySchool , }, methods : { showH1 ( console .log (this .$refs .hello ) console .log (this .$refs ) }, showMySchool ( console .log (this .$refs .myschool ) console .log (this .$refs ) } } } </script > <style > </style >
1.4 使用 id 获取元素或子组件· 1 2 3 4 5 6 7 8 9 10 11 12 13 14 15 16 17 18 19 20 21 22 23 24 25 26 27 28 <template > <div > <h1 ref ="hello" id ="hh" > Hello World</h1 > <MySchool ref ="myschool" id ="school" > </MySchool > <button @click ="showH1_School" > showH1_School</button > </div > </template > <script > import MySchool from './components/MySchool.vue' export default { name : 'App' , components : { MySchool }, methods : { showH1_School ( console .log (document .getElementById ('hh' )) console .log (document .getElementById ('school' )) } } } </script > <style > </style >
使用 ref 属性和使用 id 进行对比,使用 ref 属性不用自己操作 DOM 元素,且使用 ref 属性获取子组件时,获取的为整个组件实例对象而不是子组件编译解析后的模板,有利于后期对子组件进行操作。
props· 1 组件的 props· 为了提高组件的复用性,在封装 vue 组件时需要遵守如下的原则:
组件的 DOM 结构、Style 样式要尽量复用
为了方便使用者为组件提供要展示的数据,vue 组件提供了 props 的概念。
props 是组件的自定义属性 ,组件的使用者可以通过 props 把数据传递到子组件内部,供子组件内部进行使用。
props 的作用:
props 的好处:
2 在组件中声明 props· 在封装 vue 组件时,可以把动态的数据项声明为 props 自定义属性。自定义属性可以在当前组件的模板结构中被直接使用。示例代码如下:
1 2 3 4 5 6 7 8 9 10 11 12 13 14 15 16 <template > <div > <h3 > 标题:{{title}}</h3 > <h5 > 作者:{{author}}</h5 > <h6 > 发布时间:{{pubTime}}</h6 > </div > </template > <script > export default { name : 'MyArticle' , props : ['title' , 'author' , 'pubTime' ] } </script >
父组件向子组件传值 ,可以直接传值,也可以使用动态属性绑定。
可以使用 v-bind 属性绑定的形式,为组件动态绑定 props 的值。
1 2 3 4 5 6 7 8 9 10 11 12 13 14 15 16 17 18 19 20 21 22 23 24 25 26 27 <template > <div > <h1 > 这是 App.vue 根组件</h1 > <hr /> <my-article :title ="info.title" :author ="'post by ' + info.author" pub-time ="1989" > </my-article > </div > </template > <script > import MyArticle from './Article.vue' export default { name : 'MyApp' , data ( return { info : { title : 'abc' , author : '123' , }, } }, components : { MyArticle , }, } </script >
使用v-bind指令的形式向子组件中的props配置项传递数据,传递的为js表达式的结果,如果没有使用v-bind,传递的为字符串类型的数据。
3 无法使用未声明的 props· 如果父组件给子组件传递了未声明的 props 属性,则这些属性会被忽略,无法被子组件使用,示例代码如下:
1 2 3 4 5 6 7 8 9 10 11 12 13 14 15 16 <template > <div > <h3 > 标题:{{title}}</h3 > <h5 > 作者:{{author}}</h5 > <h6 > 发布时间:{{pubTime}}</h6 > </div > </template > <script > export default { name : 'MyArticle' , props : ['title' , 'author' ] } </script >
1 2 3 4 5 6 7 8 9 10 11 12 13 14 15 16 17 18 19 20 21 22 23 24 25 26 27 <template > <div > <h1 > 这是 App.vue 根组件</h1 > <hr /> <my-article :title ="info.title" :author ="'post by ' + info.author" pub-time ="1989" > </my-article > </div > </template > <script > import MyArticle from './Article.vue' export default { name : 'MyApp' , data ( return { info : { title : 'abc' , author : '123' , }, } }, components : { MyArticle , }, } </script >
在子组件中不存在pubTime。
4 props 的大小写命名· 组件中如果使用“camelCase (驼峰命名法)”声明了 props 属性的名称,则有两种方式为其绑定属性的值:
1 2 3 4 5 6 7 8 9 10 11 12 13 14 <template > <div > <h6 > 发布时间:{{pubTime}}</h6 > </div > </template > <script > export default { name : 'MyArticle' , props : ['pubTime' ] } </script >
1 2 3 4 5 6 7 8 9 10 11 12 13 14 15 16 17 18 19 20 21 22 23 24 25 26 27 28 <template > <div > <h1 > 这是 App.vue 根组件</h1 > <hr /> <my-article pub-time ="1989" > </my-article > <my-article pubTime ="1989" > </my-article > </div > </template > <script > import MyArticle from './Article.vue' export default { name : 'MyApp' , data ( return { info : { title : 'abc' , author : '123' , }, } }, components : { MyArticle , }, } </script >
5 props 验证· props 验证指的是:在封装组件时对外界传递过来的 props 数据进行合法性的校验,从而防止数据不合法的问题。
使用数组类型的 props 节点 的缺点:无法为每个 prop 指定具体的数据类型。
6 对象类型的 props 节点· 使用对象类型的 props 节点,可以对每个 prop 进行数据类型的校验
1 2 3 4 5 6 7 props : { count : { type : Number }, state : Boolean }
1 2 3 4 5 6 7 8 9 10 11 12 13 14 15 16 17 18 19 20 21 22 <template > <div > <p > 数量:{{ count }}</p > <p > 状态:{{ state }}</p > </div > </template > <script > export default { name : 'MyCount' , props : { count : { type : Number }, state : Boolean } } </script > <style lang ="less" scoped > </style >
7 props 验证· 对象类型的 props 节点提供了多种数据验证方案。
① 基础的类型检查
8 基础的类型检查· 可以直接为组件的 prop 属性指定基础的校验类型,从而防止组件的使用者为其绑定错误类型的数据。
8.1 支持校验的基础类型· 1 2 3 4 5 6 7 8 String Number Boolean Array Object Date Function Symbol
9 多个可能的类型· 如果某个 prop 属性值的类型不唯一,此时可以通过数组的形式,为其指定多个可能的类型
info的值可能是字符串或数字
1 2 3 4 5 6 7 8 9 10 11 12 13 14 15 16 17 18 19 20 21 22 23 <template > <div > <p > 数量:{{ count }}</p > <p > 状态:{{ state }}</p > </div > </template > <script > export default { name : 'MyCount' , props : { count : { type : Number }, state : Boolean , info : [String , Number ] }, } </script > <style lang ="less" scoped > </style >
10 必填项校验· 如果组件的某个 prop 属性是必填项,必须让组件的使用者为其传递属性的值。
可以将其设置为必填项:
1 2 3 4 count : { type : Number , required : true },
1 2 3 4 5 6 7 8 9 10 11 12 13 14 15 16 17 18 19 20 21 22 23 24 <template > <div > <p > 数量:{{ count }}</p > <p > 状态:{{ state }}</p > </div > </template > <script > export default { name : 'MyCount' , props : { count : { type : Number , required : true }, state : Boolean , info : [String , Number ] }, } </script > <style lang ="less" scoped > </style >
11 属性默认值· 在封装组件时,可以为某个 prop 属性指定默认值。
1 2 3 4 5 count : { type : Number , required : true , default : 100 },
1 2 3 4 5 6 7 8 9 10 11 12 13 14 15 16 17 18 19 20 21 22 23 24 25 <template > <div > <p > 数量:{{ count }}</p > <p > 状态:{{ state }}</p > </div > </template > <script > export default { name : 'MyCount' , props : { count : { type : Number , required : true , default : 100 }, state : Boolean , info : [String , Number ] }, } </script > <style lang ="less" scoped > </style >
12 自定义验证函数· 在封装组件时,可以为 prop 属性指定自定义的验证函数,从而对 prop 属性的值进行更加精确的控制。
通过validator函数对type属性进行校验,value为传入给type的值,type的值为数组中的一个。值为数组中的一个返回值为true表示验证通过,否则验证失败。
1 2 3 4 5 type : { validator (value ) { return ['success' , 'warning' , 'danger' ].indexOf (value) !== -1 } }
1 2 3 4 5 6 7 8 9 10 11 12 13 14 15 16 17 18 19 20 21 22 23 24 25 26 27 28 29 30 <template > <div > <p > 数量:{{ count }}</p > <p > 状态:{{ state }}</p > </div > </template > <script > export default { name : 'MyCount' , props : { count : { type : Number , required : true , default : 100 }, state : Boolean , info : [String , Number ], myType : { validator (value ) { return ['success' , 'warning' , 'danger' ].indexOf (value) !== -1 } } }, } </script > <style lang ="less" scoped > </style >
13 props配置项的注意点· 不要修改props中的值,props是只读的,Vue底层会监测你对props的修改,如果进行了修改,就会发出警告,若业务需求确实需要修改,那么请复制props的内容到data中一份,然后去修改data中的数据。 如果data与props中存在同名的变量,那么会优先使用props中的数据,因为优先级props更高 props中不要使用已经被vue使用了的关键字作为接收父组件传递数据的变量名。 mixin 混入· 1. mixin 混入· mixin (混入)可以把多个组件共用的配置提取成一个混入对象,实现对组件配置项的复用。
2. 未使用混入的页面· App.vue
1 2 3 4 5 6 7 8 9 10 11 12 13 14 15 16 17 18 19 20 21 22 23 <template > <div > <School > </School > <Student > </Student > </div > </template > <script > import School from './components/School.vue' import Student from './components/Student.vue' export default { name : 'App' , components : { School , Student } } </script > <style > </style >
School.vue
1 2 3 4 5 6 7 8 9 10 11 12 13 14 15 16 17 18 19 20 21 22 23 24 25 26 27 <template > <div class ="demo" > <h2 > 学校:{{name}}</h2 > <h2 > 地址:{{address}}</h2 > <button @click ="showName" > showName</button > </div > </template > <script > export default { name : 'School' , data ( return { name : 'SGG' , address : 'Beijing' } }, methods : { showName ( alert (this .name ) } } } </script > <style > </style >
Student.vue
1 2 3 4 5 6 7 8 9 10 11 12 13 14 15 16 17 18 19 20 21 22 23 24 25 26 27 <template > <div > <h2 > 姓名:{{name}}</h2 > <h2 > 年龄:{{age}}</h2 > <button @click ="showName" > showName</button > </div > </template > <script > export default { name : 'Student' , data ( return { name : 'ZS' , age : 18 } }, methods : { showName ( alert (this .name ) } } } </script > <style > </style >
观察代码发现在School组件和Student组件的方法代码一致,即两个组件的methods配置项代码一致,可以把多个组件共用的配置提取成一个混入对象。
3. 将相同的配置项抽取· 在src目录下建立一个mixin.js文件,用于编写不同组件相同的配置项。
mixin.js
1 2 3 4 5 6 7 export const mixin = { methods : { showName ( alert (this .name ) } } }
4. mixin 混入的使用· 在组件中使用mixin混入,需要先将其进行导入,然后再组件的配置项mixins中使用。
School.vue
1 2 3 4 5 6 7 8 9 10 11 12 13 14 15 16 17 18 19 20 21 22 23 24 25 26 <template > <div class ="demo" > <h2 > 学校:{{name}}</h2 > <h2 > 地址:{{address}}</h2 > <button @click ="showName" > showName</button > </div > </template > <script > import {mixin} from '../mixin' export default { name : 'School' , data ( return { name : 'SGG' , address : 'Beijing' } }, mixins : [mixin] } </script > <style > </style >
Student.vue
1 2 3 4 5 6 7 8 9 10 11 12 13 14 15 16 17 18 19 20 21 22 23 24 25 <template > <div > <h2 > 姓名:{{name}}</h2 > <h2 > 年龄:{{age}}</h2 > <button @click ="showName" > showName</button > </div > </template > <script > import {mixin} from '../mixin' export default { name : 'Student' , data ( return { name : 'ZS' , age : 18 } }, mixins : [mixin] } </script > <style > </style >
在mixin混入中也可以编写组件的其他配置项。
mixin.js
1 2 3 4 5 6 7 8 9 10 11 12 13 14 15 16 export const mixin = { methods : { showName ( alert (this .name ) } } } export const mixin2 = { data ( return { x : 100 , y : 200 } }, }
School.vue
1 2 3 4 5 6 7 8 9 10 11 12 13 14 15 16 17 18 19 20 21 22 23 24 25 26 <template > <div class ="demo" > <h2 > 学校:{{name}}</h2 > <h2 > 地址:{{address}}</h2 > <button @click ="showName" > showName</button > </div > </template > <script > import {mixin, mixin2} from '../mixin' export default { name : 'School' , data ( return { name : 'SGG' , address : 'Beijing' } }, mixins : [mixin, mixin2] } </script > <style > </style >
5. mixin中的配置项与组件的配置项冲突· 5.1 普通配置项· 当mixin中的普通配置项与组件的普通配置项发生冲突时,优先使用组件中自己的配置项。
School.vue
1 2 3 4 5 6 7 8 9 10 11 12 13 14 15 16 17 18 19 20 21 22 23 24 25 26 27 <template > <div class ="demo" > <h2 > 学校:{{name}}</h2 > <h2 > 地址:{{address}}</h2 > <button @click ="showName" > showName</button > </div > </template > <script > import {mixin, mixin2} from '../mixin' export default { name : 'School' , data ( return { name : 'SGG' , address : 'Beijing' , x : 666 } }, mixins : [mixin, mixin2] } </script > <style > </style >
5.2 生命周期钩子· 当mixin中的生命周期函数与组件中的周期函数发生冲突时,会先执行mixin中的生命周期函数,后执行组件自己的生命周期函数。
mixin.js
1 2 3 4 5 6 7 8 9 10 11 12 13 14 15 16 17 18 19 20 21 22 export const mixin = { methods : { showName ( alert (this .name ) } } } export const mixin2 = { data ( return { x : 100 , y : 200 } }, } export const mixin3 = { mounted ( console .log ('mixin3 mounted' ) } }
School.vue
1 2 3 4 5 6 7 8 9 10 11 12 13 14 15 16 17 18 19 20 21 22 23 24 25 26 27 28 29 30 <template > <div class ="demo" > <h2 > 学校:{{name}}</h2 > <h2 > 地址:{{address}}</h2 > <button @click ="showName" > showName</button > </div > </template > <script > import {mixin, mixin2, mixin3} from '../mixin' export default { name : 'School' , data ( return { name : 'SGG' , address : 'Beijing' , x : 666 } }, mixins : [mixin, mixin2, mixin3], mounted ( console .log ('School mounted' ) } } </script > <style > </style >
6. mixin 总结· 功能:可以把多个组件共用的配置提取成一个混入对象 使用方式: 1. 插件· Vue中自定义的插件,插件就是包含install方法的一个对象,install的第一个参数是Vue(),第二个以后的参数是插件使用者传递的数据,插件对象中的install方法会被vue自动调用。
使用插件能够增强vue的功能
2. 插件的定义· 在src文件夹下创建plugins.js文件,用于自定义插件
plugins.js
1 2 3 4 5 6 7 8 9 10 11 12 13 14 15 16 17 18 19 20 21 22 23 24 25 26 27 28 29 30 31 32 33 34 35 36 37 38 39 40 export default { install (Vue,x,y,z ){ console .log (x,y,z) Vue .filter ('mySlice' ,function (value ){ return value.slice (0 ,4 ) }) Vue .directive ('fbind' ,{ bind (element,binding ){ element.value = binding.value }, inserted (element,binding ){ element.focus () }, update (element,binding ){ element.value = binding.value } }) Vue .mixin ({ data ( return { x :100 , y :200 } }, }) Vue .prototype hello = ()=> {alert ('你好啊' )} } }
3. 插件的使用· 使用插件时,先导入对应的插件,使用Vue.use()方法使用对应的插件。
main.js
1 2 3 4 5 6 7 8 9 10 11 12 13 14 15 16 17 18 19 import Vue from 'vue' import App from './App.vue' import plugins from './plugins.js' Vue .config .productionTip = false Vue .use (plugins)new Vue ({ render : h =>h (App ), }).$mount('#app' )
App.vue
1 2 3 4 5 6 7 8 9 10 11 12 13 14 15 16 17 18 19 20 21 22 23 <template > <div > <School > </School > <Student > </Student > </div > </template > <script > import School from './components/School.vue' import Student from './components/Student.vue' export default { name : 'App' , components : { School , Student } } </script > <style > </style >
School.vue
1 2 3 4 5 6 7 8 9 10 11 12 13 14 15 16 17 18 19 20 21 22 23 24 <template > <div > <h2 > 学校名称:{{name | mySlice}}</h2 > <h2 > 学校地址:{{address}}</h2 > <button @click ="test" > 点我测试一个hello方法</button > </div > </template > <script > export default { name :'School' , data ( return { name :'SGG' , address :'Beijing' , } }, methods : { test ( this .hello () } }, } </script >
Student.vue
1 2 3 4 5 6 7 8 9 10 11 12 13 14 15 16 17 18 19 <template > <div > <h2 > 学生姓名:{{name}}</h2 > <h2 > 学生性别:{{sex}}</h2 > <input type ="text" v-fbind:value ="name" > </div > </template > <script > export default { name :'Student' , data ( return { name :'张三' , sex :'男' } }, } </script >
scoped 组件间的样式冲突· 1. 组件之间的样式冲突问题· 默认情况下,写在 .vue 组件中的样式会全局生效,因此很容易造成多个组件之间的样式冲突问题。
导致组件之间样式冲突的根本原因是:
① 单页面应用程序中,所有组件的 DOM 结构,都是基于唯一的 index.html 页面进行呈现的
1.1 如何解决组件样式冲突的问题· 为每个组件分配唯一的自定义属性,在编写组件样式时,通过属性选择器来控制样式的作用域,示例代码如下:
1.2 style 节点的 scoped 属性· 为了提高开发效率和开发体验,vue 为 style 节点提供了 scoped 属性,从而防止组件之间的样式冲突问题:
1 2 3 4 5 6 7 8 9 10 11 12 13 14 15 16 17 <template > <div > <h3 class ="title" > 这是 List.vue 组件</h3 > <p > 这是 List.vue 中的 p 标签</p > <p > 这是 List.vue 中的 p 标签</p > </div > </template > <script > export default { name : 'MyList' , } </script > <style lang ="less" scoped > </style >
1 2 3 4 5 6 7 8 9 10 11 12 13 14 15 16 17 18 19 20 21 22 23 24 25 26 27 28 29 30 <template > <div > <h1 > 这是 App.vue 组件</h1 > <p > App 中的 p 标签</p > <p > App 中的 p 标签</p > <hr /> <my-list > </my-list > </div > </template > <script > import MyList from './List.vue' export default { name : 'MyApp' , components : { MyList , }, } </script > <style lang ="less" scoped > p { color : red; } </style >
如果给当前组件的 style 节点添加了 scoped 属性,则当前组件的样式对其子组件是不生效的。
如果想让某些样式对子组件生效,可以使用 /deep/ 深度选择器。
注意:
1 2 3 4 5 6 7 8 9 10 11 12 13 14 15 16 17 18 <template > <div > <h3 class ="title" > 这是 List.vue 组件</h3 > <p > 这是 List.vue 中的 p 标签</p > <p > 这是 List.vue 中的 p 标签</p > </div > </template > <script > export default { name : 'MyList' , } </script > <style lang ="less" scoped > </style >
1 2 3 4 5 6 7 8 9 10 11 12 13 14 15 16 17 18 19 20 21 22 23 24 25 26 27 28 29 30 31 32 33 34 35 36 37 38 <template > <div > <h1 > 这是 App.vue 组件</h1 > <p > App 中的 p 标签</p > <p > App 中的 p 标签</p > <hr /> <my-list > </my-list > </div > </template > <script > import MyList from './List.vue' export default { name : 'MyApp' , components : { MyList , }, } </script > <style lang ="less" scoped > p { color : red; } // /deep/ .title { // color : blue; // } :deep (.title) { color : blue; } </style >
3. 让 style 中支持 less 语法· 如果希望使用 less 语法编写组件的 style 样式,可以按照如下两个步骤进行配置:
① 运行 npm install less -D 命令安装依赖包,从而提供 less 语法的编译支持
② 在 <style>标签上添加 lang=“less” 属性,即可使用 less 语法编写组件的样式
1 2 3 4 5 6 7 8 <style lang ="less" scoped > h1 { color : aquamarine; span { color : aqua; } } </style >
TodoList 案例· 1. 组件化编码流程(通用)· 实现静态组件:抽取组件,使用组件实现静态页面效果 展示动态数据: 交互——从绑定事件监听开始 2. 页面组件的划分·
3. 静态页面代码· 1 2 3 4 5 6 7 8 9 10 11 12 13 14 15 16 17 18 19 20 21 22 23 24 25 26 27 28 29 30 31 32 33 34 35 36 37 38 39 40 41 42 43 44 45 46 47 <!doctype html > <html lang ="en" > <head > <meta charset ="utf-8" > <title > React App</title > <link rel ="stylesheet" href ="index.css" > </head > <body > <div id ="root" > <div class ="todo-container" > <div class ="todo-wrap" > <div class ="todo-header" > <input type ="text" placeholder ="请输入你的任务名称,按回车键确认" /> </div > <ul class ="todo-main" > <li > <label > <input type ="checkbox" /> <span > xxxxx</span > </label > <button class ="btn btn-danger" style ="display:none" > 删除</button > </li > <li > <label > <input type ="checkbox" /> <span > yyyy</span > </label > <button class ="btn btn-danger" style ="display:none" > 删除</button > </li > </ul > <div class ="todo-footer" > <label > <input type ="checkbox" /> </label > <span > <span > 已完成0</span > / 全部2 </span > <button class ="btn btn-danger" > 清除已完成任务</button > </div > </div > </div > </div > </body > </html >
1 2 3 4 5 6 7 8 9 10 11 12 13 14 15 16 17 18 19 20 21 22 23 24 25 26 27 28 29 30 31 32 33 34 35 36 37 38 39 40 41 42 43 44 45 46 47 48 49 50 51 52 53 54 55 56 57 58 59 60 61 62 63 64 65 66 67 68 69 70 71 72 73 74 75 76 77 78 79 80 81 82 83 84 85 86 87 88 89 90 91 92 93 94 95 96 97 98 99 100 101 102 103 104 105 106 107 108 109 110 111 112 113 114 115 116 117 118 119 120 121 122 123 124 125 126 127 128 129 130 131 132 133 134 135 136 body { background : #fff ; } .btn { display : inline-block; padding : 4px 12px ; margin-bottom : 0 ; font-size : 14px ; line-height : 20px ; text-align : center; vertical-align : middle; cursor : pointer; box-shadow : inset 0 1px 0 rgba (255 , 255 , 255 , 0.2 ), 0 1px 2px rgba (0 , 0 , 0 , 0.05 ); border-radius : 4px ; } .btn-danger { color : #fff ; background-color : #da4f49 ; border : 1px solid #bd362f ; } .btn-danger :hover { color : #fff ; background-color : #bd362f ; } .btn :focus { outline : none; } .todo-container { width : 600px ; margin : 0 auto; } .todo-container .todo-wrap { padding : 10px ; border : 1px solid #ddd ; border-radius : 5px ; } .todo-header input { width : 560px ; height : 28px ; font-size : 14px ; border : 1px solid #ccc ; border-radius : 4px ; padding : 4px 7px ; } .todo-header input :focus { outline : none; border-color : rgba (82 , 168 , 236 , 0.8 ); box-shadow : inset 0 1px 1px rgba (0 , 0 , 0 , 0.075 ), 0 0 8px rgba (82 , 168 , 236 , 0.6 ); } .todo-main { margin-left : 0px ; border : 1px solid #ddd ; border-radius : 2px ; padding : 0px ; } .todo-empty { height : 40px ; line-height : 40px ; border : 1px solid #ddd ; border-radius : 2px ; padding-left : 5px ; margin-top : 10px ; } li { list-style : none; height : 36px ; line-height : 36px ; padding : 0 5px ; border-bottom : 1px solid #ddd ; } li label { float : left; cursor : pointer; } li label li input { vertical-align : middle; margin-right : 6px ; position : relative; top : -1px ; } li button { float : right; display : none; margin-top : 3px ; } li :before { content : initial; } li :last-child { border-bottom : none; } .todo-footer { height : 40px ; line-height : 40px ; padding-left : 6px ; margin-top : 5px ; } .todo-footer label { display : inline-block; margin-right : 20px ; cursor : pointer; } .todo-footer label input { position : relative; top : -1px ; vertical-align : middle; margin-right : 5px ; } .todo-footer button { float : right; margin-top : 5px ; }
4. 静态页面组件化拆分· App.vue
1 2 3 4 5 6 7 8 9 10 11 12 13 14 15 16 17 18 19 20 21 22 23 24 25 26 27 28 29 30 31 32 33 34 35 36 37 38 39 40 41 42 43 44 45 46 47 48 49 50 51 52 53 54 55 56 57 58 59 60 61 62 63 64 65 66 <template > <div class ="todo-container" > <div class ="todo-wrap" > <TodoAddTask > </TodoAddTask > <TodoList > </TodoList > <TodoSituation > </TodoSituation > </div > </div > </template > <script > import TodoAddTask from './components/TodoAddTask.vue' import TodoList from './components/TodoList.vue' import TodoSituation from './components/TodoSituation.vue' export default { name : 'App' , components : { TodoAddTask , TodoList , TodoSituation } } </script > <style > body { background : #fff ; } .btn { display : inline-block; padding : 4px 12px ; margin-bottom : 0 ; font-size : 14px ; line-height : 20px ; text-align : center; vertical-align : middle; cursor : pointer; box-shadow : inset 0 1px 0 rgba (255 , 255 , 255 , 0.2 ), 0 1px 2px rgba (0 , 0 , 0 , 0.05 ); border-radius : 4px ; } .btn-danger { color : #fff ; background-color : #da4f49 ; border : 1px solid #bd362f ; } .btn-danger :hover { color : #fff ; background-color : #bd362f ; } .btn :focus { outline : none; } .todo-container { width : 600px ; margin : 0 auto; } .todo-container .todo-wrap { padding : 10px ; border : 1px solid #ddd ; border-radius : 5px ; } </style >
TodoAddTask.vue
1 2 3 4 5 6 7 8 9 10 11 12 13 14 15 16 17 18 19 20 21 22 23 24 25 26 27 28 29 <template > <div class ="todo-header" > <input type ="text" placeholder ="请输入你的任务名称,按回车键确认" /> </div > </template > <script > export default { name : 'TodoAddTask' } </script > <style scoped > .todo-header input { width : 560px ; height : 28px ; font-size : 14px ; border : 1px solid #ccc ; border-radius : 4px ; padding : 4px 7px ; } .todo-header input :focus { outline : none; border-color : rgba (82 , 168 , 236 , 0.8 ); box-shadow : inset 0 1px 1px rgba (0 , 0 , 0 , 0.075 ), 0 0 8px rgba (82 , 168 , 236 , 0.6 ); } </style >
TodoList.vue
1 2 3 4 5 6 7 8 9 10 11 12 13 14 15 16 17 18 19 20 21 22 23 24 25 26 27 28 29 30 31 32 33 34 35 36 <template > <ul class ="todo-main" > <TodoItem > </TodoItem > <TodoItem > </TodoItem > <TodoItem > </TodoItem > </ul > </template > <script > import TodoItem from './TodoItem.vue' export default { name : 'TodoList' , components : {TodoItem } } </script > <style scoped > .todo-main { margin-left : 0px ; border : 1px solid #ddd ; border-radius : 2px ; padding : 0px ; } .todo-empty { height : 40px ; line-height : 40px ; border : 1px solid #ddd ; border-radius : 2px ; padding-left : 5px ; margin-top : 10px ; } </style >
TodoItem.vue
1 2 3 4 5 6 7 8 9 10 11 12 13 14 15 16 17 18 19 20 21 22 23 24 25 26 27 28 29 30 31 32 33 34 35 36 37 38 39 40 41 42 43 44 45 46 47 48 49 50 51 52 <template > <li > <label > <input type ="checkbox" /> <span > xxxxx</span > </label > <button class ="btn btn-danger" style ="display:none" > 删除</button > </li > </template > <script > export default { name : 'TodoItem' } </script > <style scoped > li { list-style : none; height : 36px ; line-height : 36px ; padding : 0 5px ; border-bottom : 1px solid #ddd ; } li label { float : left; cursor : pointer; } li label li input { vertical-align : middle; margin-right : 6px ; position : relative; top : -1px ; } li button { float : right; display : none; margin-top : 3px ; } li :before { content : initial; } li :last-child { border-bottom : none; } </style >
TodoSituation.vue
1 2 3 4 5 6 7 8 9 10 11 12 13 14 15 16 17 18 19 20 21 22 23 24 25 26 27 28 29 30 31 32 33 34 35 36 37 38 39 40 41 42 43 44 45 <template > <div class ="todo-footer" > <label > <input type ="checkbox" /> </label > <span > <span > 已完成0</span > / 全部2 </span > <button class ="btn btn-danger" > 清除已完成任务</button > </div > </template > <script > export default { name : 'TodoSituation' } </script > <style scoped > .todo-footer { height : 40px ; line-height : 40px ; padding-left : 6px ; margin-top : 5px ; } .todo-footer label { display : inline-block; margin-right : 20px ; cursor : pointer; } .todo-footer label input { position : relative; top : -1px ; vertical-align : middle; margin-right : 5px ; } .todo-footer button { float : right; margin-top : 5px ; } </style >
5. 初始化数据列表· TodoList.vue
1 2 3 4 5 6 7 8 9 10 11 12 13 14 15 16 17 18 19 20 21 22 23 24 25 26 27 28 29 30 31 32 33 34 35 36 37 38 39 40 41 42 43 44 45 46 47 <template > <ul class ="todo-main" > <TodoItem v-for ="todo in todos" :key ="todo.id" :todoObj ="todo" > </TodoItem > </ul > </template > <script > import TodoItem from './TodoItem.vue' export default { name : 'TodoList' , components : {TodoItem }, data ( return { todos : [ {id : '001' , todo : '吃饭' , done : true }, {id : '002' , todo : '睡觉' , done : false }, {id : '003' , todo : '打豆豆' , done : true } ] } }, } </script > <style scoped > .todo-main { margin-left : 0px ; border : 1px solid #ddd ; border-radius : 2px ; padding : 0px ; } .todo-empty { height : 40px ; line-height : 40px ; border : 1px solid #ddd ; border-radius : 2px ; padding-left : 5px ; margin-top : 10px ; } </style >
TodoItem.vue
1 2 3 4 5 6 7 8 9 10 11 12 13 14 15 16 17 18 19 20 21 22 23 24 25 26 27 28 29 30 31 32 33 34 35 36 37 38 39 40 41 42 43 44 45 46 47 48 49 50 51 52 53 54 <template > <li > <label > <input type ="checkbox" :checked ="todoObj.done" /> <span > {{todoObj.todo}}</span > </label > <button class ="btn btn-danger" style ="display:none" > 删除</button > </li > </template > <script > export default { name : 'TodoItem' , props : ['todoObj' ] } </script > <style scoped > li { list-style : none; height : 36px ; line-height : 36px ; padding : 0 5px ; border-bottom : 1px solid #ddd ; } li label { float : left; cursor : pointer; } li label li input { vertical-align : middle; margin-right : 6px ; position : relative; top : -1px ; } li button { float : right; display : none; margin-top : 3px ; } li :before { content : initial; } li :last-child { border-bottom : none; } </style >
6. 添加列表数据· 随机生成id,使用nanoid,安装nanoid,npm i nanoidnanoid,import {nanoid} from nanoidnanoid,nanoid()会返回一个唯一的字符串
修改列表数据的存放位置为App.vue,便于数据的添加。
当前数据的传递方式
App.vue
1 2 3 4 5 6 7 8 9 10 11 12 13 14 15 16 17 18 19 20 21 22 23 24 25 26 27 28 29 30 31 32 33 34 35 36 37 <template > <div class ="todo-container" > <div class ="todo-wrap" > <TodoAddTask :addTodo ="addTodo" > </TodoAddTask > <TodoList :todos ="todos" > </TodoList > <TodoSituation > </TodoSituation > </div > </div > </template > <script > import TodoAddTask from './components/TodoAddTask.vue' import TodoList from './components/TodoList.vue' import TodoSituation from './components/TodoSituation.vue' export default { name : 'App' , components : { TodoAddTask , TodoList , TodoSituation }, data ( return { todos : [ {id : '001' , todo : '吃饭' , done : true }, {id : '002' , todo : '睡觉' , done : false }, {id : '003' , todo : '打豆豆' , done : true } ] } }, methods : { addTodo (todo ) { this .todos .unshift (todo) } }, } </script >
TodoList.vue
1 2 3 4 5 6 7 8 9 10 11 12 13 14 15 16 17 18 19 20 21 <template > <ul class ="todo-main" > <TodoItem v-for ="todo in todos" :key ="todo.id" :todoObj ="todo" > </TodoItem > </ul > </template > <script > import TodoItem from './TodoItem.vue' export default { name : 'TodoList' , components : {TodoItem }, props : ['todos' ] } </script >
TodoAddTask.vue
1 2 3 4 5 6 7 8 9 10 11 12 13 14 15 16 17 18 19 20 21 22 23 24 25 26 27 28 29 30 31 32 33 34 35 36 37 38 39 40 41 42 <template > <div class ="todo-header" > <input type ="text" placeholder ="请输入你的任务名称,按回车键确认" v-model ="task" @keydown.enter ="addTask" /> </div > </template > <script > import {nanoid} from 'nanoid' export default { name : 'TodoAddTask' , props : ['addTodo' ], data ( return { task : '' } }, methods : { addTask ( if (!this .task ) return const todo = { id : nanoid (), todo : this .task , done : false } this .addTodo (todo) this .task = '' } } } </script >
7. 勾选· 由于数据在App组件中,所以修改数据中完成状态的方法也写在App组件中,然后将方法传递给子组件调用,子组件调用方法修改勾选状态。
App.vue
1 2 3 4 5 6 7 8 9 10 11 12 13 14 15 16 17 18 19 20 21 22 23 24 25 26 27 28 29 30 31 32 33 34 35 36 37 38 39 40 41 42 43 44 45 46 47 <template > <div class ="todo-container" > <div class ="todo-wrap" > <TodoAddTask :addTodo ="addTodo" > </TodoAddTask > <TodoList :todos ="todos" :changeDone ="changeDone" > </TodoList > <TodoSituation > </TodoSituation > </div > </div > </template > <script > import TodoAddTask from './components/TodoAddTask.vue' import TodoList from './components/TodoList.vue' import TodoSituation from './components/TodoSituation.vue' export default { name : 'App' , components : { TodoAddTask , TodoList , TodoSituation }, data ( return { todos : [ {id : '001' , todo : '吃饭' , done : true }, {id : '002' , todo : '睡觉' , done : false }, {id : '003' , todo : '打豆豆' , done : true } ] } }, methods : { addTodo (todo ) { this .todos .unshift (todo) }, changeDone (id ) { this .todos .forEach ((todo )=> { if (todo.id === id) todo.done = !todo.done }) } }, } </script >
TodoList.vue
1 2 3 4 5 6 7 8 9 10 11 12 13 14 15 16 17 18 19 20 21 22 23 <template > <ul class ="todo-main" > <TodoItem v-for ="todo in todos" :key ="todo.id" :todoObj ="todo" :changeDone ="changeDone" > </TodoItem > </ul > </template > <script > import TodoItem from './TodoItem.vue' export default { name : 'TodoList' , components : {TodoItem }, props : ['todos' , 'changeDone' ] } </script >
TodoItem.vue
1 2 3 4 5 6 7 8 9 10 11 12 13 14 15 16 17 18 19 20 21 22 23 24 25 26 27 28 29 30 31 32 33 34 35 36 37 38 39 40 41 42 43 44 45 46 47 48 49 50 51 52 53 54 55 56 57 58 59 60 <template > <li > <label > <input type ="checkbox" :checked ="todoObj.done" @click ="changeChecked" /> <span > {{todoObj.todo}}</span > </label > <button class ="btn btn-danger" style ="display:none" > 删除</button > </li > </template > <script > export default { name : 'TodoItem' , props : ['todoObj' , 'changeDone' ], methods : { changeChecked ( this .changeDone (this .todoObj .id ) } }, } </script > <style scoped > li { list-style : none; height : 36px ; line-height : 36px ; padding : 0 5px ; border-bottom : 1px solid #ddd ; } li label { float : left; cursor : pointer; } li label li input { vertical-align : middle; margin-right : 6px ; position : relative; top : -1px ; } li button { float : right; display : none; margin-top : 3px ; } li :before { content : initial; } li :last-child { border-bottom : none; } </style >
8. 删除· 鼠标悬浮,对应的item项背景颜色改变,删除按钮显示。
TodoItem.vue
1 2 3 4 5 6 7 li :hover { background-color : #ddd ; } li :hover button { display : inline-block; }
1 <button class ="btn btn-danger" @click ="handlerDelete" > 删除</button >
App.vue
1 2 3 4 5 6 7 8 9 10 11 12 13 14 15 16 17 18 19 20 21 22 23 24 25 26 27 28 29 30 31 32 33 34 35 36 37 38 39 40 41 42 43 44 45 46 47 48 49 50 51 52 53 54 <template > <div class ="todo-container" > <div class ="todo-wrap" > <TodoAddTask :addTodo ="addTodo" > </TodoAddTask > <TodoList :todos ="todos" :changeDone ="changeDone" :deleteTodo ="deleteTodo" > </TodoList > <TodoSituation > </TodoSituation > </div > </div > </template > <script > import TodoAddTask from './components/TodoAddTask.vue' import TodoList from './components/TodoList.vue' import TodoSituation from './components/TodoSituation.vue' export default { name : 'App' , components : { TodoAddTask , TodoList , TodoSituation }, data ( return { todos : [ {id : '001' , todo : '吃饭' , done : true }, {id : '002' , todo : '睡觉' , done : false }, {id : '003' , todo : '打豆豆' , done : true } ] } }, methods : { addTodo (todo ) { this .todos .unshift (todo) }, changeDone (id ) { this .todos .forEach ((todo )=> { if (todo.id === id) todo.done = !todo.done }) }, deleteTodo (id ) { this .todos = this .todos .filter ((todo )=> { return todo.id !== id }) } }, } </script >
TodoList.vue
1 2 3 4 5 6 7 8 9 10 11 12 13 14 15 16 17 18 19 20 21 22 23 24 <template > <ul class ="todo-main" > <TodoItem v-for ="todo in todos" :key ="todo.id" :todoObj ="todo" :changeDone ="changeDone" :deleteTodo ="deleteTodo" > </TodoItem > </ul > </template > <script > import TodoItem from './TodoItem.vue' export default { name : 'TodoList' , components : {TodoItem }, props : ['todos' , 'changeDone' , 'deleteTodo' ] } </script >
TodoItem.vue
1 2 3 4 5 6 7 8 9 10 11 12 13 14 15 16 17 18 19 20 21 22 23 24 25 26 27 28 29 30 31 <template > <li > <label > <input type ="checkbox" :checked ="todoObj.done" @click ="changeChecked" /> <span > {{todoObj.todo}}</span > </label > <button class ="btn btn-danger" @click ="handlerDelete" > 删除</button > </li > </template > <script > export default { name : 'TodoItem' , props : ['todoObj' , 'changeDone' , 'deleteTodo' ], methods : { changeChecked ( this .changeDone (this .todoObj .id ) }, handlerDelete ( if (confirm ('确定删除吗?' )) { this .deleteTodo (this .todoObj .id ) } } }, } </script >
9. 底部待做事项状态统计· App.vue
1 2 3 4 5 6 7 8 9 10 11 12 13 14 15 <template > <div class ="todo-container" > <div class ="todo-wrap" > <TodoAddTask :addTodo ="addTodo" > </TodoAddTask > <TodoList :todos ="todos" :changeDone ="changeDone" :deleteTodo ="deleteTodo" > </TodoList > <TodoSituation :todos ="todos" > </TodoSituation > </div > </div > </template >
TodoSituation.vue
1 2 3 4 5 6 7 8 9 10 11 12 13 14 15 16 17 18 19 20 21 22 23 24 25 26 27 28 <template > <div class ="todo-footer" > <label > <input type ="checkbox" /> </label > <span > <span > 已完成{{doneTotal}}</span > / 全部{{todos.length}} </span > <button class ="btn btn-danger" > 清除已完成任务</button > </div > </template > <script > export default { name : 'TodoSituation' , props : ['todos' ], computed : { doneTotal ( return this .todos .reduce ((pre, todo ) => { return pre + (todo.done ? 1 : 0 ) }, 0 ) } } } </script >
10. 全选 & 清除已完成· App.vue
1 2 3 4 5 6 7 8 9 10 11 12 13 14 15 16 17 18 19 20 21 22 23 24 25 26 27 28 29 30 31 32 33 34 35 36 37 38 39 40 41 42 43 44 45 46 47 48 49 50 51 52 53 54 55 56 57 58 59 60 61 62 63 64 65 66 67 68 <template > <div class ="todo-container" > <div class ="todo-wrap" > <TodoAddTask :addTodo ="addTodo" > </TodoAddTask > <TodoList :todos ="todos" :changeDone ="changeDone" :deleteTodo ="deleteTodo" > </TodoList > <TodoSituation :todos ="todos" :checkAll ="checkAll" :deleteDone ="deleteDone" > </TodoSituation > </div > </div > </template > <script > import TodoAddTask from './components/TodoAddTask.vue' import TodoList from './components/TodoList.vue' import TodoSituation from './components/TodoSituation.vue' export default { name : 'App' , components : { TodoAddTask , TodoList , TodoSituation }, data ( return { todos : [ {id : '001' , todo : '吃饭' , done : true }, {id : '002' , todo : '睡觉' , done : false }, {id : '003' , todo : '打豆豆' , done : true } ] } }, methods : { addTodo (todo ) { this .todos .unshift (todo) }, changeDone (id ) { this .todos .forEach ((todo )=> { if (todo.id === id) todo.done = !todo.done }) }, deleteTodo (id ) { this .todos = this .todos .filter ((todo )=> { return todo.id !== id }) }, checkAll (done ) { this .todos .forEach ((todo )=> { todo.done = done }) }, deleteDone ( this .todos = this .todos .filter (todo =>done ) } }, } </script >
TodoSituation.vue
1 2 3 4 5 6 7 8 9 10 11 12 13 14 15 16 17 18 19 20 21 22 23 24 25 26 27 28 29 30 31 32 33 34 35 36 37 38 39 40 41 42 43 44 45 <template > <div class ="todo-footer" v-show ="total" > <label > <input type ="checkbox" v-model ="isAll" /> </label > <span > <span > 已完成{{doneTotal}}</span > / 全部{{total}} </span > <button class ="btn btn-danger" @click ="clearDone" > 清除已完成任务</button > </div > </template > <script > export default { name : 'TodoSituation' , props : ['todos' , 'checkAll' , 'deleteDone' ], computed : { total ( return this .todos .length }, doneTotal ( return this .todos .reduce ((pre, todo ) => { return pre + (todo.done ? 1 : 0 ) }, 0 ) }, isAll : { get ( return this .total === this .doneTotal && this .total >0 }, set (value ) { this .checkAll (value) } } }, methods : { clearDone ( this .deleteDone () } }, } </script >
11. 总结· 组件化编码流程:(1).拆分静态组件:组件要按照功能点拆分,命名不要与html元素冲突。 (2).实现动态组件:考虑好数据的存放位置,数据是一个组件在用,还是一些组件在用:1).一个组件在用:放在组件自身即可。 2). 一些组件在用:放在他们共同的父组件上(状态提升)。 (3).实现交互:从绑定事件开始。 props适用于:(1).父组件 ==> 子组件 通信 (2).子组件 ==> 父组件 通信(要求父先给子一个函数) 使用v-model时要切记:v-model绑定的值不能是props传过来的值,因为props是不可以修改的! props传过来的若是对象类型的值,修改对象中的属性时Vue不会报错,但不推荐这样做。 12. 实现本地存储· App.vue
1 2 3 4 5 6 7 8 9 10 11 12 13 14 15 16 17 18 19 20 21 22 23 24 25 26 27 28 29 30 31 32 33 34 35 36 37 38 39 40 41 42 43 44 45 46 47 48 49 50 51 52 53 54 55 56 57 58 59 60 61 62 63 64 65 66 67 68 69 70 71 72 <template > <div class ="todo-container" > <div class ="todo-wrap" > <TodoAddTask :addTodo ="addTodo" > </TodoAddTask > <TodoList :todos ="todos" :changeDone ="changeDone" :deleteTodo ="deleteTodo" > </TodoList > <TodoSituation :todos ="todos" :checkAll ="checkAll" :deleteDone ="deleteDone" > </TodoSituation > </div > </div > </template > <script > import TodoAddTask from './components/TodoAddTask.vue' import TodoList from './components/TodoList.vue' import TodoSituation from './components/TodoSituation.vue' export default { name : 'App' , components : { TodoAddTask , TodoList , TodoSituation }, data ( return { todos : JSON .parse (localStorage .getItem ('todos' )) || [] } }, methods : { addTodo (todo ) { this .todos .unshift (todo) }, changeDone (id ) { this .todos .forEach (todo => if (todo.id === id) todo.done = !todo.done }) }, deleteTodo (id ) { this .todos = this .todos .filter (todo => return todo.id !== id }) }, checkAll (done ) { this .todos .forEach (todo => todo.done = done }) }, deleteDone ( this .todos = this .todos .filter (todo =>done ) } }, watch : { todos : { deep : true , handler (newVal ) { localStorage .setItem ('todos' , JSON .stringify (newVal)) } } } } </script >
13. 自定义事件实现子组件向父组件传递数据· App.vue
1 2 3 4 5 6 7 8 9 10 11 12 13 14 15 16 17 18 19 20 21 22 23 24 25 26 27 28 29 30 31 32 33 34 35 36 37 38 39 40 41 42 43 44 45 46 47 48 49 50 51 52 53 54 55 56 57 58 59 60 61 62 63 64 65 66 67 68 69 70 71 72 73 <template > <div class ="todo-container" > <div class ="todo-wrap" > <TodoAddTask @addTodo ="addTodo" > </TodoAddTask > <TodoList :todos ="todos" :changeDone ="changeDone" :deleteTodo ="deleteTodo" > </TodoList > <TodoSituation :todos ="todos" @checkAll ="checkAll" @deleteDone ="deleteDone" > </TodoSituation > </div > </div > </template > <script > import TodoAddTask from './components/TodoAddTask.vue' import TodoList from './components/TodoList.vue' import TodoSituation from './components/TodoSituation.vue' export default { name : 'App' , components : { TodoAddTask , TodoList , TodoSituation }, data ( return { todos : JSON .parse (localStorage .getItem ('todos' )) || [] } }, methods : { addTodo (todo ) { this .todos .unshift (todo) }, changeDone (id ) { this .todos .forEach (todo => if (todo.id === id) todo.done = !todo.done }) }, deleteTodo (id ) { this .todos = this .todos .filter (todo => return todo.id !== id }) }, checkAll (done ) { this .todos .forEach (todo => todo.done = done }) }, deleteDone ( this .todos = this .todos .filter (todo =>done ) } }, watch : { todos : { deep : true , handler (newVal ) { localStorage .setItem ('todos' , JSON .stringify (newVal)) } } } } </script >
TodoAddTask.vue
1 2 3 4 5 6 7 8 9 10 11 12 13 14 15 16 17 18 19 20 21 22 23 24 25 26 27 28 29 30 31 32 33 34 35 36 37 38 39 40 41 42 43 <template > <div class ="todo-header" > <input type ="text" placeholder ="请输入你的任务名称,按回车键确认" v-model ="task" @keydown.enter ="addTask" /> </div > </template > <script > import {nanoid} from 'nanoid' export default { name : 'TodoAddTask' , data ( return { task : '' } }, methods : { addTask ( if (!this .task ) return const todo = { id : nanoid (), todo : this .task , done : false } this .$emit('addTodo' , todo) this .task = '' } } } </script >
TodoSituation.vue
1 2 3 4 5 6 7 8 9 10 11 12 13 14 15 16 17 18 19 20 21 22 23 24 25 26 27 28 29 30 31 32 33 34 35 36 37 38 39 40 41 42 43 44 45 46 47 48 49 50 51 <template > <div class ="todo-footer" v-show ="total" > <label > <input type ="checkbox" v-model ="isAll" /> </label > <span > <span > 已完成{{doneTotal}}</span > / 全部{{total}} </span > <button class ="btn btn-danger" @click ="clearDone" > 清除已完成任务</button > </div > </template > <script > export default { name : 'TodoSituation' , props : ['todos' ], computed : { total ( return this .todos .length }, doneTotal ( return this .todos .reduce ((pre, todo ) => { return pre + (todo.done ? 1 : 0 ) }, 0 ) }, isAll : { get ( return this .total === this .doneTotal && this .total >0 }, set (value ) { this .$emit('checkAll' , value) } } }, methods : { clearDone ( this .$emit('deleteDone' ) } }, } </script >
14. 全局事件总线实现组件数据传递· 全局事件总线实现TodoItem组件向App组件传递数据。
main.js
1 2 3 4 5 6 7 8 9 10 11 12 13 import Vue from 'vue' import App from './App.vue' Vue .config .productionTip = false new Vue ({ render : h =>h (App ), beforeCreate ( Vue .prototype $bus = this } }).$mount('#app' )
App.vue
1 2 3 4 5 6 7 8 9 10 11 12 13 14 15 16 17 18 19 20 21 22 23 24 25 26 27 28 29 30 31 32 33 34 35 36 37 38 39 40 41 42 43 44 45 46 47 48 49 50 51 52 53 54 55 56 57 58 59 60 61 62 63 64 65 66 67 68 69 70 71 72 73 74 75 76 77 78 79 80 81 82 83 84 85 86 87 88 89 90 91 92 93 94 95 96 97 98 99 100 101 102 103 104 105 106 107 108 109 110 111 112 113 114 115 116 117 118 119 120 121 122 123 124 <template > <div class ="todo-container" > <div class ="todo-wrap" > <TodoAddTask @addTodo ="addTodo" > </TodoAddTask > <TodoList :todos ="todos" > </TodoList > <TodoSituation :todos ="todos" @checkAll ="checkAll" @deleteDone ="deleteDone" > </TodoSituation > </div > </div > </template > <script > import TodoAddTask from './components/TodoAddTask.vue' import TodoList from './components/TodoList.vue' import TodoSituation from './components/TodoSituation.vue' export default { name : 'App' , components : { TodoAddTask , TodoList , TodoSituation }, data ( return { todos : JSON .parse (localStorage .getItem ('todos' )) || [] } }, methods : { addTodo (todo ) { this .todos .unshift (todo) }, changeDone (id ) { this .todos .forEach (todo => if (todo.id === id) todo.done = !todo.done }) }, deleteTodo (id ) { this .todos = this .todos .filter (todo => return todo.id !== id }) }, checkAll (done ) { this .todos .forEach (todo => todo.done = done }) }, deleteDone ( this .todos = this .todos .filter (todo =>done ) } }, watch : { todos : { deep : true , handler (newVal ) { localStorage .setItem ('todos' , JSON .stringify (newVal)) } } }, mounted ( this .$bus .$on('changeDone' , this .changeDone ) this .$bus .$on('deleteTodo' , this .deleteTodo ) }, beforeDestroy ( this .$bus .$off('changeDone' ) this .$bus .$off('deleteTodo' ) } } </script > <style > body { background : #fff ; } .btn { display : inline-block; padding : 4px 12px ; margin-bottom : 0 ; font-size : 14px ; line-height : 20px ; text-align : center; vertical-align : middle; cursor : pointer; box-shadow : inset 0 1px 0 rgba (255 , 255 , 255 , 0.2 ), 0 1px 2px rgba (0 , 0 , 0 , 0.05 ); border-radius : 4px ; } .btn-danger { color : #fff ; background-color : #da4f49 ; border : 1px solid #bd362f ; } .btn-danger :hover { color : #fff ; background-color : #bd362f ; } .btn :focus { outline : none; } .todo-container { width : 600px ; margin : 0 auto; } .todo-container .todo-wrap { padding : 10px ; border : 1px solid #ddd ; border-radius : 5px ; } </style >
TodoList.vue
1 2 3 4 5 6 7 8 9 10 11 12 13 14 15 16 17 18 19 20 21 22 23 24 25 26 27 28 29 30 31 32 33 34 35 36 37 38 39 40 <template > <ul class ="todo-main" > <TodoItem v-for ="todo in todos" :key ="todo.id" :todoObj ="todo" > </TodoItem > </ul > </template > <script > import TodoItem from './TodoItem.vue' export default { name : 'TodoList' , components : {TodoItem }, props : ['todos' ] } </script > <style scoped > .todo-main { margin-left : 0px ; border : 1px solid #ddd ; border-radius : 2px ; padding : 0px ; } .todo-empty { height : 40px ; line-height : 40px ; border : 1px solid #ddd ; border-radius : 2px ; padding-left : 5px ; margin-top : 10px ; } </style >
TodoItem.vue
1 2 3 4 5 6 7 8 9 10 11 12 13 14 15 16 17 18 19 20 21 22 23 24 25 26 27 28 29 30 31 32 33 34 35 36 37 38 39 40 41 42 43 44 45 46 47 48 49 50 51 52 53 54 55 56 57 58 59 60 61 62 63 64 65 66 67 68 69 70 71 72 73 74 75 76 77 78 79 80 <template > <li > <label > <input type ="checkbox" :checked ="todoObj.done" @click ="changeChecked" /> <span > {{todoObj.todo}}</span > </label > <button class ="btn btn-danger" @click ="handlerDelete" > 删除</button > </li > </template > <script > export default { name : 'TodoItem' , props : ['todoObj' ], methods : { changeChecked ( this .$bus .$emit('changeDone' , this .todoObj .id ) }, handlerDelete ( if (confirm ('确定删除吗?' )) { this .$bus .$emit('deleteTodo' , this .todoObj .id ) } } }, } </script > <style scoped > li { list-style : none; height : 36px ; line-height : 36px ; padding : 0 5px ; border-bottom : 1px solid #ddd ; } li label { float : left; cursor : pointer; } li label li input { vertical-align : middle; margin-right : 6px ; position : relative; top : -1px ; } li button { float : right; display : none; margin-top : 3px ; } li :before { content : initial; } li :last-child { border-bottom : none; } li :hover { background-color : #ddd ; } li :hover button { display : inline-block; } </style >
15. 实现待做事项的修改· TodoItem.vue
1 2 3 4 5 6 7 8 9 10 11 12 13 14 15 16 17 18 19 20 21 22 23 24 25 26 27 28 29 30 31 32 33 34 35 36 37 38 39 40 41 42 43 44 45 46 47 48 49 50 51 52 53 54 55 56 57 58 59 60 61 62 63 <template > <li > <label > <input type ="checkbox" :checked ="todoObj.done" @click ="changeChecked" /> <span v-show ="!todoObj.isEdit" > {{todoObj.todo}}</span > <input v-show ="todoObj.isEdit" type ="text" v-model ="todoObj.todo" @blur ="handlerBlur" ref ="inputTask" > </label > <button class ="btn btn-danger" @click ="handlerDelete" > 删除</button > <button v-show ="!todoObj.isEdit" class ="btn btn-edit" @click ="handlerEdit" > 编辑</button > </li > </template > <script > export default { name : 'TodoItem' , props : ['todoObj' ], methods : { changeChecked ( this .$bus .$emit('changeDone' , this .todoObj .id ) }, handlerDelete ( if (confirm ('确定删除吗?' )) { this .$bus .$emit('deleteTodo' , this .todoObj .id ) } }, handlerEdit ( if ('isEdit' in this .todoObj ) { console .log ('todoObj存在isEdit属性,进行属性值的修改' ) this .todoObj .isEdit = true } else { console .log ('todoObj没有isEdit属性,进行属性的添加' ) this .$set(this .todoObj , 'isEdit' , true ) } this .$nextTick(() => { this .$refs .inputTask .focus () }) }, handlerBlur ( this .todoObj .isEdit = false } } } </script >
组件自定义事件· 自定义事件· 自定义事件是一种组件间通信的方式,适用于:子组件 ===> 父组件
使用场景:A是父组件,B是子组件,B想给A传数据,那么就要在A中给B绑定自定义事件(事件的回调在A中)。
1. 自定义属性实现子组件向父组件传递数据· App.vue
1 2 3 4 5 6 7 8 9 10 11 12 13 14 15 16 17 18 19 20 21 22 23 24 25 26 27 28 29 30 31 32 33 34 35 36 <template > <div class ="app" > <h1 > {{msg}}</h1 > <School :getSchoolName ="getSchoolName" > </School > <Student > </Student > </div > </template > <script > import Student from './components/Student' import School from './components/School' export default { name : 'App' , components : { School , Student }, data ( return { msg : '你好啊!' } }, methods : { getSchoolName (name ) { console .log ('App收到了学校名:' , name) } } } </script > <style scoped > .app { background-color : gray; padding : 5px ; } </style >
School.vue
1 2 3 4 5 6 7 8 9 10 11 12 13 14 15 16 17 18 19 20 21 22 23 24 25 26 27 28 29 30 31 32 33 34 <template > <div class ="school" > <h2 > 学校名称:{{name}}</h2 > <h2 > 学校地址:{{address}}</h2 > <button @click ="sendSchoolName" > 把学校名给App</button > </div > </template > <script > export default { name :'School' , props :['getSchoolName' ], data ( return { name :'SGG' , address :'Beijing' , } }, methods : { sendSchoolName ( this .getSchoolName (this .name ) } }, } </script > <style scoped > .school { background-color : skyblue; padding : 5px ; } </style >
Student.vue
1 2 3 4 5 6 7 8 9 10 11 12 13 14 15 16 17 18 19 20 21 22 23 24 25 26 27 28 <template > <div class ="student" > <h2 > 学生姓名:{{name}}</h2 > <h2 > 学生性别:{{sex}}</h2 > </div > </template > <script > export default { name :'Student' , data ( return { name :'张三' , sex :'男' } }, } </script > <style scoped > .student { background-color : pink; padding : 5px ; margin-top : 30px ; } </style >
2. 自定义事件实现子组件向父组件传递数据· 2.1 进行自定义事件的绑定· 为子组件绑定自定义事件,在父组件中:
1 <子组件名 @自定义事件名 ="事件的处理函数" > </子组件名 >
或
1 <子组件名 v-on:自定义事件名 ="事件的处理函数" > </子组件名 >
App.vue
1 2 3 4 5 6 7 8 9 10 11 12 13 14 15 16 17 18 19 20 21 22 23 24 25 26 27 28 29 30 31 32 33 34 35 36 37 38 39 40 41 42 43 44 <template > <div class ="app" > <h1 > {{msg}}</h1 > <School :getSchoolName ="getSchoolName" > </School > <Student @MyEvent ="getStudentName" > </Student > </div > </template > <script > import Student from './components/Student' import School from './components/School' export default { name : 'App' , components : { School , Student }, data ( return { msg : '你好啊!' } }, methods : { getSchoolName (name ) { console .log ('App收到了学校名:' , name) }, getStudentName (name ) { console .log ('App收到了学生名:' , name) } } } </script > <style scoped > .app { background-color : gray; padding : 5px ; } </style >
2.2 触发自定义事件· 进行自定义事件的触发,需要在被绑定自定义事件的子组件中进行触发。给谁绑定,谁触发。
子组件被绑定的自定义事件,自定义事件会挂载在对应子组件实例对象的$emit属性上。
触发自定义事件:
1 this .$emit('自定义事件名' , 向事件处理函数传递的参数)
Student.vue
1 2 3 4 5 6 7 8 9 10 11 12 13 14 15 16 17 18 19 20 21 22 23 24 25 26 27 28 29 30 31 32 33 34 35 <template > <div class ="student" > <h2 > 学生姓名:{{name}}</h2 > <h2 > 学生性别:{{sex}}</h2 > <button @click ="sendStudentName" > 把学生姓名给App</button > </div > </template > <script > export default { name :'Student' , data ( return { name :'张三' , sex :'男' } }, methods : { sendStudentName ( this .$emit('MyEvent' , this .name ) } }, } </script > <style scoped > .student { background-color : pink; padding : 5px ; margin-top : 30px ; } </style >
2.3 使用 ref 绑定自定义事件· 使用 ref 为子组件绑定自定义事件,需要在mounted()中进行,因为此时组件的真实DOM才被渲染到页面上完成。
2.3.1 语法· 使用 ref 绑定自定义事件,在父组件中:
1 <子组件名 @自定义事件名 ="事件的处理函数" > </子组件名 >
1 2 3 4 5 mounted ( this .$refs .子组件名.$on('自定义事件名' , 事件的处理函数) }
2.3.2 自定义事件的绑定· App.vue
1 2 3 4 5 6 7 8 9 10 11 12 13 14 15 16 17 18 19 20 21 22 23 24 25 26 27 28 29 30 31 32 33 34 35 36 37 38 39 40 41 42 43 44 45 46 47 48 49 50 51 52 53 <template > <div class ="app" > <h1 > {{msg}}</h1 > <School :getSchoolName ="getSchoolName" > </School > <Student ref ="student" > </Student > </div > </template > <script > import Student from './components/Student' import School from './components/School' export default { name : 'App' , components : { School , Student }, data ( return { msg : '你好啊!' } }, methods : { getSchoolName (name ) { console .log ('App收到了学校名:' , name) }, getStudentName (name ) { console .log ('App收到了学生名:' , name) } }, mounted ( this .$refs .student .$on('MyEvent' , this .getStudentName ) }, } </script > <style scoped > .app { background-color : gray; padding : 5px ; } </style >
2.3.3 使用 ref 绑定自定义事件的好处· 使用 ref 绑定自定义事件的好处,能够更好的处理自定义事件的绑定,能对自定义事件的绑定有更加灵活的控制。
使用 v-on 进行自定义事件的绑定,在页面渲染解析完成,vue就会为其绑定自定义指令,而使用 ref 绑定自定义事件,可以对其绑定的时间进行控制,如:延时、等待请求完成等。
App.vue
1 2 3 4 5 6 7 8 9 10 11 12 13 14 15 16 17 18 19 20 21 22 23 24 25 26 27 28 29 30 31 32 33 34 35 36 37 38 39 40 41 42 43 44 45 46 47 48 49 50 51 52 53 54 55 <template > <div class ="app" > <h1 > {{msg}}</h1 > <School :getSchoolName ="getSchoolName" > </School > <Student ref ="student" > </Student > </div > </template > <script > import Student from './components/Student' import School from './components/School' export default { name : 'App' , components : { School , Student }, data ( return { msg : '你好啊!' } }, methods : { getSchoolName (name ) { console .log ('App收到了学校名:' , name) }, getStudentName (name ) { console .log ('App收到了学生名:' , name) } }, mounted ( setTimeout (()=> { this .$refs .student .$on('MyEvent' , this .getStudentName ) }, 3000 ) }, } </script > <style scoped > .app { background-color : gray; padding : 5px ; } </style >
2.4 触发自定义事件向处理函数传递多个参数· 在接收参数时,不想书写多个形参,可以使用...扩展运算符将多个参数进行接收。
App.vue
1 2 3 4 5 6 7 8 9 10 11 12 13 14 15 16 17 18 19 20 21 22 23 24 25 26 27 28 29 30 31 32 33 34 35 36 37 38 39 40 41 42 43 44 45 46 47 48 49 50 51 52 53 54 <template > <div class ="app" > <h1 > {{msg}}</h1 > <School :getSchoolName ="getSchoolName" > </School > <Student ref ="student" > </Student > </div > </template > <script > import Student from './components/Student' import School from './components/School' export default { name : 'App' , components : { School , Student }, data ( return { msg : '你好啊!' } }, methods : { getSchoolName (name ) { console .log ('App收到了学校名:' , name) }, getStudentName (name, ...params ) { console .log ('App收到了学生名:' , name) console .log ('其他参数:' , params) } }, mounted ( this .$refs .student .$on('MyEvent' , this .getStudentName ) } } </script > <style scoped > .app { background-color : gray; padding : 5px ; } </style >
Student.vue
1 2 3 4 5 6 7 8 9 10 11 12 13 14 15 16 17 18 19 20 21 22 23 24 25 26 27 28 29 30 31 32 33 34 35 36 37 <template > <div class ="student" > <h2 > 学生姓名:{{name}}</h2 > <h2 > 学生性别:{{sex}}</h2 > <button @click ="sendStudentName" > 把学生姓名给App</button > </div > </template > <script > export default { name :'Student' , data ( return { name :'张三' , sex :'男' } }, methods : { sendStudentName ( console .log ('点击了按钮"把学生姓名给App"' ) this .$emit('MyEvent' , this .name , 1 , 2 , 3 ) } }, } </script > <style scoped > .student { background-color : pink; padding : 5px ; margin-top : 30px ; } </style >
2.5 自定义事件只触发一次· 实现方法与使用vue的内置事件一样,使用事件修饰符
App.vue
1 2 3 4 5 6 7 8 9 10 11 12 13 14 15 16 17 18 19 20 21 22 23 24 25 26 27 28 29 30 31 32 33 34 35 36 37 38 39 40 41 42 43 44 45 46 <template > <div class ="app" > <h1 > {{msg}}</h1 > <School :getSchoolName ="getSchoolName" > </School > <Student @MyEvent.once ="getStudentName" > </Student > </div > </template > <script > import Student from './components/Student' import School from './components/School' export default { name : 'App' , components : { School , Student }, data ( return { msg : '你好啊!' } }, methods : { getSchoolName (name ) { console .log ('App收到了学校名:' , name) }, getStudentName (name, ...params ) { console .log ('App收到了学生名:' , name) console .log ('其他参数:' , params) } }, mounted ( } } </script > <style scoped > .app { background-color : gray; padding : 5px ; } </style >
2.6 解绑自定义事件· 解绑自定义事件,需要在被绑定自定义事件的子组件实例对象上进行自定义事件的解绑。
2.6.1 语法· 解绑自定义事件,调用被绑定自定义事件的子组件实例对象上的$off()方法。
2.6.2 解绑一个自定义事件· Student.vue
1 2 3 4 5 6 7 8 9 10 11 12 13 14 15 16 17 18 19 20 21 22 23 24 25 26 27 28 29 30 31 32 33 34 35 36 37 38 39 40 <template > <div class ="student" > <h2 > 学生姓名:{{name}}</h2 > <h2 > 学生性别:{{sex}}</h2 > <button @click ="sendStudentName" > 把学生姓名给App</button > <button @click ="offEvent" > 点击解绑自定义事件</button > </div > </template > <script > export default { name :'Student' , data ( return { name :'张三' , sex :'男' } }, methods : { sendStudentName ( console .log ('点击了按钮"把学生姓名给App"' ) this .$emit('MyEvent' , this .name ) }, offEvent ( console .log ('解绑 MyEvent 自定义事件' ) this .$off('MyEvent' ) } }, } </script > <style scoped > .student { background-color : pink; padding : 5px ; margin-top : 30px ; } </style >
2.6.3 解绑多个自定义事件· 解绑多个自定义事件,需要向$off()方法中传入一个数组,数组中的元素为需要解绑的自定义事件的名
1 2 this .$off(['MyEvent' , 'demo' ])
App.vue
1 2 3 4 5 6 7 8 9 10 11 12 13 14 15 16 17 18 19 20 21 22 23 24 25 26 27 28 29 30 31 32 33 34 35 36 37 38 39 40 41 42 43 44 45 <template > <div class ="app" > <h1 > {{msg}}</h1 > <School :getSchoolName ="getSchoolName" > </School > <Student @MyEvent ="getStudentName" @demo ="demo" > </Student > </div > </template > <script > import Student from './components/Student' import School from './components/School' export default { name : 'App' , components : { School , Student }, data ( return { msg : '你好啊!' } }, methods : { getSchoolName (name ) { console .log ('App收到了学校名:' , name) }, getStudentName (name ) { console .log ('App收到了学生名:' , name) }, demo ( console .log ('自定义事件 demo 被触发...' ) } }, } </script > <style scoped > .app { background-color : gray; padding : 5px ; } </style >
Student.vue
1 2 3 4 5 6 7 8 9 10 11 12 13 14 15 16 17 18 19 20 21 22 23 24 25 26 27 28 29 30 31 32 33 34 35 36 37 38 39 40 41 <template > <div class ="student" > <h2 > 学生姓名:{{name}}</h2 > <h2 > 学生性别:{{sex}}</h2 > <button @click ="sendStudentName" > 把学生姓名给App</button > <button @click ="offEvent" > 点击解绑自定义事件</button > </div > </template > <script > export default { name :'Student' , data ( return { name :'张三' , sex :'男' } }, methods : { sendStudentName ( console .log ('触发事件:' ) this .$emit('MyEvent' , this .name ) this .$emit('demo' ) }, offEvent ( console .log ('解绑 MyEvent demo 自定义事件' ) this .$off(['MyEvent' , 'demo' ]) } }, } </script > <style scoped > .student { background-color : pink; padding : 5px ; margin-top : 30px ; } </style >
2.6.4 解绑所有自定义事件· 解绑所有自定义事件,向$off()方法中不传入参数即可
Student.vue
1 2 3 4 5 6 7 8 9 10 11 12 13 14 15 16 17 18 19 20 21 22 23 24 25 26 27 28 29 30 31 32 33 34 35 36 37 38 39 40 41 <template > <div class ="student" > <h2 > 学生姓名:{{name}}</h2 > <h2 > 学生性别:{{sex}}</h2 > <button @click ="sendStudentName" > 把学生姓名给App</button > <button @click ="offEvent" > 点击解绑自定义事件</button > </div > </template > <script > export default { name :'Student' , data ( return { name :'张三' , sex :'男' } }, methods : { sendStudentName ( console .log ('触发事件:' ) this .$emit('MyEvent' , this .name ) this .$emit('demo' ) }, offEvent ( console .log ('解绑 所有 自定义事件' ) this .$off() } }, } </script > <style scoped > .student { background-color : pink; padding : 5px ; margin-top : 30px ; } </style >
3. 自定义事件的注意点· 3.1 使用 ref 绑定自定义事件中的 this· 1 2 3 4 5 6 7 8 9 10 11 12 13 14 15 16 17 18 19 20 21 22 23 24 25 26 27 28 29 30 31 32 33 34 35 36 37 38 39 40 41 42 43 44 45 46 47 48 49 50 51 52 <template > <div class ="app" > <h1 > {{msg}} 学生姓名:{{stuName}}</h1 > <School :getSchoolName ="getSchoolName" > </School > <Student ref ="stu" > </Student > </div > </template > <script > import Student from './components/Student' import School from './components/School' export default { name : 'App' , components : { School , Student }, data ( return { msg : '你好啊!' , stuName : '' } }, methods : { getSchoolName (name ) { console .log ('App收到了学校名:' , name) }, getStudentName (name ) { console .log ('App收到了学生名:' , name) }, }, mounted ( this .$refs .stu .$on('MyEvent' , function (name ) { console .log ('App收到了学生名:' , name) this .stuName = name }) }, } </script > <style scoped > .app { background-color : gray; padding : 5px ; } </style >
1 2 3 4 5 6 7 8 9 10 11 12 mounted ( this .$refs .stu .$on('MyEvent' , (name ) => { console .log ('App收到了学生名:' , name) this .stuName = name }) },
1 2 3 4 5 6 7 8 9 10 11 12 13 14 15 16 17 18 19 20 21 22 23 24 25 26 27 28 29 30 31 32 33 34 35 36 37 38 39 40 41 42 43 44 45 46 47 48 49 <template > <div class ="app" > <h1 > {{msg}} 学生姓名:{{stuName}}</h1 > <School :getSchoolName ="getSchoolName" > </School > <Student ref ="stu" > </Student > </div > </template > <script > import Student from './components/Student' import School from './components/School' export default { name : 'App' , components : { School , Student }, data ( return { msg : '你好啊!' , stuName : '' } }, methods : { getSchoolName (name ) { console .log ('App收到了学校名:' , name) }, getStudentName (name ) { console .log ('App收到了学生名:' , name) this .stuName = name }, }, mounted ( this .$refs .stu .$on('MyEvent' , this .getStudentName ) }, } </script > <style scoped > .app { background-color : gray; padding : 5px ; } </style >
3.2 为子组件绑定内置事件· 1 2 <Student ref ="stu" @click ="show" > </Student >
1 2 3 4 show ( alert (11111 ) }
为子组件绑定内置事件,且不让内置事件被认为是自定义事件,需要使用事件修饰符native,即可为子组件绑定内置事件。
1 <Student ref ="stu" @click.native ="show" > </Student >
4. 组件自定义事件 总结· 一种组件间通信的方式,适用于:子组件 ===> 父组件
使用场景:A是父组件,B是子组件,B想给A传数据,那么就要在A中给B绑定自定义事件(事件的回调在A中)。
绑定自定义事件:
第一种方式,在父组件中:<Demo @atguigu="test"/>或 <Demo v-on:atguigu="test"/>
第二种方式,在父组件中:
1 2 3 4 5 <Demo ref="demo" /> ...... mounted ( this .$refs .xxx .$on('atguigu' ,this .test ) }
若想让自定义事件只能触发一次,可以使用once修饰符,或$once方法。
触发自定义事件:this.$emit('atguigu',数据)
解绑自定义事件this.$off('atguigu')
组件上也可以绑定原生DOM事件,需要使用native修饰符。
注意:通过this.$refs.xxx.$on('atguigu',回调)绑定自定义事件时,回调要么配置在methods中,要么用箭头函数,否则this指向会出问题!
全局事件总线· 1. 全局事件总线· 全局事件总线是一种组件间通信的方式,能够实现任意组件间的通信。
原理图:
在全局事件总线中,X需要满足的条件:$on() $off() $emit()
2. $on() $off() $emit() 存放位置· $on() $off() $emit()三个方法被挂载在Vue的原型对象上。
1 2 3 4 5 6 7 8 9 10 11 12 import Vue from 'vue' import App from './App.vue' Vue .config .productionTip = false console .log (Vue .prototype new Vue ({ render : h =>h (App ), }).$mount('#app' )
在Vue中,VueComponent()的原型对象的原型对象为Vue()的原型对象。即组件的原型对象的原型对象为Vue()的原型对象。
1 VueComponent .prototype __proto__ === Vue .prototype
所以能够作为全局事件总线的可以是Vue的实例对象,或者是组件实例对象。
3. 组件实例对象作为全局事件总线· 创建组件,需要先创建组件的构造函数:
1 2 const XVueComponent = Vue .extend ({})
使用组件的构造函数,创建对应的组件:
1 const X = new XVueComponent ()
新创建的组件实例对象,要能够被所有的组件看见,需要将其挂载到Vue的原型对象上。
main.js
1 2 3 4 5 6 7 8 9 10 11 12 13 14 15 16 17 import Vue from 'vue' import App from './App.vue' Vue .config .productionTip = false const XVueComponent = Vue .extend ({})const X = new XVueComponent ()Vue .prototype X = Xnew Vue ({ render : h =>h (App ), }).$mount('#app' )
Student.vue
1 2 3 4 5 6 7 8 9 10 11 12 13 14 15 16 17 18 19 20 21 22 23 24 25 26 27 28 29 30 31 32 33 <template > <div class ="student" > <h2 > 学生姓名:{{name}}</h2 > <h2 > 学生性别:{{sex}}</h2 > <button @click ="show" > 点击查看中转数据的组件实例对象</button > </div > </template > <script > export default { name : 'Student' , data ( return { name : '张三' , sex : '男' } }, methods : { show ( console .log (this .X ) } }, } </script > <style scoped > .student { background-color : pink; padding : 5px ; margin-top : 30px ; } </style >
4. Vue实例对象作为全局事件总线· main.js
1 2 3 4 5 6 7 8 9 10 11 12 13 14 15 16 17 18 import Vue from 'vue' import App from './App.vue' Vue .config .productionTip = false new Vue ({ render : h =>h (App ), beforeCreate ( Vue .prototype $bus = this } }).$mount('#app' )
Student.vue
1 2 3 4 5 6 7 8 9 10 11 12 13 14 15 16 17 18 19 20 21 22 23 24 25 26 27 28 29 30 31 32 33 <template > <div class ="student" > <h2 > 学生姓名:{{name}}</h2 > <h2 > 学生性别:{{sex}}</h2 > <button @click ="show" > 点击查看中转数据的组件实例对象</button > </div > </template > <script > export default { name : 'Student' , data ( return { name : '张三' , sex : '男' } }, methods : { show ( console .log (this .$bus ) } }, } </script > <style scoped > .student { background-color : pink; padding : 5px ; margin-top : 30px ; } </style >
5. 事件总线实现组件数据互传· 注意:
实现将组件Student中的学生姓名传递给组件School:
School.vue
1 2 3 4 5 6 7 8 9 10 11 12 13 14 15 16 17 18 19 20 21 22 23 24 25 26 27 28 29 30 31 32 33 34 35 36 <template > <div class ="school" > <h2 > 学校名称:{{name}}</h2 > <h2 > 学校地址:{{address}}</h2 > </div > </template > <script > export default { name : 'School' , data ( return { name : 'SGG' , address : 'Beijing' } }, mounted ( this .$bus .$on('getStudentName' , (name )=> { console .log ('School 组件收到了数据:' , name) }) }, beforeDestroy ( this .$bus .$off('getStudentName' ) } } </script > <style scoped > .school { background-color : skyblue; padding : 5px ; } </style >
Student.vue
1 2 3 4 5 6 7 8 9 10 11 12 13 14 15 16 17 18 19 20 21 22 23 24 25 26 27 28 29 30 31 32 33 34 <template > <div class ="student" > <h2 > 学生姓名:{{name}}</h2 > <h2 > 学生性别:{{sex}}</h2 > <button @click ="sendStudentName" > 点击发送学生姓名</button > </div > </template > <script > export default { name : 'Student' , data ( return { name : '张三' , sex : '男' } }, methods : { sendStudentName ( this .$bus .$emit('getStudentName' , this .name ) } }, } </script > <style scoped > .student { background-color : pink; padding : 5px ; margin-top : 30px ; } </style >
6. 全局事件总线(GlobalEventBus)总结· 一种组件间通信的方式,适用于任意组件间通信。
安装全局事件总线:
1 2 3 4 5 6 7 new Vue ({ ...... beforeCreate ( Vue .prototype $bus = this }, ...... })
使用事件总线:
接收数据:A组件想接收数据,则在A组件中给$bus绑定自定义事件,事件的回调留在A组件自身。
1 2 3 4 5 6 7 methods ( demo (data ){......} } ...... mounted ( this .$bus .$on('xxxx' ,this .demo ) }
提供数据:this.$bus.$emit('xxxx',数据)
最好在beforeDestroy钩子中,用$off去解绑当前组件所用到的事件。
消息的订阅与发布· 1. 消息的订阅与发布· 1.1 简介· 消息的订阅与发布类似报纸的订阅与发布,报纸订阅与发布的步骤:
消息订阅与发布的步骤:
1.2 pubsub-js· 实现消息的订阅与发布需要借助第三方库,这里使用pubsub-js。
1.2.1 安装· 安装pubsub-js:
1.2.2 引入· 引入pubsub-js:
需要进行消息的订阅与发布的组件都需要引入pubsub-js。
1 import pubsub from 'pubsub-js'
1.2.3 订阅消息· 订阅消息,需要调用pubsub对象上的subscribe()方法进行消息的订阅
1 pubsub.subscribe ('消息名' , 回调函数)
subscribe()方法会返回订阅消息对应的ID 回调函数,不建议使用普通匿名函数,因为第三方库和vue不一样,不保证函数中的this指向vue实例或组件实例对象。建议使用箭头函数或者将普通函数写在methods配置项中。 回调函数接收两个参数,第一个参数为消息名,第二个参数为传递过来的数据 subscribe:订阅
1.2.4 发布消息· 发布消息,需要调用pubsub对象上的publish()方法进行消息的发布。
1 pubsub.publish ('消息名' , 数据)
1.2.5 取消订阅· 取消消息的订阅,需要调用pubsub对象上的unsubscribe()方法进行消息的取消订阅。
一般消息的取消订阅,在组件销毁之前进行取消订阅,即在beforeDestroy()中进行消息的取消订阅。
取消订阅需要根据之前订阅消息生成的消息ID来取消订阅对应的消息。
在不同方法中,使用同一个变量,可以将变量挂载在组件实例对象上。
1 this .pubId = pubsub.subscribe ('消息名' , 回调函数)
1 pubsub.unsubscribe (this .pubId )
2. 消息的订阅与发布实现组件通信· main.js
1 2 3 4 5 6 7 8 9 import Vue from 'vue' import App from './App.vue' Vue .config .productionTip = false new Vue ({ render : h =>h (App ) }).$mount('#app' )
App.vue
1 2 3 4 5 6 7 8 9 10 11 12 13 14 15 16 17 18 19 20 21 22 23 24 25 26 27 28 29 30 31 <template > <div class ="app" > <h1 > {{msg}}</h1 > <School > </School > <Student > </Student > </div > </template > <script > import Student from './components/Student' import School from './components/School' export default { name : 'App' , components : { School , Student }, data ( return { msg : '你好啊!' } } } </script > <style scoped > .app { background-color : gray; padding : 5px ; } </style >
School.vue
1 2 3 4 5 6 7 8 9 10 11 12 13 14 15 16 17 18 19 20 21 22 23 24 25 26 27 28 29 30 31 32 33 34 35 36 37 38 39 40 41 42 43 44 45 <template > <div class ="school" > <h2 > 学校名称:{{name}}</h2 > <h2 > 学校地址:{{address}}</h2 > </div > </template > <script > import pubsub from 'pubsub-js' export default { name : 'School' , data ( return { name : 'SGG' , address : 'Beijing' } }, mounted ( this .pubId = pubsub.subscribe ('getStudentName' , (msgName, data )=> { console .log ('School组件接收到消息:' , data) console .log (this ) }) }, beforeDestroy ( pubsub.unsubscribe (this .pubId ) } } </script > <style scoped > .school { background-color : skyblue; padding : 5px ; } </style >
Student.vue
1 2 3 4 5 6 7 8 9 10 11 12 13 14 15 16 17 18 19 20 21 22 23 24 25 26 27 28 29 30 31 32 33 34 35 36 37 38 39 <template > <div class ="student" > <h2 > 学生姓名:{{name}}</h2 > <h2 > 学生性别:{{sex}}</h2 > <button @click ="sendStudentName" > 点击发送学生姓名</button > </div > </template > <script > import pubsub from 'pubsub-js' export default { name : 'Student' , data ( return { name : '张三' , sex : '男' } }, methods : { sendStudentName ( pubsub.publish ('getStudentName' , this .name ) } }, } </script > <style scoped > .student { background-color : pink; padding : 5px ; margin-top : 30px ; } </style >
3. 消息的订阅与发布 总结· 一种组件间通信的方式,适用于任意组件间通信。
使用步骤:
安装pubsub:npm i pubsub-js
引入: import pubsub from 'pubsub-js'
接收数据:A组件想接收数据,则在A组件中订阅消息,订阅的回调留在A组件自身。
1 2 3 4 5 6 7 methods ( demo (data ){......} } ...... mounted ( this .pid = pubsub.subscribe ('xxx' ,this .demo ) }
提供数据:pubsub.publish('xxx',数据)
最好在beforeDestroy钩子中,用PubSub.unsubscribe(pid)去取消订阅。
$nextTick()· 1. $nextTick()· 1.1 语法· 1.2 作用· 在下一次 DOM 更新结束后执行其指定的回调。
1.3 使用时机· 当改变数据后,要基于更新后的新DOM进行某些操作时,要在nextTick所指定的回调函数中执行。
2. $nextTick() 使用实例· 需求:需要实现点击按钮,使用文本框对页面中的标题数据进行修改,且文本框能够自动获取焦点,文本框失去焦点保存修改后的标题,且文本框隐藏。
1 2 3 4 5 6 7 8 9 10 11 12 13 14 15 16 17 18 19 20 21 22 23 24 25 26 27 28 29 30 31 32 33 34 35 36 37 38 39 40 41 42 43 44 45 46 47 48 49 50 51 52 53 54 55 56 57 58 <!DOCTYPE html > <html lang ="en" > <head > <meta charset = "UTF-8" > <meta http-equiv ="X-UA-Compatible" content ="IE=edge" > <meta name ="viewport" content ="width=device-width, initial-scale=1.0" > <title > Document</title > </head > <body > <div id ="root" > <h1 > {{title}}</h1 > <input type ="text" v-model ="title" v-show ="isEdit" ref ="inputTitle" @blur ="handlerBlur" > <button v-show ="!isEdit" @click ="handlerEdit" > 点击修改标题</button > </div > </body > <script src ="https://cdn.jsdelivr.net/npm/vue@2.6.14/dist/vue.js" > </script > <script > const vm = new Vue ({ el : '#root' , data : { title : 'hello world' , isEdit : false }, methods : { handlerEdit ( this .isEdit = !this .isEdit this .$nextTick(()=> { this .$refs .inputTitle .focus () }) }, handlerBlur ( this .isEdit = !this .isEdit } }, }) </script > </html >
动画与过渡· 1. 绑定class样式实现动画效果· main.js
1 2 3 4 5 6 7 8 9 import Vue from 'vue' import App from './App.vue' Vue .config .productionTip = false new Vue ({ render : h =>h (App ) }).$mount('#app' )
App.vue
1 2 3 4 5 6 7 8 9 10 11 12 13 14 15 16 17 18 19 20 <template > <div class ="app" > <Test > </Test > </div > </template > <script > import Test from './components/Test.vue' export default { name : 'App' , components : { Test } } </script > <style scoped > </style >
Test.vue
1 2 3 4 5 6 7 8 9 10 11 12 13 14 15 16 17 18 19 20 21 22 23 24 25 26 27 28 29 30 31 32 33 34 35 36 37 38 39 40 41 42 43 44 45 46 47 48 49 50 51 52 53 54 55 56 57 58 59 60 61 <template > <div > <button @click ="changeShow" > 显示/隐藏</button > <h1 :class ="animation" v-show ="isShow" > hello world</h1 > </div > </template > <script > export default { name : 'Test' , data ( return { isShow : false , animation : '' } }, methods : { changeShow ( if (!this .isShow ) { this .isShow = true this .animation = 'enter' } else { this .isShow = false this .animation = 'leave' } } } } </script > <style scoped > h1 { background-color : orange; } .enter { animation : sgg 0.5s linear; } .leave { animation : sgg 0.5s linear reverse; } @keyframes sgg { from { transform : translateX (-100% ); } to { transform : translateX (0px ); } } </style >
2. transition 标签实现动画效果· 2.1 语法· vue规定,想要让哪个元素具有动画效果,就使用 transition 标签将该元素进行包裹,vue会在合适的时机为元素加上动画效果。
1 2 3 <transition > <h1 v-show ="isShow" > hello world</h1 > </transition >
要实现动画效果,还需要将动画的命名修改为符合vue的规定,进入页面的动画的命名为v-enter-active,离开页面的动画的命名为v-leave-active。
1 2 3 4 5 6 7 8 9 10 11 12 13 14 15 16 17 18 19 .v-enter-active { animation : sgg 0.5s linear; } .v-leave-active { animation : sgg 0.5s linear reverse; } @keyframes sgg { from { transform : translateX (-100% ); } to { transform : translateX (0px ); } }
2.2 动画实现· Test.vue
1 2 3 4 5 6 7 8 9 10 11 12 13 14 15 16 17 18 19 20 21 22 23 24 25 26 27 28 29 30 31 32 33 34 35 36 37 38 39 40 41 42 43 44 45 46 47 48 49 50 51 52 53 54 55 56 57 58 59 <template > <div > <button @click ="changeShow" > 显示/隐藏</button > <transition > <h1 v-show ="isShow" > hello world</h1 > </transition > </div > </template > <script > export default { name : 'Test' , data ( return { isShow : false , } }, methods : { changeShow ( if (!this .isShow ) { this .isShow = true } else { this .isShow = false } } } } </script > <style scoped > h1 { background-color : orange; } .v-enter-active { animation : sgg 0.5s linear; } .v-leave-active { animation : sgg 0.5s linear reverse; } @keyframes sgg { from { transform : translateX (-100% ); } to { transform : translateX (0px ); } } </style >
2.3 为 transition 标签指定名字· 为 transition 标签指定名字,需要使用 transition 标签上的 name 属性,如果为 transition 标签指定了名字,那么对应的动画的名字也要进行相应的更改。
为 transition 标签指定了名字,可以实现使得不同的元素有不同的动画。
1 2 3 <transition name ="hello" > <h1 v-show ="isShow" > hello world</h1 > </transition >
1 2 3 4 5 6 7 8 9 10 11 12 13 14 15 16 17 18 19 .hello-enter-active { animation : sgg 0.5s linear; } .hello-leave-active { animation : sgg 0.5s linear reverse; } @keyframes sgg { from { transform : translateX (-100% ); } to { transform : translateX (0px ); } }
Test.vue
1 2 3 4 5 6 7 8 9 10 11 12 13 14 15 16 17 18 19 20 21 22 23 24 25 26 27 28 29 30 31 32 33 34 35 36 37 38 39 40 41 42 43 44 45 46 47 48 49 50 51 52 53 54 55 56 57 58 59 <template > <div > <button @click ="changeShow" > 显示/隐藏</button > <transition name ="hello" > <h1 v-show ="isShow" > hello world</h1 > </transition > </div > </template > <script > export default { name : 'Test' , data ( return { isShow : false , } }, methods : { changeShow ( if (!this .isShow ) { this .isShow = true } else { this .isShow = false } } } } </script > <style scoped > h1 { background-color : orange; } .hello-enter-active { animation : sgg 0.5s linear; } .hello-leave-active { animation : sgg 0.5s linear reverse; } @keyframes sgg { from { transform : translateX (-100% ); } to { transform : translateX (0px ); } } </style >
2.4 页面加载完成立即执行动画· 要实现页面加载完成立即执行动画,需要使用 transition 标签的 appear 属性,指定该属性的值为 true。
1 2 3 4 5 6 7 <transition name ="hello" :appear ="true" > <h1 v-show ="isShow" > hello world</h1 > </transition >
或者
1 2 3 4 5 6 <transition name ="hello" appear > <h1 v-show ="isShow" > hello world</h1 > </transition >
Test.vue
1 2 3 4 5 6 7 8 9 10 11 12 13 14 15 16 17 18 19 20 21 22 23 24 25 26 27 28 29 30 31 32 33 34 35 36 37 38 39 40 41 42 43 44 45 46 47 48 49 50 51 52 53 54 55 56 57 58 59 60 61 62 63 <template > <div > <button @click ="changeShow" > 显示/隐藏</button > <transition name ="hello" appear > <h1 v-show ="isShow" > hello world</h1 > </transition > </div > </template > <script > export default { name : 'Test' , data ( return { isShow : true , } }, methods : { changeShow ( if (!this .isShow ) { this .isShow = true } else { this .isShow = false } } } } </script > <style scoped > h1 { background-color : orange; } .hello-enter-active { animation : sgg 0.5s linear; } .hello-leave-active { animation : sgg 0.5s linear reverse; } @keyframes sgg { from { transform : translateX (-100% ); } to { transform : translateX (0px ); } } </style >
3. 通过过渡实现动画效果· 通过过渡实现动画效果一样需要使用 transition 标签将需要添加动画效果的元素进行包裹,vue会在合适的时机为元素加上动画效果。
1 2 3 <transition > <h1 v-show ="isShow" > hello world</h1 > </transition >
通过过渡实现动画效果,需要提前写好过渡前的样式和过渡后的样式,过渡前后样式的类名需要满足vue的规定:
进入页面的起点:.v-enter {} 进入页面的终点:v-enter-to {} 离开页面的起点:.v-leave {} 离开页面的终点:v-leave-to {} 如果在 transition 标签中有指定 name 属性,则对应的样式类名中的v需要修改成对应的name。
1 2 3 <transition name ="hello" appear > <h1 v-show ="isShow" > hello world</h1 > </transition >
1 2 3 4 5 6 7 8 9 10 11 12 13 14 15 16 17 18 19 20 21 22 23 24 25 26 27 <style scoped > h1 { background-color : orange; transition : 0.5s linear; } .hello-enter { transform : translate (-100% ); } .hello-enter-to { transform : translate (0 ); } .hello-leave { transform : translate (0 ); } .hello-leave-to { transform : translate (-100% ); } </style >
由于离开的终点和进入的起点、离开的起点和进入的终点样式一样,所以可以进行合并:
1 2 3 4 5 6 7 8 9 10 11 12 13 14 15 16 17 18 19 <style scoped > h1 { background-color : orange; transition : 0.5s linear; } .hello-enter ,.hello-leave-to { transform : translate (-100% ); } .hello-enter-to ,.hello-leave { transform : translate (0 ); } </style >
动画执行的时间和方式可以写在v-enter-active和v-leave-active中,由于动画执行的时间和方式在进入页面和离开页面一样,可以进行合并。
动画执行的时间和方式可以写在v-enter-active和v-leave-active中,不会影响原来的css样式。
1 2 3 4 5 6 7 8 9 10 11 12 13 14 15 16 17 18 19 20 21 22 23 24 <style scoped > h1 { background-color : orange; } .hello-enter ,.hello-leave-to { transform : translate (-100% ); } .hello-enter-to ,.hello-leave { transform : translate (0 ); } .hello-enter-active ,.hello-leave-active { transition : 0.5s linear; } </style >
Test.vue
1 2 3 4 5 6 7 8 9 10 11 12 13 14 15 16 17 18 19 20 21 22 23 24 25 26 27 28 29 30 31 32 33 34 35 36 37 38 39 40 41 42 43 44 45 46 47 48 49 50 51 52 53 54 55 56 57 58 <template > <div > <button @click ="changeShow" > 显示/隐藏</button > <transition name ="hello" appear > <h1 v-show ="isShow" > hello world</h1 > </transition > </div > </template > <script > export default { name : 'Test' , data ( return { isShow : true , } }, methods : { changeShow ( if (!this .isShow ) { this .isShow = true } else { this .isShow = false } } } } </script > <style scoped > h1 { background-color : orange; } .hello-enter ,.hello-leave-to { transform : translate (-100% ); } .hello-enter-to ,.hello-leave { transform : translate (0 ); } .hello-enter-active ,.hello-leave-active { transition : 0.5s linear; } </style >
4. 多个元素过渡· 实现多个元素过渡,需要使用 transition-group 标签,transition 标签只能用于一个元素的过渡。
transition-group 标签的用法和 transition 标签的用法一样。
注意:如果使用 transition-group 标签实现多个元素的过渡,需要为每个元素指定 key 属性值(这里的 key 与 v-for 循环中的 key 一样)。
4.1 实现多个元素同时显示同时隐藏· Test.vue
1 2 3 4 5 6 7 8 9 10 11 12 13 14 15 16 17 18 19 20 21 22 23 24 25 26 27 28 29 30 31 32 33 34 35 36 37 38 39 40 41 42 43 44 45 46 47 48 49 50 51 52 53 54 55 56 57 58 59 <template > <div > <button @click ="changeShow" > 显示/隐藏</button > <transition-group name ="hello" appear > <h1 v-show ="isShow" key ="1" > hello world</h1 > <h1 v-show ="isShow" key ="2" > 你好 世界</h1 > </transition-group > </div > </template > <script > export default { name : 'Test' , data ( return { isShow : true , } }, methods : { changeShow ( if (!this .isShow ) { this .isShow = true } else { this .isShow = false } } } } </script > <style scoped > h1 { background-color : orange; } .hello-enter ,.hello-leave-to { transform : translate (-100% ); } .hello-enter-to ,.hello-leave { transform : translate (0 ); } .hello-enter-active ,.hello-leave-active { transition : 0.5s linear; } </style >
4.2 实现一个元素显示一个元素隐藏· 1 2 3 4 5 6 7 8 9 10 11 12 13 14 15 16 17 18 19 20 21 22 23 24 25 26 27 28 29 30 31 32 33 34 35 36 37 38 39 40 41 42 43 44 45 46 47 48 49 50 51 52 53 54 55 56 57 58 59 <template > <div > <button @click ="changeShow" > 显示/隐藏</button > <transition-group name ="hello" appear > <h1 v-show ="isShow" key ="1" > hello world</h1 > <h1 v-show ="!isShow" key ="2" > 你好 世界</h1 > </transition-group > </div > </template > <script > export default { name : 'Test' , data ( return { isShow : true , } }, methods : { changeShow ( if (!this .isShow ) { this .isShow = true } else { this .isShow = false } } } } </script > <style scoped > h1 { background-color : orange; } .hello-enter ,.hello-leave-to { transform : translate (-100% ); } .hello-enter-to ,.hello-leave { transform : translate (0 ); } .hello-enter-active ,.hello-leave-active { transition : 0.5s linear; } </style >
5. 第三方动画库· 这里演示 Animate.css【npm 官网】 【Animate.css 首页】 【Animate.css 中文官网】
5.1 安装· 1 npm install animate.css --save
5.2 引入· 5.3 配置· 在 transition 标签或者 transition-group 标签设置属性 name 的值为:animate__animated animate__bounce
1 2 3 4 <transition-group name ="animate__animated animate__bounce" appear > <h1 v-show ="isShow" key ="1" > hello world</h1 > <h1 v-show ="!isShow" key ="2" > 你好 世界</h1 > </transition-group >
5.4 设置进入页面和离开页面的动画· 在 transition 标签或者 transition-group 标签设置设置进入页面和离开页面的动画,需要使用属性enter-active-class和leave-active-class
选择动画:
5.5 实例效果· Test.vue
1 2 3 4 5 6 7 8 9 10 11 12 13 14 15 16 17 18 19 20 21 22 23 24 25 26 27 28 29 30 31 32 33 34 35 36 37 38 39 40 41 42 43 44 45 46 47 48 <template > <div > <button @click ="changeShow" > 显示/隐藏</button > <transition-group name ="animate__animated animate__bounce" enter-active-class ="animate__bounce" leave-active-class ="animate__backOutUp" appear > <h1 v-show ="isShow" key ="1" > hello world</h1 > <h1 v-show ="!isShow" key ="2" > 你好 世界</h1 > </transition-group > </div > </template > <script > import 'animate.css' export default { name : 'Test' , data ( return { isShow : true , } }, methods : { changeShow ( if (!this .isShow ) { this .isShow = true } else { this .isShow = false } } } } </script > <style scoped > h1 { background-color : orange; } </style >
6. 动画与过渡 总结· 作用:在插入、更新或移除 DOM元素时,在合适的时候给元素添加样式类名。
图示:
写法:
准备好样式:
元素进入的样式:v-enter:进入的起点 v-enter-active:进入过程中 v-enter-to:进入的终点 元素离开的样式:v-leave:离开的起点 v-leave-active:离开过程中 v-leave-to:离开的终点 使用<transition>包裹要过度的元素,并配置name属性:
1 2 3 <transition name ="hello" > <h1 v-show ="isShow" > 你好啊!</h1 > </transition >
备注:若有多个元素需要过度,则需要使用:<transition-group>,且每个元素都要指定key值。
配置代理· 1. 使用 axios 发送请求· 1.1 安装 axios· 1.2 引入 axios· 1 import axios from 'axios'
1.3 发送请求· 1 2 3 4 5 6 7 8 9 10 11 12 13 14 15 16 17 18 19 20 21 22 23 24 25 <template > <div > <button @click ="getMsg" > 获取信息</button > </div > </template > <script > import axios from 'axios' export default { name : 'App' , methods : { getMsg ( axios.get ('https://blog.csdn.net/m0_53022813/article/details/127392473' ).then ( response => console .log ('请求成功了' , response.data ) }, error => console .log ('请求失败了' ,error) } ) } }, } </script >
观察结果,发生了跨域请求
跨域请求:
这里使用代理服务器解决跨域问题
2. 借助vue-cli开启代理服务器· 通过 vue.config.js 修改脚手架配置开启代理服务器。
vue-cli官网 开启代理服务器 配置参考
2.1 方法一· vue.config.js
1 2 3 4 5 6 7 8 9 10 11 12 13 14 15 16 17 18 19 20 21 const { defineConfig } = require ('@vue/cli-service' )module .exports = defineConfig ({ pages : { index : { entry : 'src/my_main.js' } }, lintOnSave : false , devServer : { proxy : 'https://blog.csdn.net' } })
修改 vue.config.js 配置文件,记得重启运行项目
App.vue
1 2 3 4 5 6 7 8 9 10 11 12 13 14 15 16 17 18 19 20 21 22 23 24 25 26 27 28 29 30 <template > <div > <button @click ="getMsg" > 获取信息</button > </div > </template > <script > import axios from 'axios' export default { name : 'App' , methods : { getMsg ( axios.get ('http://localhost:8080/m0_53022813/article/details/127392473' ).then ( response => console .log ('请求成功了' , response.data ) }, error => console .log ('请求失败了' ,error) } ) } }, } </script >
请求成功,解决跨域问题
方式一有两个缺点:
2.2 方法二· vue.config.js
1 2 3 4 5 6 7 8 9 10 11 12 13 14 15 16 17 18 19 20 21 22 23 24 25 26 27 28 29 30 31 32 33 34 35 36 37 38 39 40 41 42 const { defineConfig } = require ('@vue/cli-service' )module .exports = defineConfig ({ pages : { index : { entry : 'src/my_main.js' } }, lintOnSave : false , devServer : { proxy : { '/api' : { target : 'https://blog.csdn.net' , pathRewrite :{'^/api' :'' }, ws : true , changeOrigin : true } } } })
修改 vue.config.js 配置文件,记得重启运行项目
App.vue
1 2 3 4 5 6 7 8 9 10 11 12 13 14 15 16 17 18 19 20 21 22 23 24 25 26 27 28 29 30 <template > <div > <button @click ="getMsg" > 获取信息</button > </div > </template > <script > import axios from 'axios' export default { name : 'App' , methods : { getMsg ( axios.get ('http://localhost:8080/api/m0_53022813/article/details/127392473' ).then ( response => console .log ('请求成功了' , response.data ) }, error => console .log ('请求失败了' ,error) } ) } }, } </script >
请求成功
3. vue脚手架配置代理 总结· 3.1 方法一· 在vue.config.js中添加如下配置:
1 2 3 devServer :{ proxy :"http://localhost:5000" }
说明:
优点:配置简单,请求资源时直接发给前端(8080)即可。 缺点:不能配置多个代理,不能灵活的控制请求是否走代理。 工作方式:若按照上述配置代理,当请求了前端不存在的资源时,那么该请求会转发给服务器 (优先匹配前端资源) 3.2 方法二· 编写vue.config.js配置具体代理规则:
1 2 3 4 5 6 7 8 9 10 11 12 13 14 15 16 17 18 19 20 21 module .exports = { devServer : { proxy : { '/api1' : { target : 'http://localhost:5000' , changeOrigin : true , pathRewrite : {'^/api1' : '' } }, '/api2' : { target : 'http://localhost:5001' , changeOrigin : true , pathRewrite : {'^/api2' : '' } } } } }
说明:
优点:可以配置多个代理,且可以灵活的控制请求是否走代理。 缺点:配置略微繁琐,请求资源时必须加前缀。 github案例· 1. 案例效果·
2. 静态页面· 1 2 3 4 5 6 7 8 9 10 11 12 13 14 15 16 17 18 19 20 21 22 23 24 25 26 27 28 29 30 31 32 33 34 35 36 37 38 39 40 41 42 43 44 45 46 47 48 49 50 51 52 53 <!DOCTYPE html > <html lang ="en" > <head > <meta charset ="UTF-8" > <title > Title</title > <link rel ="stylesheet" href ="./bootstrap.css" > <link rel ="stylesheet" href ="./index.css" > </head > <body > <div id ="app" > <div class ="container" > <section class ="jumbotron" > <h3 class ="jumbotron-heading" > Search Github Users</h3 > <div > <input type ="text" placeholder ="enter the name you search" /> <button > Search</button > </div > </section > <div class ="row" > <div class ="card" > <a href ="https://github.com/xxxxxx" target ="_blank" > <img src ="https://cn.vuejs.org/images/logo.svg" style ='width: 100px' /> </a > <p class ="card-text" > xxxxxx</p > </div > <div class ="card" > <a href ="https://github.com/xxxxxx" target ="_blank" > <img src ="https://cn.vuejs.org/images/logo.svg" style ='width: 100px' /> </a > <p class ="card-text" > xxxxxx</p > </div > <div class ="card" > <a href ="https://github.com/xxxxxx" target ="_blank" > <img src ="https://cn.vuejs.org/images/logo.svg" style ='width: 100px' /> </a > <p class ="card-text" > xxxxxx</p > </div > <div class ="card" > <a href ="https://github.com/xxxxxx" target ="_blank" > <img src ="https://cn.vuejs.org/images/logo.svg" style ='width: 100px' /> </a > <p class ="card-text" > xxxxxx</p > </div > <div class ="card" > <a href ="https://github.com/xxxxxx" target ="_blank" > <img src ="https://cn.vuejs.org/images/logo.svg" style ='width: 100px' /> </a > <p class ="card-text" > xxxxxx</p > </div > </div > </div > </div > </body > </html >
1 2 3 4 5 6 7 8 9 10 11 12 13 14 15 16 17 18 19 20 21 22 23 24 25 .album { min-height : 50rem ; padding-top : 3rem ; padding-bottom : 3rem ; background-color : #f7f7f7 ; } .card { float : left; width : 33.333% ; padding : .75rem ; margin-bottom : 2rem ; border : 1px solid #efefef ; text-align : center; } .card > img { margin-bottom : .75rem ; border-radius : 100px ; } .card-text { font-size : 85% ; }
3. 组件的拆分· 3.1 目录结构·
3.2 引入第三方css样式· 在index.html中使用link标签引入第三方css样式
由于import导入第三方样式,会对引入的样式进行代码检查,而在代码中使用了本地没有的字体样式,会报错;使用link标签引入第三方样式不会进行严格的代码检查,不会报错。
index.html
1 2 3 4 5 6 7 8 9 10 11 12 13 14 15 16 17 18 19 20 21 22 23 24 25 26 <!DOCTYPE html > <html lang ="" > <head > <meta charset ="utf-8" > <meta http-equiv ="X-UA-Compatible" content ="IE=edge" > <meta name ="viewport" content ="width=device-width,initial-scale=1.0" > <link rel ="icon" href ="<%= BASE_URL %>favicon.ico" > <link rel ="stylesheet" href ="<%= BASE_URL %>css/bootstrap.css" > <title > <%= htmlWebpackPlugin.options.title %></title > </head > <body > <noscript > <strong > We're sorry but <%= htmlWebpackPlugin.options.title %> doesn't work properly without JavaScript enabled. Please enable it to continue.</strong > </noscript > <div id ="app" > </div > </body > </html >
3.3 拆分组件· App.vue
1 2 3 4 5 6 7 8 9 10 11 12 13 14 15 16 17 18 19 20 21 22 <template > <div class ="container" > <Search > </Search > <List > </List > </div > </template > <script > import Search from './components/Search.vue' import List from './components/List.vue' export default { name : 'App' , components : { Search , List } } </script >
Search.vue
1 2 3 4 5 6 7 8 9 10 11 12 13 14 <template > <section class ="jumbotron" > <h3 class ="jumbotron-heading" > Search Github Users</h3 > <div > <input type ="text" placeholder ="enter the name you search" /> <button > Search</button > </div > </section > </template > <script > export default { name : 'Search' } </script >
List.vue
1 2 3 4 5 6 7 8 9 10 11 12 13 14 15 16 17 18 19 20 21 22 23 24 25 26 27 28 29 30 31 32 33 34 35 36 37 38 39 40 41 42 43 44 45 46 47 48 49 50 51 52 53 54 55 56 57 58 59 60 61 62 63 64 65 66 67 <template > <div class ="row" > <div class ="card" > <a href ="https://github.com/xxxxxx" target ="_blank" > <img src ="https://v2.cn.vuejs.org/images/logo.svg" style ='width: 100px' /> </a > <p class ="card-text" > xxxxxx</p > </div > <div class ="card" > <a href ="https://github.com/xxxxxx" target ="_blank" > <img src ="https://v2.cn.vuejs.org/images/logo.svg" style ='width: 100px' /> </a > <p class ="card-text" > xxxxxx</p > </div > <div class ="card" > <a href ="https://github.com/xxxxxx" target ="_blank" > <img src ="https://v2.cn.vuejs.org/images/logo.svg" style ='width: 100px' /> </a > <p class ="card-text" > xxxxxx</p > </div > <div class ="card" > <a href ="https://github.com/xxxxxx" target ="_blank" > <img src ="https://v2.cn.vuejs.org/images/logo.svg" style ='width: 100px' /> </a > <p class ="card-text" > xxxxxx</p > </div > <div class ="card" > <a href ="https://github.com/xxxxxx" target ="_blank" > <img src ="https://v2.cn.vuejs.org/images/logo.svg" style ='width: 100px' /> </a > <p class ="card-text" > xxxxxx</p > </div > </div > </template > <script > export default { name : 'List' } </script > <style scoped > .album { min-height : 50rem ; padding-top : 3rem ; padding-bottom : 3rem ; background-color : #f7f7f7 ; } .card { float : left; width : 33.333% ; padding : 0.75rem ; margin-bottom : 2rem ; border : 1px solid #efefef ; text-align : center; } .card > img { margin-bottom : 0.75rem ; border-radius : 100px ; } .card-text { font-size : 85% ; } </style >
4. 列表展示实现· 4.1 查询请求数据· 请求接口地址:
1 https:// api.github.com/search/u sers?q=xxx
Search.vue
1 2 3 4 5 6 7 8 9 10 11 12 13 14 15 16 17 18 19 20 21 22 23 24 25 26 27 28 29 30 31 32 33 34 35 36 37 38 39 40 <template > <section class ="jumbotron" > <h3 class ="jumbotron-heading" > Search Github Users</h3 > <div > <input type ="text" placeholder ="enter the name you search" v-model ="keyWord" /> <button @click ="searchUsers" > Search</button > </div > </section > </template > <script > import axios from 'axios' export default { name : 'Search' , data ( return { keyWord : '' } }, methods : { searchUsers ( axios.get (`https://api.github.com/search/users?q=${this .keyWord} ` ).then ( response => console .log ('请求成功' , response.data ) }, error => console .log ('请求失败' , error) } ) } }, } </script >
4.2 数据传递· 子组件Search与List为兄弟组件,这里使用全局事件总线进行数据的传递。
4.2.1 安装全局事件总线· main.js
1 2 3 4 5 6 7 8 9 10 11 12 13 import Vue from 'vue' import App from './App.vue' Vue .config .productionTip = false new Vue ({ render : h =>h (App ), beforeCreate ( Vue .prototype $bus = this } }).$mount('#app' )
4.2.2 全局事件总线绑定自定义事件· List.vue
1 2 3 4 5 6 7 8 9 10 11 12 13 14 15 16 <script > export default { name : 'List' , data ( return { users : [] } }, mounted ( this .$bus .$on('getUsers' , (users )=> { console .log ('List组件收到了数据' ) this .users = users }) } } </script >
4.2.3 触发全局事件总线事件· Search.vue
1 2 3 4 5 6 7 8 9 10 11 12 13 14 15 16 17 18 19 20 21 22 23 24 25 26 27 28 29 30 31 32 33 34 35 36 37 38 39 40 41 42 43 <template > <section class ="jumbotron" > <h3 class ="jumbotron-heading" > Search Github Users</h3 > <div > <input type ="text" placeholder ="enter the name you search" v-model ="keyWord" /> <button @click ="searchUsers" > Search</button > </div > </section > </template > <script > import axios from 'axios' export default { name : 'Search' , data ( return { keyWord : '' } }, methods : { searchUsers ( axios.get (`https://api.github.com/search/users?q=${this .keyWord} ` ).then ( response => console .log ('请求成功' ) this .$bus .$emit('getUsers' , response.data .items ) }, error => console .log ('请求失败' , error) } ) } }, } </script >
4.3 列表数据展示· 4.3.1 需要使用的数据·
4.3.2 数据展示· List.vue
1 2 3 4 5 6 7 8 9 10 11 12 13 14 15 16 17 18 19 20 21 22 23 24 25 26 27 28 <template > <div class ="row" > <div class ="card" v-for ="user in users" :key ="user.id" > <a :href ="user.html_url" target ="_blank" > <img :src ="user.avatar_url" style ='width: 100px' /> </a > <p class ="card-text" > {{user.login}}</p > </div > </div > </template > <script > export default { name : 'List' , data ( return { users : [] } }, mounted ( this .$bus .$on('getUsers' , (users )=> { console .log ('List组件收到了数据' ) this .users = users }) } } </script >
5. 完善案例· 实现初始页面的欢迎词展示、数据请求过程中的加载提示、请求失败的错误信息显示。
List.vue
1 2 3 4 5 6 7 8 9 10 11 12 13 14 15 16 17 18 19 20 21 22 23 24 25 26 27 28 29 30 31 32 33 34 35 36 37 38 39 40 41 42 43 44 45 46 47 48 49 50 51 52 <template > <div class ="row" > <div class ="card" v-show ="info.users" v-for ="user in info.users" :key ="user.id" > <a :href ="user.html_url" target ="_blank" > <img :src ="user.avatar_url" style ='width: 100px' /> </a > <p class ="card-text" > {{user.login}}</p > </div > <h1 v-show ="info.isFirst" > welcome to use</h1 > <h1 v-show ="info.isLoading" > loading...</h1 > <h1 v-show ="info.errorMsg" > {{info.errorMsg}}</h1 > </div > </template > <script > export default { name : 'List' , data ( return { info : { isFirst : true , isLoading : false , errorMsg : '' , users : [] } } }, mounted ( this .$bus .$on('updateUsers' , (dataObj )=> { console .log ('List组件收到了数据' ) this .info = {...this .info , ...dataObj} }) } } </script >
Search.vue
1 2 3 4 5 6 7 8 9 10 11 12 13 14 15 16 17 18 19 20 21 22 23 24 25 26 27 28 29 30 31 32 33 34 35 36 37 38 39 40 41 42 43 44 45 46 47 48 49 50 51 52 53 54 55 56 57 58 59 60 61 62 63 64 65 66 67 68 69 70 <template > <section class ="jumbotron" > <h3 class ="jumbotron-heading" > Search Github Users</h3 > <div > <input type ="text" placeholder ="enter the name you search" v-model ="keyWord" /> <button @click ="searchUsers" > Search</button > </div > </section > </template > <script > import axios from 'axios' export default { name : 'Search' , data ( return { keyWord : '' } }, methods : { searchUsers ( this .$bus .$emit('updateUsers' , { isFirst : false , isLoading : true , errorMsg : '' , users : [] }) axios.get (`https://api.github.com/search/users?q=${this .keyWord} ` ).then ( response => console .log ('请求成功' ) this .$bus .$emit('updateUsers' , { isLoading : false , errorMsg : '' , users : response.data .items }) }, error => console .log ('请求失败' , error) this .$bus .$emit('updateUsers' , { isLoading : false , errorMsg : error, users : [] }) } ) } } } </script >
vue-resource· 1. vue-resource· vue 发送请求推荐使用 axios ,vue-resource 的更新频率不高,且 vue 也推荐 axios。
vue-resource 是 vue 中一个用于发送请求的插件。
1.1 安装 vue-resource· 1.2 导入 vue-resource· vue-resource 中使用的是默认导出,导入 vue-resource 使用一个变量接收即可。
1 import vueResource from 'vue-resource'
1.3 使用插件 vue-resource· 使用 Vue 的 use() 方法使用插件,在所有的 vue 实例对象和组件实例对象中会多一个 $http 属性。
1.4 使用 vue-resource 发送请求· vue-resource 与 axios 一样都是 promise 风格的,vue-resource 发送请求的方法与形式和 axios 一样。
以发送 get 请求为例:
axios:
1 2 3 4 5 6 7 8 9 10 11 axios.get (`请求地址` ).then ( response => console .log ('请求成功' ) }, error => console .log ('请求失败' , error) } )
vue-resource:
1 2 3 4 5 6 7 8 9 10 11 this .$http .get (`请求地址` ).then ( response => console .log ('请求成功' ) }, error => console .log ('请求失败' , error) } )
2. github 案例 vue-resource 发送请求· main.js
1 2 3 4 5 6 7 8 9 10 11 12 13 14 15 16 17 import Vue from 'vue' import App from './App.vue' import vueResource from 'vue-resource' Vue .use (vueResource)Vue .config .productionTip = false new Vue ({ render : h =>h (App ), beforeCreate ( Vue .prototype $bus = this } }).$mount('#app' )
Search.vue
1 2 3 4 5 6 7 8 9 10 11 12 13 14 15 16 17 18 19 20 21 22 23 24 25 26 27 28 29 30 31 32 33 34 35 36 37 38 39 40 41 42 43 44 45 46 47 48 49 50 51 52 53 54 55 56 57 58 59 60 61 62 63 64 65 66 67 68 69 70 <template > <section class ="jumbotron" > <h3 class ="jumbotron-heading" > Search Github Users</h3 > <div > <input type ="text" placeholder ="enter the name you search" v-model ="keyWord" /> <button @click ="searchUsers" > Search</button > </div > </section > </template > <script > import axios from 'axios' export default { name : 'Search' , data ( return { keyWord : '' } }, methods : { searchUsers ( this .$bus .$emit('updateUsers' , { isFirst : false , isLoading : true , errorMsg : '' , users : [] }) this .$http .get (`https://api.github.com/search/users?q=${this .keyWord} ` ).then ( response => console .log ('请求成功' ) this .$bus .$emit('updateUsers' , { isLoading : false , errorMsg : '' , users : response.data .items }) }, error => console .log ('请求失败' , error) this .$bus .$emit('updateUsers' , { isLoading : false , errorMsg : error, users : [] }) } ) } } } </script >
插槽(slot)· 1. 插槽· 插槽(Slot)是 vue 为组件的封装者提供的功能,允许开发者在封装组件 时,把不确定的、希望由用户指定的部分定义为插槽。
可以把插槽认为是组件封装期间,为用户预留的内容的占位符,在组件的使用者使用该组件时可以为插槽指定填充的内容。
2. 默认插槽· 2.1 插槽的基本使用· 在封装组件时,可以通过<slot>元素定义插槽,从而为用户预留内容占位符。
Com.vue
1 2 3 4 5 6 7 8 9 10 11 12 13 14 15 16 17 <template > <div > <h3 > Com 组件</h3 > <p > 插槽开始</p > <slot > </slot > <p > 插槽结束</p > </div > </template > <script > export default { name : 'Com' } </script >
App.vue
1 2 3 4 5 6 7 8 9 10 11 12 13 14 15 16 17 18 19 20 21 22 23 24 25 <template > <div > <h1 > App 组件</h1 > <hr > <Com > <div > 插槽的内容</div > </Com > </div > </template > <script > import Com from './Com.vue' export default { name : 'App' , components : { Com } } </script >
2.2 没有预留插槽 组件标签内的内容会被丢弃· 如果在封装组件时没有预留任何 <slot> 插槽,则用户提供的任何自定义内容都会被丢弃。即用户提供的页面元素没有位置放入。
Com.vue
1 2 3 4 5 6 7 8 9 10 11 12 13 14 15 16 17 <template > <div > <h3 > Com 组件</h3 > <p > 插槽开始</p > <p > 插槽结束</p > </div > </template > <script > export default { name : 'Com' } </script >
App.vue
1 2 3 4 5 6 7 8 9 10 11 12 13 14 15 16 17 18 19 20 21 22 23 24 25 <template > <div > <h1 > App 组件</h1 > <hr > <Com > <div > 插槽的内容</div > </Com > </div > </template > <script > import Com from './Com.vue' export default { name : 'App' , components : { Com } } </script >
2.3 后备内容· 封装组件时,可以为预留的 <slot> 插槽提供后备内容(默认内容)。如果组件的使用者没有为插槽提供任何内容,则后备内容会生效,后备内容会展示在页面上。
Com.vue
1 2 3 4 5 6 7 8 9 10 11 12 13 14 15 16 17 18 19 20 21 22 23 <template > <div > <h3 > Com 组件</h3 > <p > 插槽开始</p > <slot > <div > 插槽的后备内容</div > </slot > <p > 插槽结束</p > </div > </template > <script > export default { name : 'Com' } </script > <style > </style >
App.vue
1 2 3 4 5 6 7 8 9 10 11 12 13 14 15 16 17 18 19 20 21 22 23 24 25 <template > <div > <h1 > App 组件</h1 > <hr > <Com > </Com > </div > </template > <script > import Com from './Com.vue' export default { name : 'App' , components : { Com } } </script >
如果在封装组件时需要预留多个插槽节点,则需要为每个 <slot>插槽指定具体的 name 名称。
这种带有具体名称的插槽叫做“具名插槽”。
注意:没有指定 name 名称的插槽,会有隐含的名称叫做 “default”。
3.1 具名插槽的定义· Com.vue
1 2 3 4 5 6 7 8 9 10 11 12 13 14 15 16 17 18 19 20 21 <template > <div > <h3 > Com 组件</h3 > <p > ----------插槽开始----------</p > <slot name ="header" > </slot > <slot > </slot > <slot name ="bottom" > </slot > <p > ----------插槽结束----------</p > </div > </template > <script > export default { name : 'Com' } </script >
3.2 为具名插槽提供内容· 在向具名插槽提供内容的时候,我们可以在一个 <template> 元素上使用 v-slot 指令,并以 v-slot 的参数的形式指定元素需要放在哪个插槽中。
语法:
1 2 3 <template v-slot:插槽的name > 需要向插槽中放入的内容 </template >
注意:使用 v-slot 指令指定元素放在哪个插槽中,必须配合<template> 元素,且一个<template> 元素只能对应一个预留的插槽,即不能多个<template> 元素都使用 v-slot 指令指定相同的插槽。
在 2.6.0 中,我们为具名插槽和作用域插槽引入了一个新的统一的语法 (即 v-slot 指令)。它取代了 slot 和 slot-scope 这两个目前已被废弃但未被移除且仍在文档中的 attribute。
使用 slot 属性指定元素放置的插槽:slot="插槽的name",slot 属性可以直接写在元素标签上,即 slot 属性不用必须与<template> 元素配合,且不同的标签可以使用 slot 属性指定相同的插槽,使用 slot 属性指定了相同的插槽都会被放入一个插槽中,后面的元素会被追加在前面放入插槽的元素后。
App.vue
1 2 3 4 5 6 7 8 9 10 11 12 13 14 15 16 17 18 19 20 21 22 23 24 25 26 27 28 29 30 31 32 33 34 <template > <div > <h1 > App 组件</h1 > <hr > <Com > <template v-slot:header > <div > 头部区域</div > </template > <template v-slot:default > <div > 默认区域</div > </template > <template v-slot:bottom > <div > bottom区域</div > </template > </Com > </div > </template > <script > import Com from './Com.vue' export default { name : 'App' , components : { Com } } </script >
3.2 具名插槽的简写形式· 跟 v-on 和 v-bind 一样,v-slot 也有缩写,即把参数之前的所有内容 (v-slot:) 替换为字符 #。例如 v-slot:header可以被重写为 #header
1 2 3 4 5 6 7 8 9 10 11 12 13 14 15 16 17 18 19 20 21 22 23 24 25 26 27 28 29 30 31 32 33 34 35 <template > <div > <h1 > App 组件</h1 > <hr > <Com > <template #header > <div > 头部区域</div > </template > <template #default > <div > 默认区域</div > </template > <template #bottom > <div > bottom区域</div > </template > </Com > </div > </template > <script > import Com from './Com.vue' export default { name : 'App' , components : { Com } } </script >
4. 作用域插槽· 4.1 作用域插槽的使用· 在封装组件的过程中,可以为预留的<slot> 插槽绑定 props 数据,这种带有 props 数据的<slot> 叫做“作用域插槽”。
作用域插槽,要显示的数据已经在组件中,以什么样的样式显示数据(用什么标签和标签的样式),可以由组件的使用者进行指定。
为作用域插槽指定插槽内的元素必须使用 <template> 标签。
作用域插槽也能取名
Com.vue
1 2 3 4 5 6 7 8 9 10 11 12 13 14 15 16 17 18 19 20 21 22 23 24 25 26 27 28 <template > <div > <h3 > Com 组件</h3 > <p > ----------插槽开始----------</p > <slot :infomation ="info" > </slot > <p > ----------插槽结束----------</p > </div > </template > <script > export default { name : 'Com' , data ( return { info : { name : 'zs' , age : 23 }, msg : 'hello vue' } } } </script >
获取插槽绑定 props 数据的方法:scope="接收的变量名":<template scope="接收的变量名">slot-scope="接收的变量名":<template slot-scope="接收的变量名">v-slot:插槽名="接收的变量名":<template v-slot:插槽名="接收的变量名">
App.vue
1 2 3 4 5 6 7 8 9 10 11 12 13 14 15 16 17 18 19 20 21 22 23 24 25 26 27 <template > <div > <h1 > App 组件</h1 > <hr > <Com > <template #default ="val" > {{ val }} </template > </Com > </div > </template > <script > import Com from './Com.vue' export default { name : 'App' , components : { Com } } </script >
得到的是一个对象
4.2 解构作用域插槽的 prop· 作用域插槽对外提供的数据对象,可以使用解构赋值简化数据的接收过程。
1 2 3 4 5 6 7 8 9 10 11 12 13 14 15 16 17 18 19 20 21 22 23 24 25 26 27 28 29 <template > <div > <h3 > Com 组件</h3 > <p > ----------插槽开始----------</p > <slot :infomation ="info" :message ="msg" > </slot > <p > ----------插槽结束----------</p > </div > </template > <script > export default { name : 'Com' , data ( return { info : { name : 'zs' , age : 23 }, msg : 'hello vue' } } } </script > <style > </style >
把information的数据解构出来
1 2 3 4 5 6 7 8 9 10 11 12 13 14 15 16 17 18 19 20 21 22 23 24 25 26 <template > <div > <h1 > App 组件</h1 > <hr > <Com > <template #default ="{ infomation }" > <div > {{ infomation.name }}</div > <div > {{ infomation.age }}</div > </template > </Com > </div > </template > <script > import Com from './Com.vue' export default { name : 'App' , components : { Com } } </script >
4.3 声明作用域插槽· 在封装 Com 组件的过程中,可以通过作用域插槽把表格每一行的数据传递给组件的使用者。
1 2 3 4 5 6 7 8 9 10 11 12 13 14 15 16 17 18 19 20 21 22 23 24 25 26 27 28 29 30 31 32 <template > <div > <h3 > Com 组件</h3 > <tbody > <tr v-for ="item in arr" :key ="item.id" > <slot :arr_i ="item" > </slot > </tr > </tbody > </div > </template > <script > export default { name : 'Com' , data ( return { arr : [ {id : 1 , data : 'a' }, {id : 2 , data : 'b' }, {id : 3 , data : 'c' }, {id : 4 , data : 'd' }, {id : 5 , data : 'e' }, ] } } } </script > <style > </style >
4.4 使用作用域插槽· 在使用 Com 组件时,自定义单元格的渲染方式,并接收作用域插槽对外提供的数据。
1 2 3 4 5 6 7 8 9 10 11 12 13 14 15 16 17 18 19 20 21 22 23 24 25 26 27 28 <template > <div > <h1 > App 组件</h1 > <hr > <Com > <template #default ="{arr_i}" > <td > {{ arr_i.id }}</td > <td > {{ arr_i.data }}</td > </template > </Com > </div > </template > <script > import Com from './Com.vue' export default { name : 'App' , components : { Com } } </script >
5. 插槽 总结· 作用:让父组件可以向子组件指定位置插入html结构,也是一种组件间通信的方式,适用于 父组件 ===> 子组件 。
分类:默认插槽、具名插槽、作用域插槽
使用方式:
默认插槽:
1 2 3 4 5 6 7 8 9 10 11 父组件中: <Category > <div > html结构1</div > </Category > 子组件中: <template > <div > <slot > 插槽默认内容...</slot > </div > </template >
具名插槽:
1 2 3 4 5 6 7 8 9 10 11 12 13 14 15 16 17 18 父组件中: <Category > <template slot ="center" > <div > html结构1</div > </template > <template v-slot:footer > <div > html结构2</div > </template > </Category > 子组件中: <template > <div > <slot name ="center" > 插槽默认内容...</slot > <slot name ="footer" > 插槽默认内容...</slot > </div > </template >
作用域插槽:
理解:数据在组件的自身,但根据数据生成的结构需要组件的使用者来决定。(games数据在Category组件中,但使用数据所遍历出来的结构由App组件决定)
具体编码:
1 2 3 4 5 6 7 8 9 10 11 12 13 14 15 16 17 18 19 20 21 22 23 24 25 26 27 28 29 30 31 32 33 34 35 父组件中: <Category > <template scope ="scopeData" > <ul > <li v-for ="g in scopeData.games" :key ="g" > {{g}}</li > </ul > </template > </Category > <Category > <template slot-scope ="scopeData" > <h4 v-for ="g in scopeData.games" :key ="g" > {{g}}</h4 > </template > </Category > 子组件中: <template > <div > <slot :games ="games" > </slot > </div > </template > <script > export default { name :'Category' , props :['title' ], data ( return { games :['红色警戒' ,'穿越火线' ,'劲舞团' ,'超级玛丽' ] } }, } </script >
vuex· 1. vuex· 1.1 vuex 是什么· vuex 是专门在 Vue 中实现集中式数据管理的一个 Vue 插件,对 vue 应用中多个组件的共享数据进行集中式的管理(读/写),也是一种组件间通信的方式,且适用于任意组件间通信。
vuex github地址
1.2 什么时候使用 vuex· 多个组件依赖于同一数据 来自不同组件的行为需要变更同一数据 即多个组件需要对同一个数据进行读和写操作时可以使用 vuex。
使用全局事件总线实现多个组件对同一个数据进行读和写操作:
当对一个数据进行读写操作的组件较少时,全局事件总线可以简单实现,但是当对这个数据进行读和写操作的组件个数较多时,代码写起来较为繁琐。
使用 vuex 实现多个组件对同一个数据进行读和写操作:
当对数据进行读和写操作的组件个数较多时,使用 vuex 实现比全局事件总线实现更为简易。
2. 求和案例· App.vue
1 2 3 4 5 6 7 8 9 10 11 12 13 14 15 16 17 18 19 <template > <div > <Count > </Count > </div > </template > <script > import Count from './components/Count.vue' export default { name : 'App' , components : { Count } } </script >
Count.vue
1 2 3 4 5 6 7 8 9 10 11 12 13 14 15 16 17 18 19 20 21 22 23 24 25 26 27 28 29 30 31 32 33 34 35 36 37 38 39 40 41 42 43 44 45 46 47 48 49 50 <template > <div > <h1 > 当前求和为: {{sum}}</h1 > <select v-model.number ="n" > <option value ="1" > 1</option > <option value ="2" > 2</option > <option value ="3" > 3</option > </select > <button @click ="increment" > +</button > <button @click ="decrement" > -</button > <button @click ="incrementWait" > 等一等再加</button > <button @click ="incrementOdd" > 当前求和为奇数再加</button > </div > </template > <script > export default { name : 'Count' , data ( return { n : 1 , sum : 0 } }, methods : { increment ( this .sum += this .n }, decrement ( this .sum -= this .n }, incrementWait ( setTimeout (()=> { this .sum += this .n }, 500 ) }, incrementOdd ( if ( this .sum % 2 ) { this .sum += this .n } } } } </script > <style > button { margin : 5px ; } </style >
3. vuex 工作原理·
Actions的作用,当组件调用dispatch方法只知道动作类型,而不知道参数,需要向外部服务器请求,这种情况下,可以在Actions中发送ajax请求获取参数。
vuex 中的 Actions、Mutations、State 需要受到 store 的管理,同时 dispatch 方法和 commit 方法由 store 提供。
4. 搭建 vuex 环境· vue2 使用vuex3版本vue3 使用vuex4版本
4.1 安装 vuex· 由于使用的vue版本为2.x,所以安装vuex的3.x版本。
4.2 新建 store 文件夹· 在 src 文件夹下,创建一个 store 文件夹,在 store 文件夹下新建一个 index.js 文件。
store/index.js
1 2 3 4 5 6 7 8 9 10 11 12 13 14 15 16 17 18 19 20 21 22 23 import Vue from 'vue' import Vuex from 'vuex' Vue .use (Vuex )const actions = {}const mutations = {}const state = {}export default new Vuex .Store ({ actions, mutations, state })
在 store/index.js 中使用 vuex 插件而不是在 main.js 中使用 vuex 插件,是由于 vuex 插件的使用必须在创建 store 实例对象之前。
4.3 store 配置项· 在引入和使用 vuex 后,在创建 vue 实例对象时,可以传入一个配置项 store。在创建 vue 实例对象时传入 store 配置项,vue 实例对象和所有的组件实例对象上都会有一个 $store 属性。
main.js
1 2 3 4 5 6 7 8 9 10 11 12 13 14 15 import Vue from 'vue' import App from './App.vue' import store from './store' Vue .config .productionTip = false new Vue ({ render : h =>h (App ), store }).$mount('#app' )
main.js
1 2 3 4 5 6 7 8 9 const vm = new Vue ({ render : h =>h (App ), store }).$mount('#app' ) console .log (vm)
App.vue
1 2 3 4 5 6 7 8 9 10 11 12 13 14 15 <script > import Count from './components/Count.vue' export default { name : 'App' , components : { Count }, mounted ( console .log (this ) } } </script >
5. 求和案例(vuex版)· Count.vue
1 2 3 4 5 6 7 8 9 10 11 12 13 14 15 16 17 18 19 20 21 22 23 24 25 26 27 28 29 30 31 32 33 34 35 36 37 38 39 40 41 42 43 44 45 46 47 48 49 50 51 52 53 <template > <div > <h1 > 当前求和为: {{$store.state.sum}}</h1 > <select v-model.number ="n" > <option value ="1" > 1</option > <option value ="2" > 2</option > <option value ="3" > 3</option > </select > <button @click ="increment" > +</button > <button @click ="decrement" > -</button > <button @click ="incrementWait" > 等一等再加</button > <button @click ="incrementOdd" > 当前求和为奇数再加</button > </div > </template > <script > export default { name : 'Count' , data ( return { n : 1 } }, methods : { increment ( this .$store .commit ('INCREMENT' , this .n ) }, decrement ( this .$store .commit ('DECREMENT' , this .n ) }, incrementWait ( this .$store .dispatch ('incrementWait' , this .n ) }, incrementOdd ( this .$store .dispatch ('incrementOdd' , this .n ) } } } </script > <style > button { margin : 5px ; } </style >
store/index.js
1 2 3 4 5 6 7 8 9 10 11 12 13 14 15 16 17 18 19 20 21 22 23 24 25 26 27 28 29 30 31 32 33 34 35 36 37 38 39 40 41 42 43 44 45 46 47 48 49 50 51 52 53 54 55 56 57 58 59 60 61 62 63 64 65 66 67 68 69 70 71 72 73 74 75 76 77 import Vue from 'vue' import Vuex from 'vuex' Vue .use (Vuex )const actions = { incrementWait (context, value ) { console .log ('actions 中的 incrementWait 被触发' , context, value) setTimeout (() => { context.commit ('INCREMENTWAIT' , value) }, 500 ); }, incrementOdd (context, value ) { console .log ('actions 中的 incrementOdd 被触发' , context, value) if (context.state .sum % 2 ) { context.commit ('INCREMENTODD' , value) } } } const mutations = { INCREMENT (store, value ) { console .log ('mutations 中的 INCREMENT 被触发' , store, value) store.sum += value }, DECREMENT (store, value ) { console .log ('mutations 中的 DECREMENT 被触发' , store, value) store.sum -= value }, INCREMENTWAIT (store, value ) { console .log ('mutations 中的 INCREMENTWAIT 被触发' , store, value) store.sum += value }, INCREMENTODD (store, value ) { console .log ('mutations 中的 INCREMENTODD 被触发' , store, value) store.sum += value } } const state = { sum : 0 } export default new Vuex .Store ({ actions, mutations, state })
vuex 中的 actions 负责业务逻辑的处理,mutations 负责数据的操作修改。
6. store 中的 getters 配置项· 类似于计算属性,可以读取state中数据加工后的值。
6.1 getters 配置项· store/index.js
1 2 3 4 5 6 7 8 9 10 11 12 13 14 15 16 17 18 19 20 21 22 23 24 25 26 27 28 29 30 31 32 33 ...... const actions = { ...... } const mutations = { ...... } const state = { sum : 0 } const getters = { bigSum (state ) { return state.sum * 10 } } export default new Vuex .Store ({ actions, mutations, state, getters })
6.2 读取 getters 配置项中的值· 在 $store 实例对象中存在一个属性 getters:
Count.vue
1 2 3 4 5 6 7 8 9 10 11 12 13 14 15 16 17 18 19 20 21 22 23 24 25 26 27 28 29 30 31 32 33 34 35 36 37 38 39 40 41 42 43 44 45 46 47 48 49 50 51 52 53 54 <template > <div > <h1 > 当前求和为: {{$store.state.sum}}</h1 > <h1 > 当前求和放大10倍为: {{$store.getters.bigSum}}</h1 > <select v-model.number ="n" > <option value ="1" > 1</option > <option value ="2" > 2</option > <option value ="3" > 3</option > </select > <button @click ="increment" > +</button > <button @click ="decrement" > -</button > <button @click ="incrementWait" > 等一等再加</button > <button @click ="incrementOdd" > 当前求和为奇数再加</button > </div > </template > <script > export default { name : 'Count' , data ( return { n : 1 } }, methods : { increment ( this .$store .commit ('INCREMENT' , this .n ) }, decrement ( this .$store .commit ('DECREMENT' , this .n ) }, incrementWait ( this .$store .dispatch ('incrementWait' , this .n ) }, incrementOdd ( this .$store .dispatch ('incrementOdd' , this .n ) } } } </script > <style > button { margin : 5px ; } </style >
7. mapState & mapGetters· 导入 mapState & mapGetters:
1 2 import { mapState, mapGetters } from 'vuex'
7.1 mapState 生成 state 数据对应的计算属性· 通过 mapState 生成 state 中各个数据对应的计算属性,可以在页面直接使用计算属性名获取 state 中的数据值,而不用通过 $store.state.变量 获取。
**mapState方法:**用于帮助我们映射state中的数据为计算属性
store/index.js
1 2 3 4 5 6 7 8 9 10 11 12 13 ...... const state = { sum : 0 , school : 'SGG' , subject : '前端' } ......
7.1.1 对象写法· 1 2 3 4 5 6 7 8 9 10 11 12 13 14 15 16 17 18 19 20 21 22 23 24 25 26 27 28 29 30 31 32 33 34 35 36 37 38 39 40 41 42 43 44 45 46 47 48 49 50 51 52 53 54 55 56 57 <template > <div > <h1 > 当前求和为: {{mySum}}</h1 > <h1 > 当前求和放大10倍为: {{$store.getters.bigSum}}</h1 > <h1 > 学校: {{mySchool}}</h1 > <h1 > 学科: {{mySubject}}</h1 > <select v-model.number ="n" > <option value ="1" > 1</option > <option value ="2" > 2</option > <option value ="3" > 3</option > </select > <button @click ="increment" > +</button > <button @click ="decrement" > -</button > <button @click ="incrementWait" > 等一等再加</button > <button @click ="incrementOdd" > 当前求和为奇数再加</button > </div > </template > <script > import {mapState} from 'vuex' export default { name : 'Count' , data ( return { n : 1 } }, computed : { ...mapState ({ mySum : 'sum' , mySchool : 'school' , mySubject : 'subject' , }) }, methods : { ...... } } </script > <style > button { margin : 5px ; } </style >
7.1.2 数组写法· 数组写法生成的计算属性名和state中的数据变量名一致。
1 2 3 4 5 6 7 8 9 10 11 12 13 14 15 16 17 18 19 20 21 22 23 24 25 26 27 28 29 30 31 32 33 34 35 36 37 38 39 40 41 42 43 44 45 46 47 48 49 50 51 52 <template > <div > <h1 > 当前求和为: {{sum}}</h1 > <h1 > 当前求和放大10倍为: {{$store.getters.bigSum}}</h1 > <h1 > 学校: {{school}}</h1 > <h1 > 学科: {{subject}}</h1 > <select v-model.number ="n" > <option value ="1" > 1</option > <option value ="2" > 2</option > <option value ="3" > 3</option > </select > <button @click ="increment" > +</button > <button @click ="decrement" > -</button > <button @click ="incrementWait" > 等一等再加</button > <button @click ="incrementOdd" > 当前求和为奇数再加</button > </div > </template > <script > import {mapState} from 'vuex' export default { name : 'Count' , data ( return { n : 1 } }, computed : { ...mapState (['sum' , 'school' , 'subject' ]) }, methods : { ...... } } </script > <style > button { margin : 5px ; } </style >
7.2 mapGetters 生成 getters 数据对应的计算属性· 通过 mapGetters 生成 getters 中各个数据对应的计算属性,可以在页面直接使用计算属性名获取 getters 中的数据值,而不用通过 $store.getters.变量 获取。
**mapGetters方法:**用于帮助我们映射getters中的数据为计算属性
store/index.js
1 2 3 4 5 6 7 8 9 10 11 12 13 14 ...... const getters = { bigSum (state ) { return state.sum * 10 } } ......
7.2.1 对象写法· Count.vue
1 2 3 4 5 6 7 8 9 10 11 12 13 14 15 16 17 18 19 20 21 22 23 24 25 26 27 28 29 30 31 32 33 34 35 36 37 38 39 40 41 42 43 44 45 46 47 48 49 50 <template > <div > <h1 > 当前求和为: {{sum}}</h1 > <h1 > 当前求和放大10倍为: {{bigSum}}</h1 > <h1 > 学校: {{school}}</h1 > <h1 > 学科: {{subject}}</h1 > <select v-model.number ="n" > <option value ="1" > 1</option > <option value ="2" > 2</option > <option value ="3" > 3</option > </select > <button @click ="increment" > +</button > <button @click ="decrement" > -</button > <button @click ="incrementWait" > 等一等再加</button > <button @click ="incrementOdd" > 当前求和为奇数再加</button > </div > </template > <script > import { mapState, mapGetters } from 'vuex' export default { name : 'Count' , data ( return { n : 1 } }, computed : { ...... ...mapState (['sum' , 'school' , 'subject' ]), ...mapGetters ({bigSum :'bigSum' }) }, methods : { ...... } } </script > <style > button { margin : 5px ; } </style >
7.2.2 数组写法· 数组写法生成的计算属性名和getters中的数据变量名一致。
Count.vue
1 2 3 4 5 6 7 8 9 10 11 12 13 14 15 16 17 18 19 20 21 22 23 24 25 26 27 28 29 30 31 32 33 34 35 36 37 38 39 40 41 42 43 44 45 46 47 48 49 50 51 52 53 <template > <div > <h1 > 当前求和为: {{sum}}</h1 > <h1 > 当前求和放大10倍为: {{bigSum}}</h1 > <h1 > 学校: {{school}}</h1 > <h1 > 学科: {{subject}}</h1 > <select v-model.number ="n" > <option value ="1" > 1</option > <option value ="2" > 2</option > <option value ="3" > 3</option > </select > <button @click ="increment" > +</button > <button @click ="decrement" > -</button > <button @click ="incrementWait" > 等一等再加</button > <button @click ="incrementOdd" > 当前求和为奇数再加</button > </div > </template > <script > import { mapState, mapGetters } from 'vuex' export default { name : 'Count' , data ( return { n : 1 } }, computed : { ...... ...mapState (['sum' , 'school' , 'subject' ]), ...mapGetters (['bigSum' ]) }, methods : { ...... } } </script > <style > button { margin : 5px ; } </style >
8. mapActions & mapMutations· 8.1 mapMutations· **mapMutations方法:**用于帮助我们生成与mutations对话的方法,即:包含$store.commit(xxx)的函数
借助mapMutations生成对应的方法,方法中会调用commit去联系mutations
8.1.1 引入 mapMutations· 1 2 import { mapMutations } from 'vuex'
8.1.2 对象写法· Count.vue
1 2 3 4 5 6 7 8 9 10 11 12 13 14 15 16 17 18 19 20 21 22 23 24 25 26 27 28 29 30 31 32 33 34 35 36 37 38 39 40 41 42 43 44 45 46 47 48 49 50 51 52 53 54 55 56 57 58 59 60 61 62 <template > <div > <h1 > 当前求和为: {{sum}}</h1 > <h1 > 当前求和放大10倍为: {{bigSum}}</h1 > <h1 > 学校: {{school}}</h1 > <h1 > 学科: {{subject}}</h1 > <select v-model.number ="n" > <option value ="1" > 1</option > <option value ="2" > 2</option > <option value ="3" > 3</option > </select > <button @click ="increment(n)" > +</button > <button @click ="decrement(n)" > -</button > <button @click ="incrementWait" > 等一等再加</button > <button @click ="incrementOdd" > 当前求和为奇数再加</button > </div > </template > <script > import { mapState, mapGetters } from 'vuex' import { mapMutations } from 'vuex' export default { name : 'Count' , data ( return { n : 1 } }, computed : { ...... }, methods : { ...mapMutations ({ increment : 'INCREMENT' , decrement : 'DECREMENT' }), ...... } } </script >
8.1.3 数组写法· Count.vue
1 2 3 4 5 6 7 8 9 10 11 12 13 14 15 16 17 18 19 20 21 22 23 24 25 26 27 28 29 30 31 32 33 34 35 36 37 38 39 40 41 42 43 44 45 46 47 48 49 50 51 52 53 54 55 56 57 58 59 60 61 62 63 64 65 <template > <div > <h1 > 当前求和为: {{sum}}</h1 > <h1 > 当前求和放大10倍为: {{bigSum}}</h1 > <h1 > 学校: {{school}}</h1 > <h1 > 学科: {{subject}}</h1 > <select v-model.number ="n" > <option value ="1" > 1</option > <option value ="2" > 2</option > <option value ="3" > 3</option > </select > <button @click ="INCREMENT(n)" > +</button > <button @click ="DECREMENT(n)" > -</button > <button @click ="incrementWait" > 等一等再加</button > <button @click ="incrementOdd" > 当前求和为奇数再加</button > </div > </template > <script > import { mapState, mapGetters } from 'vuex' import { mapMutations } from 'vuex' export default { name : 'Count' , data ( return { n : 1 } }, computed : { ...... }, methods : { ...mapMutations (['INCREMENT' , 'DECREMENT' ]), ...... } } </script > <style > button { margin : 5px ; } </style >
8.2 mapActions· **mapActions方法:**用于帮助我们生成与actions对话的方法,即:包含$store.dispatch(xxx)的函数
借助mapActions生成对应的方法,方法中会调用dispatch去联系actions
8.2.1 引入 mapActions· 1 2 import { mapActions } from 'vuex'
8.2.2 对象写法· Count.vue
1 2 3 4 5 6 7 8 9 10 11 12 13 14 15 16 17 18 19 20 21 22 23 24 25 26 27 28 29 30 31 32 33 34 35 36 37 38 39 40 41 42 43 44 45 46 47 48 49 50 51 52 53 54 55 56 57 58 <template > <div > <h1 > 当前求和为: {{sum}}</h1 > <h1 > 当前求和放大10倍为: {{bigSum}}</h1 > <h1 > 学校: {{school}}</h1 > <h1 > 学科: {{subject}}</h1 > <select v-model.number ="n" > <option value ="1" > 1</option > <option value ="2" > 2</option > <option value ="3" > 3</option > </select > <button @click ="INCREMENT(n)" > +</button > <button @click ="DECREMENT(n)" > -</button > <button @click ="incrementWait(n)" > 等一等再加</button > <button @click ="incrementOdd(n)" > 当前求和为奇数再加</button > </div > </template > <script > import { mapState, mapGetters } from 'vuex' import { mapMutations, mapActions } from 'vuex' export default { name : 'Count' , data ( return { n : 1 } }, computed : { ...... }, methods : { ...... ...mapActions ({ incrementWait : 'incrementWait' , incrementOdd : 'incrementOdd' }) } } </script >
8.2.3 数组写法· 1 2 3 4 5 6 7 8 9 10 11 12 13 14 15 16 17 18 19 20 21 22 23 24 25 26 27 28 29 30 31 32 33 34 35 36 37 38 39 40 41 42 43 44 45 46 47 48 49 50 51 52 53 54 55 <template > <div > <h1 > 当前求和为: {{sum}}</h1 > <h1 > 当前求和放大10倍为: {{bigSum}}</h1 > <h1 > 学校: {{school}}</h1 > <h1 > 学科: {{subject}}</h1 > <select v-model.number ="n" > <option value ="1" > 1</option > <option value ="2" > 2</option > <option value ="3" > 3</option > </select > <button @click ="INCREMENT(n)" > +</button > <button @click ="DECREMENT(n)" > -</button > <button @click ="incrementWait(n)" > 等一等再加</button > <button @click ="incrementOdd(n)" > 当前求和为奇数再加</button > </div > </template > <script > import { mapState, mapGetters } from 'vuex' import { mapMutations, mapActions } from 'vuex' export default { name : 'Count' , data ( return { n : 1 } }, computed : { ...... }, methods : { ...... ...mapActions (['incrementWait' , 'incrementOdd' ]) } } </script >
9. vuex 总结· 1.概念· 在Vue中实现集中式状态(数据)管理的一个Vue插件,对vue应用中多个组件的共享状态进行集中式的管理(读/写),也是一种组件间通信的方式,且适用于任意组件间通信。
2.何时使用?· 多个组件需要共享数据时
3.搭建vuex环境· 创建文件:src/store/index.js
1 2 3 4 5 6 7 8 9 10 11 12 13 14 15 16 17 18 19 20 import Vue from 'vue' import Vuex from 'vuex' Vue .use (Vuex )const actions = {}const mutations = {}const state = {}export default new Vuex .Store ({ actions, mutations, state })
在main.js中创建vm时传入store配置项
1 2 3 4 5 6 7 8 9 10 11 ...... import store from './store' ...... new Vue ({ el :'#app' , render : h =>h (App ), store })
4.基本使用· 初始化数据、配置actions、配置mutations,操作文件store.js
1 2 3 4 5 6 7 8 9 10 11 12 13 14 15 16 17 18 19 20 21 22 23 24 25 26 27 28 29 30 31 32 33 34 import Vue from 'vue' import Vuex from 'vuex' Vue .use (Vuex )const actions = { jia (context,value ){ context.commit ('JIA' ,value) }, } const mutations = { JIA (state,value ){ state.sum += value } } const state = { sum :0 } export default new Vuex .Store ({ actions, mutations, state, })
组件中读取vuex中的数据:$store.state.sum
组件中修改vuex中的数据:$store.dispatch('action中的方法名',数据)或 $store.commit('mutations中的方法名',数据)
备注:若没有网络请求或其他业务逻辑,组件中也可以越过actions,即不写dispatch,直接编写commit
5.getters的使用· 概念:当state中的数据需要经过加工后再使用时,可以使用getters加工。
在store.js中追加getters配置
1 2 3 4 5 6 7 8 9 10 11 12 13 ...... const getters = { bigSum (state ){ return state.sum * 10 } } export default new Vuex .Store ({ ...... getters })
组件中读取数据:$store.getters.bigSum
6.四个map方法的使用· **mapState方法:**用于帮助我们映射state中的数据为计算属性
1 2 3 4 5 6 7 computed : { ...mapState ({sum :'sum' ,school :'school' ,subject :'subject' }), ...mapState (['sum' ,'school' ,'subject' ]), },
**mapGetters方法:**用于帮助我们映射getters中的数据为计算属性
1 2 3 4 5 6 7 computed : { ...mapGetters ({bigSum :'bigSum' }), ...mapGetters (['bigSum' ]) },
**mapActions方法:**用于帮助我们生成与actions对话的方法,即:包含$store.dispatch(xxx)的函数
1 2 3 4 5 6 7 methods :{ ...mapActions ({incrementOdd :'jiaOdd' ,incrementWait :'jiaWait' }) ...mapActions (['jiaOdd' ,'jiaWait' ]) }
**mapMutations方法:**用于帮助我们生成与mutations对话的方法,即:包含$store.commit(xxx)的函数
1 2 3 4 5 6 7 methods :{ ...mapMutations ({increment :'JIA' ,decrement :'JIAN' }), ...mapMutations (['JIA' ,'JIAN' ]), }
备注:mapActions与mapMutations使用时,若需要传递参数需要:在模板中绑定事件时传递好参数,否则参数是事件对象。
多组件共享数据与vuex模块化· 1. 多组件共享数据案例· 1.1 实现效果·
1.2 代码实现· store/index.js
1 2 3 4 5 6 7 8 9 10 11 12 13 14 15 16 17 18 19 20 21 22 23 24 25 26 27 28 29 30 31 32 33 34 35 36 37 38 39 40 41 42 43 44 45 46 47 48 49 50 51 52 53 54 55 56 57 58 59 60 61 62 63 64 65 66 67 68 69 70 71 72 73 74 75 76 77 78 79 80 81 import Vue from 'vue' import Vuex from 'vuex' Vue .use (Vuex )const actions = { incrementWait (context, value ) { console .log ('actions 中的 incrementWait 被触发' , context, value) setTimeout (() => { context.commit ('INCREMENTWAIT' , value) }, 500 ); }, incrementOdd (context, value ) { console .log ('actions 中的 incrementOdd 被触发' , context, value) if (context.state .sum % 2 ) { context.commit ('INCREMENTODD' , value) } } } const mutations = { INCREMENT (store, value ) { console .log ('mutations 中的 INCREMENT 被触发' , store, value) store.sum += value }, DECREMENT (store, value ) { console .log ('mutations 中的 DECREMENT 被触发' , store, value) store.sum -= value }, INCREMENTWAIT (store, value ) { console .log ('mutations 中的 INCREMENTWAIT 被触发' , store, value) store.sum += value }, INCREMENTODD (store, value ) { console .log ('mutations 中的 INCREMENTODD 被触发' , store, value) store.sum += value }, ADD_PERSON (state, person ) { state.personList .unshift (person) } } const state = { sum : 0 , school : 'SGG' , subject : '前端' , personList : [ {id : '001' , name : '张三' } ] } const getters = { bigSum (state ) { return state.sum * 10 } } export default new Vuex .Store ({ actions, mutations, state, getters })
main.js
1 2 3 4 5 6 7 8 9 10 11 12 import Vue from 'vue' import App from './App.vue' import store from './store' Vue .config .productionTip = false new Vue ({ render : h =>h (App ), store }).$mount('#app' )
App.vue
1 2 3 4 5 6 7 8 9 10 11 12 13 14 15 16 17 18 19 20 21 22 23 <template > <div > <Count > </Count > <hr > <Person > </Person > </div > </template > <script > import Count from './components/Count.vue' import Person from './components/Person.vue' export default { name : 'App' , components : { Count , Person } } </script >
Count.vue
1 2 3 4 5 6 7 8 9 10 11 12 13 14 15 16 17 18 19 20 21 22 23 24 25 26 27 28 29 30 31 32 33 34 35 36 37 38 39 40 41 42 43 44 45 46 47 48 49 50 51 52 53 54 55 56 <template > <div > <h1 > 当前求和为: {{sum}}</h1 > <h1 > 当前求和放大10倍为: {{bigSum}}</h1 > <h1 > 学校: {{school}}</h1 > <h1 > 学科: {{subject}}</h1 > <select v-model.number ="n" > <option value ="1" > 1</option > <option value ="2" > 2</option > <option value ="3" > 3</option > </select > <button @click ="INCREMENT(n)" > +</button > <button @click ="DECREMENT(n)" > -</button > <button @click ="incrementWait(n)" > 等一等再加</button > <button @click ="incrementOdd(n)" > 当前求和为奇数再加</button > <h3 > Person组件的总人数为: {{personList.length}}</h3 > </div > </template > <script > import { mapState, mapGetters } from 'vuex' import { mapMutations, mapActions } from 'vuex' export default { name : 'Count' , data ( return { n : 1 } }, computed : { ...mapState (['sum' , 'school' , 'subject' , 'personList' ]), ...mapGetters (['bigSum' ]) }, methods : { ...mapMutations (['INCREMENT' , 'DECREMENT' ]), ...mapActions (['incrementWait' , 'incrementOdd' ]) } } </script > <style > button { margin : 5px ; } h3 { color : brown; } </style >
Person.vue
1 2 3 4 5 6 7 8 9 10 11 12 13 14 15 16 17 18 19 20 21 22 23 24 25 26 27 28 29 30 31 32 33 34 35 36 37 38 39 40 41 42 43 44 45 <template > <div > <h1 > 人员列表</h1 > <input type ="text" placeholder ="请输入姓名" v-model ="name" > <button @click ="addPerson" > 添加</button > <ul > <li v-for ="person in personList" :key ="person.id" > {{person.name}}</li > </ul > <h3 > Count组件求和为: {{sum}}</h3 > </div > </template > <script > import {mapState, mapMutations} from 'vuex' import {nanoid} from 'nanoid' export default { name : 'Person' , data ( return { name : '' } }, computed : { ...mapState (['personList' , 'sum' ]) }, methods : { addPerson ( const person = { id : nanoid (), name : this .name } this .ADD_PERSON (person) this .name = '' }, ...mapMutations (['ADD_PERSON' ]) } } </script > <style > </style >
2. vuex 模块化· vuex 模块化是将 vuex 中 actions、mutations、state、getters 中的数据和方法根据功能进行拆分。即和同一个功能相关的 actions、mutations、state、getters 放在一起。
2.1 vuex 模块化拆分· store/index.js
1 2 3 4 5 6 7 8 9 10 11 12 13 14 15 16 17 18 19 20 21 22 23 24 25 26 27 28 29 30 31 32 33 34 35 36 37 38 39 40 41 42 43 44 45 46 47 48 49 50 51 52 53 54 55 56 57 58 59 60 61 62 63 64 65 66 67 68 69 70 71 72 73 74 75 76 77 78 import Vue from 'vue' import Vuex from 'vuex' Vue .use (Vuex )const acountOptions = { actions : { incrementWait (context, value ) { console .log ('actions 中的 incrementWait 被触发' , context, value) setTimeout (() => { context.commit ('INCREMENTWAIT' , value) }, 500 ); }, incrementOdd (context, value ) { console .log ('actions 中的 incrementOdd 被触发' , context, value) if (context.state .sum % 2 ) { context.commit ('INCREMENTODD' , value) } } }, mutations : { INCREMENT (store, value ) { console .log ('mutations 中的 INCREMENT 被触发' , store, value) store.sum += value }, DECREMENT (store, value ) { console .log ('mutations 中的 DECREMENT 被触发' , store, value) store.sum -= value }, INCREMENTWAIT (store, value ) { console .log ('mutations 中的 INCREMENTWAIT 被触发' , store, value) store.sum += value }, INCREMENTODD (store, value ) { console .log ('mutations 中的 INCREMENTODD 被触发' , store, value) store.sum += value }, }, state : { sum : 0 , school : 'SGG' , subject : '前端' , }, getters : { bigSum (state ) { return state.sum * 10 } } } const personOptions = { actions : {}, mutations : { ADD_PERSON (state, person ) { state.personList .unshift (person) } }, state : { personList : [ { id : '001' , name : '张三' } ] }, getters : {} }
2.2 使用模块化后的配置项· 创建store实例对象时,使用模块化后的配置项,模块化后的配置项需要写在store的modules配置项中。
store/index.js
1 2 3 4 5 6 7 export default new Vuex .Store ({ modules : { acount : acountOptions, person : personOptions } })
2.2 开启命名空间· store/index.js
1 2 3 4 5 6 7 8 9 10 11 12 13 14 15 16 17 18 19 20 21 22 23 24 25 26 27 28 29 const acountOptions = { namespaced : true , actions : { ...... }, mutations : { ...... }, state : { ...... }, getters : { ...... } } const personOptions = { namespaced : true , actions : {}, mutations : { ...... }, state : { ...... }, getters : {} }
2.3 模块化后读取数据和方法· vuex 模块化使用 mapState、mapGetters、mapMutations、mapActions 读取数据和获取相应的方法,需要在数组和对象前面先传入一个参数,该参数为数据和方法对应所在的命名空间。
Count.vue
1 2 3 4 5 6 7 8 9 10 11 12 13 14 15 16 17 18 19 20 21 22 23 24 25 26 27 28 29 30 31 32 33 34 35 36 37 38 39 40 41 42 43 44 45 46 47 48 49 50 51 52 53 54 55 56 57 <template > <div > <h1 > 当前求和为: {{sum}}</h1 > <h1 > 当前求和放大10倍为: {{bigSum}}</h1 > <h1 > 学校: {{school}}</h1 > <h1 > 学科: {{subject}}</h1 > <select v-model.number ="n" > <option value ="1" > 1</option > <option value ="2" > 2</option > <option value ="3" > 3</option > </select > <button @click ="INCREMENT(n)" > +</button > <button @click ="DECREMENT(n)" > -</button > <button @click ="incrementWait(n)" > 等一等再加</button > <button @click ="incrementOdd(n)" > 当前求和为奇数再加</button > <h3 > Person组件的总人数为: {{personList.length}}</h3 > </div > </template > <script > import { mapState, mapGetters } from 'vuex' import { mapMutations, mapActions } from 'vuex' export default { name : 'Count' , data ( return { n : 1 } }, computed : { ...mapState ('acount' ,['sum' , 'school' , 'subject' ]), ...mapState ('person' ,['personList' ]), ...mapGetters ('acount' ,['bigSum' ]) }, methods : { ...mapMutations ('acount' ,['INCREMENT' , 'DECREMENT' ]), ...mapActions ('acount' ,['incrementWait' , 'incrementOdd' ]) } } </script > <style > button { margin : 5px ; } h3 { color : brown; } </style >
Person.vue
1 2 3 4 5 6 7 8 9 10 11 12 13 14 15 16 17 18 19 20 21 22 23 24 25 26 27 28 29 30 31 32 33 34 35 36 37 38 39 40 41 42 43 44 45 46 <template > <div > <h1 > 人员列表</h1 > <input type ="text" placeholder ="请输入姓名" v-model ="name" > <button @click ="addPerson" > 添加</button > <ul > <li v-for ="person in personList" :key ="person.id" > {{person.name}}</li > </ul > <h3 > Count组件求和为: {{sum}}</h3 > </div > </template > <script > import {mapState, mapMutations} from 'vuex' import {nanoid} from 'nanoid' export default { name : 'Person' , data ( return { name : '' } }, computed : { ...mapState ('acount' ,['sum' ]), ...mapState ('person' ,['personList' ]) }, methods : { addPerson ( const person = { id : nanoid (), name : this .name } this .ADD_PERSON (person) this .name = '' }, ...mapMutations ('person' , ['ADD_PERSON' ]) } } </script > <style > </style >
3. 总结 多组件共享数据与vuex模块化· 3.1. 目的· 让代码更好维护,让多种数据分类更加明确。
3.2. 修改store.js· 1 2 3 4 5 6 7 8 9 10 11 12 13 14 15 16 17 18 19 20 21 22 23 24 25 const countAbout = { namespaced :true , state :{x :1 }, mutations : { ... }, actions : { ... }, getters : { bigSum (state ){ return state.sum * 10 } } } const personAbout = { namespaced :true , state :{ ... }, mutations : { ... }, actions : { ... } } const store = new Vuex .Store ({ modules : { countAbout, personAbout } })
3.3 开启命名空间后,组件中读取state数据· 1 2 3 4 this .$store .state .personAbout .list ...mapState ('countAbout' ,['sum' ,'school' ,'subject' ]),
3.4. 开启命名空间后,组件中读取getters数据:· 1 2 3 4 this .$store .getters ['personAbout/firstPersonName' ]...mapGetters ('countAbout' ,['bigSum' ])
3.5. 开启命名空间后,组件中调用dispatch· 1 2 3 4 this .$store .dispatch ('personAbout/addPersonWang' ,person)...mapActions ('countAbout' ,{incrementOdd :'jiaOdd' ,incrementWait :'jiaWait' })
3.6. 开启命名空间后,组件中调用commit· 1 2 3 4 this .$store .commit ('personAbout/ADD_PERSON' ,person)...mapMutations ('countAbout' ,{increment :'JIA' ,decrement :'JIAN' }),
路由及路由的基本使用· 1. 相关概念· 1.1 SPA· SPA 指的是一个 web 网站只有唯一的一个 HTML 页面,所有组件的展示与切换都在这唯一的一个页面内完成。
单页 Web 应用(single page web application,SPA)。 整个应用只有一个完整的页面。 点击页面中的导航链接不会刷新页面,只会做页面的局部更新。 数据需要通过 ajax 请求获取。 在 SPA 项目中,不同功能之间的切换,要依赖于前端路由来完成。
1.2 vue-router· 1.2.1 vue-router 的概念· vue-router 是 vue 的一个插件库,是 vue.js 官方给出的路由解决方案,专门用来实现 SPA 应用。它只能结合 vue 项目进行使用,能够轻松的管理 SPA 项目中组件的切换。
1.2.2 vue-router 的版本· vue-router 目前有 3.x 的版本和 4.x 的版本。
其中:vue2 进行使用,vue-router 3.x 的官方文档地址 vue3 进行使用,vue-router 4.x 的官方文档地址
1.3 路由· 1.3.1 路由的概念· 一个路由就是一组映射关系(key - value),key 为路径, value 可能是 function 或 component。
一个路由 key 对应的 value 是 function 还是 component 取决于路由的类别。
1.3.2 路由的分类· 路由分为前端路由和后端路由。
后端路由:理解:后端路由指的是,请求方式、请求地址与 function 处理函数之间的对应关系。value 是 function, 用于处理客户端提交的请求。 工作过程:服务器接收到一个请求时, 根据请求路径找到匹配的函数 前端路由:理解:前端路由指的是,路径 与 component 组件之间的对应关系。value 是 component,用于展示页面内容。 工作过程:当浏览器的路径改变时, 对应的组件就会显示。 2. 路由的基本使用· 2.1 案例实现效果·
2.2 案例准备· 2.2.1 静态页面· 1 2 3 4 5 6 7 8 9 10 11 12 13 14 15 16 17 18 19 20 21 22 23 24 25 26 27 28 29 30 31 <html lang ="en" > <head > <meta charset ="utf-8" > <title > Vue App</title > <link rel ="stylesheet" href ="./css/bootstrap.css" > </head > <body > <div > <div class ="row" > <div class ="col-xs-offset-2 col-xs-8" > <div class ="page-header" > <h2 > Vue Router Demo</h2 > </div > </div > </div > <div class ="row" > <div class ="col-xs-2 col-xs-offset-2" > <div class ="list-group" > <a class ="list-group-item active" href ="./about.html" > About</a > <a class ="list-group-item" href ="./home.html" > Home</a > </div > </div > <div class ="col-xs-6" > <div class ="panel" > <div class ="panel-body" > <h2 > 我是About的内容</h2 > </div > </div > </div > </div > </div > </body > </html >
2.2.2 文件目录结构·
2.2.3 index.js中引入bootstrap· 1 2 <link rel ="stylesheet" href ="<%= BASE_URL %>css/bootstrap.css" >
2.2.4 组件的拆分· main.js
1 2 3 4 5 6 7 8 9 import Vue from 'vue' import App from './App.vue' Vue .config .productionTip = false new Vue ({ render : h =>h (App ), }).$mount('#app' )
App.vue
1 2 3 4 5 6 7 8 9 10 11 12 13 14 15 16 17 18 19 20 21 22 23 24 25 26 27 28 29 30 31 32 33 34 35 36 37 38 39 <template > <div > <div class ="row" > <div class ="col-xs-offset-2 col-xs-8" > <div class ="page-header" > <h2 > Vue Router Demo</h2 > </div > </div > </div > <div class ="row" > <div class ="col-xs-2 col-xs-offset-2" > <div class ="list-group" > <a class ="list-group-item active" href ="./about.html" > About</a > <a class ="list-group-item" href ="./home.html" > Home</a > </div > </div > <div class ="col-xs-6" > <div class ="panel" > <div class ="panel-body" > <h2 > 点击导航后切换内容区</h2 > </div > </div > </div > </div > </div > </template > <script > export default { name : 'App' , components : { } } </script >
Home.vue
1 2 3 4 5 6 7 8 9 10 11 12 13 14 15 <template > <div > <h2 > Home组件</h2 > </div > </template > <script > export default { name : 'Home' } </script > <style > </style >
About.vue
1 2 3 4 5 6 7 8 9 10 11 12 13 14 15 16 <template > <div > <h2 > About组件</h2 > </div > </template > <script > export default { name : 'About' } </script > <style > </style >
2.3 安装 vue-router· 注意:vue-router 3.x 的官方文档地址 vue-router 4.x 的官方文档地址
这里vue的版本为2.x,所以安装vue-router的3.x版本
2.4 引入与使用 vue-router 插件· 由于 vue-router 是 vue 中的一个插件,所以使用 vue-router 需要先引入和使用 vue-router。
1 2 3 4 5 import VueRouter from 'vue-router' Vue .use (VueRouter )
在引入和使用 vue-router 之后,实例化 vue 实例对象时可以传入一个配置项 router。
2.5 新建文件夹创建路由器· 目录结构:
1 2 3 4 5 6 7 8 9 10 11 12 13 14 15 16 17 18 19 20 import VueRouter from 'vue-router' import About from '../components/About' import Home from '../components/Home' export default new VueRouter ({ routes :[ { path :'/about' , component :About }, { path :'/home' , component :Home } ] })
2.6 引入并配置路由器· main.js
1 2 3 4 5 6 7 8 9 10 11 12 13 14 15 16 17 18 import Vue from 'vue' import App from './App.vue' import VueRouter from 'vue-router' import router from './router' Vue .use (VueRouter )Vue .config .productionTip = false new Vue ({ render : h =>h (App ), router : router }).$mount('#app' )
2.7 实现导航区地址修改· 实现导航区地址的修改,需要使用 vue-router 提供的标签 <router-link ></router-link>,跳转到的地址通过 router-link 标签上的 to 属性指定。
跳转到的路由地址需要与路由器中配置的一致
1 2 3 4 5 6 7 8 9 10 11 12 13 <div class ="col-xs-2 col-xs-offset-2" > <div class ="list-group" > <router-link class ="list-group-item" active-class ="active" to ="/about" > About</router-link > <router-link class ="list-group-item" active-class ="active" to ="/home" > Home</router-link > </div > </div >
2.8 当前路由对应的组件的呈现· 指定当前路由对应组件呈现的位置使用 router-view 标签。
1 2 3 4 5 6 7 8 9 10 <div class ="col-xs-6" > <div class ="panel" > <div class ="panel-body" > <router-view > </router-view > </div > </div > </div >
3. 几个注意点· 路由组件通常存放在pages文件夹,一般组件通常存放在components文件夹。 通过切换,“隐藏”了的路由组件,默认是被销毁掉的,需要的时候再去挂载。 每个组件都有自己的$route属性,里面存储着自己的路由信息。 整个应用只有一个router,可以通过组件的$router属性获取到。 4. 总结 路由及路由的基本使用· 4.1 路由· 理解: 一个路由(route)就是一组映射关系(key - value),多个路由需要路由器(router)进行管理。 前端路由:key是路径,value是组件。 4.2 基本使用· 安装vue-router,命令:npm i vue-router
应用插件:Vue.use(VueRouter)
编写router配置项:
1 2 3 4 5 6 7 8 9 10 11 12 13 14 15 16 17 18 19 20 21 22 import VueRouter from 'vue-router' import About from '../components/About' import Home from '../components/Home' const router = new VueRouter ({ routes :[ { path :'/about' , component :About }, { path :'/home' , component :Home } ] }) export default router
实现切换(active-class可配置高亮样式)
1 <router-link active-class="active" to="/about">About</router-link>
指定展示位置
1 <router-view></router-view>
嵌套(多级)路由· 1. 静态页面· 1 2 3 4 5 6 7 8 9 10 11 12 13 14 15 16 17 18 19 20 21 22 23 24 25 26 27 28 29 30 31 32 33 34 35 36 37 38 39 40 41 42 43 44 45 46 47 48 49 50 51 52 53 54 55 56 57 58 <html lang ="en" > <head > <meta charset ="utf-8" > <title > Vue App</title > <link rel ="stylesheet" href ="./css/bootstrap.css" > </head > <body > <div id ="root" > <div > <div class ="row" > <div class ="col-xs-offset-2 col-xs-8" > <div class ="page-header" > <h2 > Vue Router Demo</h2 > </div > </div > </div > <div class ="row" > <div class ="col-xs-2 col-xs-offset-2" > <div class ="list-group" > <a class ="list-group-item" href ="/about" > About</a > <a class ="list-group-item active" href ="/home" aria-current ="page" > Home</a > </div > </div > <div class ="col-xs-6" > <div class ="panel" > <div class ="panel-body" > <div > <h2 > Home组件内容</h2 > <div > <ul class ="nav nav-tabs" > <li > <a class ="list-group-item" href ="./home-news.html" > News</a > </li > <li > <a class ="list-group-item active" href ="./home-message.html" > Message</a > </li > </ul > <div > <ul > <li > <a href ="/message1" > message001</a > </li > <li > <a href ="/message2" > message002</a > </li > <li > <a href ="/message/3" > message003</a > </li > </ul > </div > </div > </div > </div > </div > </div > </div > </div > </div > </body > </html >
2. 组件的拆分· 2.1 目录结构·
2.2 组件· Home.vue
1 2 3 4 5 6 7 8 9 10 11 12 13 14 15 16 17 18 19 20 21 22 23 24 25 <template > <div > <h2 > Home组件</h2 > <ul class ="nav nav-tabs" > <li > <a class ="list-group-item" href ="./home-news.html" > News</a > </li > <li > <a class ="list-group-item active" href ="./home-message.html" > Message</a > </li > </ul > <div > ??????????? </div > </div > </template > <script > export default { name : 'Home' } </script > <style > </style >
Message.vue
1 2 3 4 5 6 7 8 9 10 11 12 13 14 15 16 17 18 19 20 21 22 23 24 <template > <div > <ul > <li > <a href ="/message1" > message001</a > </li > <li > <a href ="/message2" > message002</a > </li > <li > <a href ="/message/3" > message003</a > </li > </ul > </div > </template > <script > export default { name : 'Message' } </script > <style > </style >
News.vue
1 2 3 4 5 6 7 8 9 10 11 12 13 14 15 16 17 18 <template > <div > <ul > <li > news001</li > <li > news002</li > <li > news003</li > </ul > </div > </template > <script > export default { name : 'News' } </script > <style > </style >
About.vue
1 2 3 4 5 6 7 8 9 10 11 12 13 14 15 <template > <div > <h2 > About组件</h2 > </div > </template > <script > export default { name : 'About' } </script > <style > </style >
3. 嵌套路由的配置· 子路由写在父级路由的 children 配置项相中,在子路由中路径不用写 / 。
router/index.js
1 2 3 4 5 6 7 8 9 10 11 12 13 14 15 16 17 18 19 20 21 22 23 24 25 26 27 import VueRouter from 'vue-router' import About from '../pages/About' import Home from '../pages/Home' import Message from '../pages/Message' import News from '../pages/News' export default new VueRouter ({ routes : [ { path : '/about' , component : About }, { path : '/home' , component : Home , children : [ { path : 'news' , component : News }, { path : 'message' , component : Message } ] } ] })
在页面中路由进行跳转时,路径需要书写完整。即/父级路由路径/子路由路径
Home.vue
1 2 3 4 5 6 7 8 9 10 11 12 13 14 15 16 17 18 19 20 21 22 23 24 25 26 27 28 <template > <div > <h2 > Home组件</h2 > <ul class ="nav nav-tabs" > <li > <router-link class ="list-group-item" active-class ="active" to ="/home/news" > News</router-link > </li > <li > <router-link class ="list-group-item" active-class ="active" to ="/home/message" > Message</router-link > </li > </ul > <div > <router-view > </router-view > </div > </div > </template > <script > export default { name : 'Home' } </script > <style > </style >
4. 总结 嵌套(多级)路由· 配置路由规则,使用children配置项:
1 2 3 4 5 6 7 8 9 10 11 12 13 14 15 16 17 18 19 20 routes :[ { path :'/about' , component :About , }, { path :'/home' , component :Home , children :[ { path :'news' , component :News }, { path :'message' , component :Message } ] } ]
跳转(要写完整路径):
1 <router-link to="/home/news">News</router-link>
路由传参 & 命名路由· 1. 页面组件· 1.1 目录结构·
1.3 路由配置· 1 2 3 4 5 6 7 8 9 10 11 12 13 14 15 16 17 18 19 20 21 22 23 24 25 26 27 28 29 30 import VueRouter from 'vue-router' import About from '../pages/About' import Home from '../pages/Home' import Message from '../pages/Message' import News from '../pages/News' import Detail from '../pages/Detail' export default new VueRouter ({ routes : [ { path : '/about' , component : About }, { path : '/home' , component : Home , children : [ { path : 'news' , component : News }, { path : 'message' , component : Message , children : [ { path : 'detail' , component : Detail } ] } ] } ] })
1.2 组件· Home.vue
1 2 3 4 5 6 7 8 9 10 11 12 13 14 15 16 17 18 19 20 21 22 23 24 25 <template > <div > <h2 > Home组件</h2 > <ul class ="nav nav-tabs" > <li > <router-link class ="list-group-item" active-class ="active" to ="/home/news" > News</router-link > </li > <li > <router-link class ="list-group-item" active-class ="active" to ="/home/message" > Message</router-link > </li > </ul > <div > <router-view > </router-view > </div > </div > </template > <script > export default { name : 'Home' } </script > <style > </style >
Message.vue
1 2 3 4 5 6 7 8 9 10 11 12 13 14 15 16 17 18 19 20 21 22 23 24 25 26 27 28 29 <template > <div > <ul > <li v-for ="m in messageList" :key ="m.id" > <router-link to ="/home/message/detail" > {{m.title}}</router-link > </li > </ul > <hr > <router-view > </router-view > </div > </template > <script > export default { name : 'Message' , data ( return { messageList : [ {id : '001' , title : '消息001' }, {id : '002' , title : '消息002' }, {id : '003' , title : '消息003' }, ] } }, } </script > <style > </style >
Detail.vue
1 2 3 4 5 6 7 8 9 10 11 12 13 14 15 16 17 <template > <div > <ul > <li > 消息编号: {{}}</li > <li > 消息标题: {{}}</li > </ul > </div > </template > <script > export default { name : 'Detail' } </script > <style > </style >
2. 路由 query 传参· 2.1 使用 query 传参· 2.1.1 to 的字符串写法· 1 2 3 4 5 <ul > <li v-for ="m in messageList" :key ="m.id" > <router-link :to ="`/home/message/detail?id=${m.id}&title=${m.title}`" > {{m.title}}</router-link > </li > </ul >
2.1.2 to 的对象写法· 1 2 3 4 5 6 7 8 9 10 11 12 13 14 15 <ul > <li v-for ="m in messageList" :key ="m.id" > <router-link :to ="{ path: '/home/message/detail', query: { id: m.id, title: m.title } }" > {{m.title}} </router-link > </li > </ul >
2.2 组件接收 query 参数· 在路由跳转时通过 query 进行传参,传递的参数会被存放在组件实例对象的 $route
Detail.vue
1 2 3 4 5 6 7 8 9 10 11 12 13 14 15 16 17 18 19 20 <template > <div > <ul > <li > 消息编号: {{}}</li > <li > 消息标题: {{}}</li > </ul > </div > </template > <script > export default { name : 'Detail' , mounted ( console .log (this .$route ) } } </script > <style > </style >
Detail.vue
1 2 3 4 5 6 7 8 <template > <div > <ul > <li > 消息编号: {{$route.query.id}}</li > <li > 消息标题: {{$route.query.title}}</li > </ul > </div > </template >
2.3 总结 路由 query 传参· 传递参数
1 2 3 4 5 6 7 8 9 10 11 12 13 <router-link :to ="/home/message/detail?id=666&title=你好" > 跳转</router-link > <router-link :to ="{ path:'/home/message/detail', query:{ id:666, title:'你好' } }" > 跳转</router-link >
接收参数:
1 2 $route.query .id $route.query .title
3. 命名路由· 命名路由可以简化使用路由进行跳转时路径的写法。
3.1 配置命名路由· 设置命名路由,在配置路由时,为路由添加一个 name 配置项。
router/index.js
1 2 3 4 5 6 7 8 9 10 11 12 13 14 15 16 17 18 19 20 21 22 23 24 25 26 27 28 29 30 31 32 33 34 35 36 37 38 39 40 41 42 43 import VueRouter from 'vue-router' import About from '../pages/About' import Home from '../pages/Home' import Message from '../pages/Message' import News from '../pages/News' import Detail from '../pages/Detail' export default new VueRouter ({ routes : [ { name : 'about' , path : '/about' , component : About }, { name : 'home' , path : '/home' , component : Home , children : [ { name : 'news' , path : 'news' , component : News }, { name : 'message' , path : 'message' , component : Message , children : [ { name : 'messageDetail' , path : 'detail' , component : Detail } ] } ] } ] })
3.2 使用命名路由· 使用命名路由时,router-link 标签的 to 属性需要使用对象写法,在对象写法中,使用name 替代原来的 path。
Message.vue
1 2 3 4 5 6 7 8 9 <router-link :to ="{ name: 'messageDetail', query: { id: m.id, title: m.title } }" > {{m.title}} </router-link >
3.3 总结 命名路由· 作用:可以简化路由的跳转。
如何使用
给路由命名:
1 2 3 4 5 6 7 8 9 10 11 12 13 14 15 16 17 { path :'/demo' , component :Demo , children :[ { path :'test' , component :Test , children :[ { name :'hello' path :'welcome' , component :Hello , } ] } ] }
简化跳转:
1 2 3 4 5 6 7 8 9 10 11 12 13 14 15 16 <router-link to ="/demo/test/welcome" > 跳转</router-link > <router-link :to ="{name:'hello'}" > 跳转</router-link > <router-link :to ="{ name:'hello', query:{ id:666, title:'你好' } }" > 跳转</router-link >
4. 路由 params 传参· 4.1 使用 params 参数· 4.1.1 设置路由地址占位符· router/index.js
1 2 3 4 5 6 7 8 9 10 11 12 13 { name : 'message' , path : 'message' , component : Message , children : [ { name : 'messageDetail' , path : 'detail/:id/:title' , component : Detail } ] }
4.1.2 params 参数字符串写法· 1 2 3 4 5 6 7 8 <ul > <li v-for ="m in messageList" :key ="m.id" > <router-link :to ="`/home/message/detail/${m.id}/${m.title}`" > {{m.title}}</router-link > {{m.title}} </router-link > </li > </ul >
4.1.3 params 参数对象写法· 注意:使用 params 进行传参时,路由地址不能使用 path,只能使用 name。即 params 进行传参时使用对象写法只能使用命名路由。
1 2 3 4 5 6 7 8 9 10 11 12 13 14 15 <ul > <li v-for ="m in messageList" :key ="m.id" > <router-link :to ="{ name: 'messageDetail', params: { id: m.id, title: m.title } }" > {{m.title}} </router-link > </li > </ul >
4.2 组件接收 params 参数· 在路由跳转时通过 params 进行传参,传递的参数会被存放在组件实例对象的 $route
1 2 3 4 5 6 7 8 9 10 11 12 13 14 15 16 17 18 19 20 <template > <div > <ul > <li > 消息编号: {{$route.params.id}}</li > <li > 消息标题: {{$route.params.title}}</li > </ul > </div > </template > <script > export default { name : 'Detail' , mounted ( console .log (this .$route ) } } </script > <style > </style >
4.3 总结 路由 params 传参· 配置路由,声明接收params参数
1 2 3 4 5 6 7 8 9 10 11 12 13 14 15 16 17 18 19 20 { path :'/home' , component :Home , children :[ { path :'news' , component :News }, { component :Message , children :[ { name :'xiangqing' , path :'detail/:id/:title' , component :Detail } ] } ] }
传递参数
1 2 3 4 5 6 7 8 9 10 11 12 13 <router-link :to ="/home/message/detail/666/你好" > 跳转</router-link > <router-link :to ="{ name:'xiangqing', params:{ id:666, title:'你好' } }" > 跳转</router-link >
特别注意:路由携带params参数时,若使用to的对象写法,则不能使用path配置项,必须使用name配置!
接收参数:
1 2 $route.params .id $route.params .title
5. 路由的 props 配置· 5.1 第一种写法:props值为对象· 该对象中所有的key-value的组合最终都会通过props传给组件
但是这种写法传递的数据为死数据
router/index.js
1 2 3 4 5 6 7 8 9 10 11 12 13 14 { name : 'message' , path : 'message' , component : Message , children : [ { name : 'messageDetail' , path : 'detail/:id/:title' , component : Detail , props : {a : 900 , b : 1212 } } ] }
Detail.vue
1 2 3 4 5 6 7 8 9 10 11 12 13 14 15 16 17 18 19 20 21 22 23 <template > <div > <ul > <li > 消息编号: {{$route.params.id}}</li > <li > 消息标题: {{$route.params.title}}</li > <li > a: {{a}}</li > <li > b: {{b}}</li > </ul > </div > </template > <script > export default { name : 'Detail' , props : ['a' , 'b' ], mounted ( console .log (this .$route ) } } </script > <style > </style >
5.2 第二种写法:props值为布尔值· 布尔值为true,则把路由收到的所有params参数通过props传给组件。
router/index.js
1 2 3 4 5 6 7 8 9 10 11 12 13 14 15 { name : 'message' , path : 'message' , component : Message , children : [ { name : 'messageDetail' , path : 'detail/:id/:title' , component : Detail , props : true } ] }
Detail.vue
1 2 3 4 5 6 7 8 9 10 11 12 13 14 15 16 17 18 19 20 21 <template > <div > <ul > <li > 消息编号: {{id}}</li > <li > 消息标题: {{title}}</li > </ul > </div > </template > <script > export default { name : 'Detail' , props : ['id' , 'title' ], mounted ( console .log (this .$route ) } } </script > <style > </style >
5.3 第三种写法:props值为函数· 该函数返回的对象中每一组key-value都会通过props传给组件
Detail.vue
使用 query 传参
1 2 3 4 5 6 7 8 9 <router-link :to ="{ name: 'messageDetail', query: { id: m.id, title: m.title } }" > {{m.title}} </router-link >
router/index.js
1 2 3 4 5 6 7 8 9 10 11 12 13 14 15 16 17 18 19 20 21 22 23 24 25 26 27 28 { name : 'message' , path : 'message' , component : Message , children : [ { name : 'messageDetail' , path : 'detail' , component : Detail , props ($route ) { return { id : $route.query .id , title : $route.query .title } }, } ] }
Detail.vue
1 2 3 4 5 6 7 8 9 10 11 12 13 14 15 16 17 18 19 20 21 <template > <div > <ul > <li > 消息编号: {{id}}</li > <li > 消息标题: {{title}}</li > </ul > </div > </template > <script > export default { name : 'Detail' , props : ['id' , 'title' ], mounted ( console .log (this .$route ) } } </script > <style > </style >
5.4 总结 路由的 props 配置· 作用:让路由组件更方便的收到参数
1 2 3 4 5 6 7 8 9 10 11 12 13 14 15 16 17 18 19 { name :'xiangqing' , path :'detail/:id' , component :Detail , props (route ){ return { id :route.query .id , title :route.query .title } } }
6. <router-link>的replace属性· 作用:控制路由跳转时操作浏览器历史记录的模式 浏览器的历史记录有两种写入方式:分别为push和replace,push是追加历史记录,replace是替换当前记录。路由跳转时候默认为push 如何开启replace模式:<router-link replace .......>News</router-link> 编程式路由导航· 1. 声明式导航 & 编程式导航· 1.1 声明式导航· 通过点击链接实现导航的方式,叫做声明式导航。
例如:<a>链接、vue 项目中点击 <router-link> 都属于声明式导航。
1.2 编程式导航· 通过调用 API 方法实现导航的方式,叫做编程式导航。
例如:
vue-router 提供了许多编程式导航的 API,vue-router 提供的编程式导航 API 都在 vue-router 的原型对象上。
2.1 常用的编程式导航 API· $router.push(地址)
$router.replace(地址)
$router.go(数值 n)
$router.back()
$router.forward()
2.2 $router.push与$router.replace· 调用 $router.push()方法或$router.replace()方法,可以跳转到指定的地址,从而展示对应的组件页面。
push 和 replace 的区别:
push 会增加一条历史记录
1 2 3 4 5 6 7 8 9 10 11 12 13 14 15 16 17 18 19 20 21 22 23 24 25 26 27 28 29 30 31 32 33 34 35 <template > <div class ="home-container" > <h3 > Home 组件</h3 > <hr /> <button @click ="gotoLk" > 通过 push 跳转到“洛基”页面</button > <button @click ="gotoLk2" > 通过 replace 跳转到“洛基”页面</button > </div > </template > <script > export default { name : 'Home' , methods : { gotoLk ( this .$router .push ('/movie/1' ) }, gotoLk2 ( this .$router .replace ('/movie/1' ) } } } </script > <style lang ="less" scoped > .home-container { min-height : 200px ; background-color : pink; padding : 15px ; } </style >
2.3 $router.go· 调用 $router.go()方法,可以在浏览历史中前进和后退。$router.go()方法通过参数指定前进或后退的次数。参数为正数表示前进,参数为负数表示后退。
1 2 3 4 5 6 7 8 9 10 11 12 13 14 15 16 17 18 19 20 21 22 23 24 25 26 27 28 29 30 31 32 33 34 35 36 <template > <div class ="movie-container" > <h3 > Movie 组件 --- {{ $route.params.mid }} --- {{ mid }}</h3 > <button @click ="showThis" > 打印 this</button > <button @click ="goback" > 后退</button > </div > </template > <script > export default { name : 'Movie' , props : ['mid' ], methods : { showThis ( console .log (this ) }, goback ( this .$router .go (-1 ) } } } </script > <style lang ="less" scoped > .movie-container { min-height : 200px ; background-color : lightsalmon; padding : 15px ; } </style >
2.4 $router.back() & $router.forward()· 在实际开发中,一般只会前进和后退一层页面。因此 vue-router 提供了如下两个便捷方法:$router.back() & $router.forward()
$router.back() :在历史记录中,后退到上一个页面$router.forward() :在历史记录中,前进到下一个页面1 2 3 4 5 6 7 8 9 10 11 12 13 14 15 16 17 18 19 20 21 22 23 24 25 26 27 28 29 30 31 32 33 34 35 36 37 38 39 <template > <div class ="movie-container" > <h3 > Movie 组件 --- {{ $route.params.mid }} --- {{ mid }}</h3 > <button @click ="showThis" > 打印 this</button > <button @click ="goback" > 后退</button > <button @click ="$router.back()" > back 后退</button > <button @click ="$router.forward()" > forward 前进</button > </div > </template > <script > export default { name : 'Movie' , props : ['mid' ], methods : { showThis ( console .log (this ) }, goback ( this .$router .go (-1 ) } } } </script > <style lang ="less" scoped > .movie-container { min-height : 200px ; background-color : lightsalmon; padding : 15px ; } </style >
3. 总结 编程式路由导航· 作用:不借助<router-link> 实现路由跳转 ,让路由跳转更加灵活
具体编码:
1 2 3 4 5 6 7 8 9 10 11 12 13 14 15 16 17 18 19 this .$router .push ({ name :'xiangqing' , params :{ id :xxx, title :xxx } }) this .$router .replace ({ name :'xiangqing' , params :{ id :xxx, title :xxx } }) this .$router .forward () this .$router .back () this .$router .go ()
缓存路由组件 & activated()与deactivated()· 1. 缓存路由组件· 默认情况下,进行路由的切换原来展示在页面上的组件会被销毁,新的组件会被挂载在页面上。由于每次通过路由切换组件,原来的组件都会被销毁,所以原来组件中的状态将不被保留,即每次展示在页面上的都是一个全新的被创建的组件实例对象。
App.vue
1 2 3 4 5 6 7 8 9 10 11 12 13 14 15 16 17 18 19 20 21 22 23 24 25 26 27 28 29 30 31 32 33 34 35 36 37 <template > <div > <div class ="row" > <div class ="col-xs-offset-2 col-xs-8" > <div class ="page-header" > <h2 > Vue Router Demo</h2 > </div > </div > </div > <div class ="row" > <div class ="col-xs-2 col-xs-offset-2" > <div class ="list-group" > <router-link class ="list-group-item" active-class ="active" to ="/about" > About</router-link > <router-link class ="list-group-item" active-class ="active" to ="/home" > Home</router-link > </div > </div > <div class ="col-xs-6" > <div class ="panel" > <div class ="panel-body" > <router-view > </router-view > </div > </div > </div > </div > </div > </template > <script > export default { name : 'App' , } </script >
About.vue
1 2 3 4 5 6 7 8 9 10 11 12 13 14 15 16 <template > <div > <h2 > About组件</h2 > </div > </template > <script > export default { name : 'About' } </script > <style > </style >
Home.vue
1 2 3 4 5 6 7 8 9 10 11 12 13 14 15 16 17 18 19 20 21 22 23 24 25 <template > <div > <h2 > Home组件</h2 > <ul class ="nav nav-tabs" > <li > <router-link class ="list-group-item" active-class ="active" to ="/home/news" > News</router-link > </li > <li > <router-link class ="list-group-item" active-class ="active" to ="/home/message" > Message</router-link > </li > </ul > <div > <router-view > </router-view > </div > </div > </template > <script > export default { name : 'Home' } </script > <style > </style >
News.vue
1 2 3 4 5 6 7 8 9 10 11 12 13 14 15 16 17 18 19 20 21 <template> <div> <ul> <li>news001 <input type="text"></li> <li>news002 <input type="text"></li> <li>news003 <input type="text"></li> </ul> </div> </template> <script> export default { name: 'News', beforeDestroy() { console.log('News组件即将被销毁...') } } </script> <style> </style>
Message.vue
1 2 3 4 5 6 7 8 9 10 11 12 13 14 15 16 17 18 19 20 21 22 23 24 25 26 27 28 29 30 31 32 33 34 35 36 37 38 39 40 <template> <div> <ul> <li v-for="m in messageList" :key="m.id"> <router-link :to="{ name: 'messageDetail', query: { id: m.id, title: m.title } }"> {{m.title}} </router-link> </li> </ul> <hr> <router-view></router-view> </div> </template> <script> export default { name: 'Message', data() { return { messageList: [ { id: '001', title: '消息001' }, { id: '002', title: '消息002' }, { id: '003', title: '消息003' } ] } }, beforeDestroy() { console.log('Message组件即将被销毁...') } } </script> <style> </style>
Detail.vue
1 2 3 4 5 6 7 8 9 10 11 12 13 14 15 16 17 18 19 20 21 <template> <div> <ul> <li>消息编号: {{id}}</li> <li>消息标题: {{title}}</li> </ul> </div> </template> <script> export default { name: 'Detail', props: ['id', 'title'], mounted() { console.log(this.$router) } } </script> <style> </style>
router/index.js
1 2 3 4 5 6 7 8 9 10 11 12 13 14 15 16 17 18 19 20 21 22 23 24 25 26 27 28 29 30 31 32 33 34 35 36 37 38 39 40 41 42 43 44 45 46 47 48 49 50 import VueRouter from 'vue-router' import About from '../pages/About' import Home from '../pages/Home' import Message from '../pages/Message' import News from '../pages/News' import Detail from '../pages/Detail' export default new VueRouter ({ routes : [ { name : 'about' , path : '/about' , component : About }, { name : 'home' , path : '/home' , component : Home , children : [ { name : 'news' , path : 'news' , component : News }, { name : 'message' , path : 'message' , component : Message , children : [ { name : 'messageDetail' , path : 'detail' , component : Detail , props ($route ) { return { id : $route.query .id , title : $route.query .title } }, } ] } ] } ] })
如果需要在通过路由切换组件时,将原来的组件进行保留,使得在切换组件时原来的组件不被销毁,需要使用 keep-alive 标签将组件的展示区域的 router-view 标签进行包裹。
1 2 3 4 5 6 7 8 9 10 11 12 13 14 15 16 17 18 19 <template > <div > <h2 > Home组件</h2 > <ul class ="nav nav-tabs" > <li > <router-link class ="list-group-item" active-class ="active" to ="/home/news" > News</router-link > </li > <li > <router-link class ="list-group-item" active-class ="active" to ="/home/message" > Message</router-link > </li > </ul > <div > <keep-alive > <router-view > </router-view > </keep-alive > </div > </div > </template >
默认情况下,如果只是单纯的使用 keep-alive 标签将 router-view 标签进行包裹,则展示在该区域的所有组件都将会被保留下来,不会被销毁。
如果需要指定保留的组件,则需要在 keep-alive 标签中使用 include 属性指定需要保留的组件,使用 include 属性之后只有指定的组件会被保留。
注意:include 属性中写的是组件名 name
1 2 3 4 5 <div > <keep-alive include ="News" > <router-view > </router-view > </keep-alive > </div >
如果需要指定保留多个组件不被销毁,使用属性绑定指令数组形式的写法:
1 2 3 4 5 <div > <keep-alive :include ="['News', 'Message']" > <router-view > </router-view > </keep-alive > </div >
2. 总结 缓存路由组件· 作用:让不展示的路由组件保持挂载,不被销毁。
具体编码:
1 2 3 <keep-alive include ="News" > <router-view > </router-view > </keep-alive >
3. activated()与deactivated()· activated()与deactivated()是两个生命周期钩子(生命周期函数)。
activated()与deactivated()是路由组件所独有的两个生命周期钩子,用于捕获路由组件的激活状态。
activated路由组件被激活时触发。deactivated路由组件失活时触发。路由守卫· 1. 路由守卫· 1.1 概念· 路由守卫能够对路由进行权限控制,即在路由进行改变时,可以判断当前能否访问路由对应的组件。
1.2 分类· 路由守卫分为:全局守卫、独享守卫、组件内守卫。
2. 全局路由守卫· 2.1 全局前置路由守卫· 全局前置路由守卫会在初始化时被触发,在每次进行路由的切换前也会被触发。
1 2 3 4 5 6 7 8 9 router.beforeEach ((to, from , next ) => { })
1 2 3 router.beforeEach ((to, from , next ) => { console .log (to, from ) })
实现如果localStorage中存在school的值为SGG则可以对News组件和Message组件进行访问,如果school的值不为SGG则不能进行访问。其他组件可以不用判断直接放行。
router/index.js
1 2 3 4 5 6 7 8 9 10 11 12 13 14 15 16 17 18 19 20 21 22 23 24 25 26 27 28 29 30 31 32 33 34 35 36 37 38 39 40 41 42 43 44 45 46 47 48 49 50 51 52 53 54 55 56 57 58 59 60 61 62 63 64 65 66 67 68 69 70 71 72 73 74 75 76 import VueRouter from 'vue-router' import About from '../pages/About' import Home from '../pages/Home' import Message from '../pages/Message' import News from '../pages/News' import Detail from '../pages/Detail' const router = new VueRouter ({ routes : [ { name : 'about' , path : '/about' , component : About }, { name : 'home' , path : '/home' , component : Home , children : [ { name : 'news' , path : 'news' , component : News }, { name : 'message' , path : 'message' , component : Message , children : [ { name : 'messageDetail' , path : 'detail' , component : Detail , props ($route ) { return { id : $route.query .id , title : $route.query .title } }, } ] } ] } ] }) router.beforeEach ((to, from , next ) => { console .log (to) if (to.name === 'news' || to.name === 'message' ) { if (localStorage .getItem ('school' ) === 'SGG' ) { next () } else { alert ('school的值不为SGG,不能访问' ) } } else { next () } }) export default router
在配置路由时,可以传入meta配置项,在meta配置项中可以写我们自己的数据,可以用于判断当前路由是否需要进行权限的判断。
1 2 3 4 5 6 7 8 9 10 11 12 13 14 15 router.beforeEach ((to, from , next ) => { console .log (to) if (to.meta .isAuth ) { if (localStorage .getItem ('school' ) === 'SGG' ) { next () } else { alert ('school的值不为SGG,不能访问' ) } } else { next () } })
1 2 3 4 5 6 7 8 9 10 11 12 13 14 15 16 17 18 19 20 21 22 23 24 25 26 27 28 29 30 31 32 33 34 35 36 37 38 39 40 41 42 43 const router = new VueRouter ({ routes : [ { name : 'about' , path : '/about' , component : About , meta : {isAuth : false } }, { name : 'home' , path : '/home' , component : Home , children : [ { name : 'news' , path : 'news' , component : News , meta : {isAuth : true } }, { name : 'message' , path : 'message' , component : Message , meta : {isAuth : true }, children : [ { name : 'messageDetail' , path : 'detail' , component : Detail , props ($route ) { return { id : $route.query .id , title : $route.query .title } }, } ] } ] } ] })
2.3 全局后置路由守卫· 全局后置路由守卫会在初始化时被触发,在每次进行路由的切换后也会被触发。
1 2 3 4 5 6 7 8 9 router.afterEach ((to, from , next ) => { console .log (to, from , next) })
访问相关组件之后,实现页面标题根据当前不同组件进行切换。
1 2 3 4 5 6 7 8 9 10 11 12 13 14 15 16 17 18 19 20 21 22 23 24 25 26 27 28 29 30 31 32 33 34 35 36 37 38 39 40 41 42 43 44 45 const router = new VueRouter ({ routes : [ { name : 'about' , path : '/about' , component : About , meta : {isAuth : false , title : '关于' } }, { name : 'home' , path : '/home' , component : Home , meta : {isAuth : false , title : '主页' }, children : [ { name : 'news' , path : 'news' , component : News , meta : {isAuth : true , title : '新闻' } }, { name : 'message' , path : 'message' , component : Message , meta : {isAuth : true , title : '消息' }, children : [ { name : 'messageDetail' , path : 'detail' , component : Detail , meta : {isAuth : false , title : '详情' }, props ($route ) { return { id : $route.query .id , title : $route.query .title } }, } ] } ] } ] })
1 2 3 4 5 6 router.afterEach ((to, from , next ) => { document .title = to.meta .title })
3. 独享路由守卫· 独享路由守卫写在每个路由对应的配置中,即独享路由守卫是每个路由所独享的,独享路由守卫与全局前置路由守卫类似。
注意:独享路由守卫与全局路由守卫不一样,独享路由守卫不分前置和后置。
注释全局前置路由守卫
1 2 3 4 5 6 7 8 9 10 11 12 13 14 15 16 17 18 19 20 21 22 23 24 25 26 27 28 29 30 31 32 33 const router = new VueRouter ({ routes : [ ...... { name : 'home' , path : '/home' , component : Home , meta : { isAuth : false , title : '主页' }, children : [ { name : 'news' , path : 'news' , component : News , meta : { isAuth : true , title : '新闻' }, beforeEnter (to, from , next ) { console .log (to, from ) if (localStorage .getItem ('school' ) === 'SGG' ) { next () } else { console .log ('school的值不正确,不能访问' ) alert ('school的值不正确,不能访问' ) } } }, ...... ] } ] } ] })
4. 组件内路由守卫· 组件内路由守卫写在组件内,组件路由守卫有:beforeRouteEnter:通过路由规则,进入该组件时被调用beforeRouteLeave:通过路由规则,离开该组件时被调用
注释全局前置路由守卫与全局后置路由守卫
1 2 3 4 5 6 7 8 9 10 11 12 13 14 15 16 17 18 19 20 21 22 23 24 25 26 27 28 <template > <div > <h2 > About组件</h2 > </div > </template > <script > export default { name : 'About' , beforeRouteEnter (to, from , next ) { console .log ('beforeRouteEnter' ) console .log (to) console .log (from ) next () }, beforeRouteLeave (to, from , next ) { console .log ('beforeRouteLeave' ) console .log (to) console .log (from ) next () } } </script > <style > </style >
5. 总结 路由守卫· 作用:对路由进行权限控制
分类:全局守卫、独享守卫、组件内守卫
全局守卫:
1 2 3 4 5 6 7 8 9 10 11 12 13 14 15 16 17 18 19 20 21 22 23 24 router.beforeEach ((to,from ,next )=> { console .log ('beforeEach' ,to,from ) if (to.meta .isAuth ){ if (localStorage .getItem ('school' ) === 'atguigu' ){ next () }else { alert ('暂无权限查看' ) } }else { next () } }) router.afterEach ((to,from )=> { console .log ('afterEach' ,to,from ) if (to.meta .title ){ document .title = to.meta .title }else { document .title = 'vue_test' } })
独享守卫:
1 2 3 4 5 6 7 8 9 10 11 12 13 beforeEnter (to,from ,next ){ console .log ('beforeEnter' ,to,from ) if (to.meta .isAuth ){ if (localStorage .getItem ('school' ) === 'atguigu' ){ next () }else { alert ('暂无权限查看' ) } }else { next () } }
组件内守卫:
1 2 3 4 5 6 beforeRouteEnter (to, from , next) { }, beforeRouteLeave (to, from , next) { }
路由器的两种工作模式· 对于一个url来说,什么是hash值?—— #及其后面的内容就是hash值。
hash值不会包含在 HTTP 请求中,即:hash值不会带给服务器。
hash模式:
地址中永远带着#号,不美观 。 若以后将地址通过第三方手机app分享,若app校验严格,则地址会被标记为不合法。 兼容性较好。 history模式:
地址干净,美观 。 兼容性和hash模式相比略差。 应用部署上线时需要后端人员支持,解决刷新页面服务端404的问题。 hash模式与history模式的切换:
1 2 3 4 5 const router = new VueRouter ({ routes :[......] })
